This article describes how to set up your Ocean Site with a FHIR eReferral Integration.
Notes
- FHIR Patient Engagement integrations are not included in the scope of this article.
- Before following the steps in this article, contact your EMR vendor to confirm if a FHIR eReferral Integration exists for your EMR.
- To keep the various pieces of information for your integration organized, you may optionally consider using the OceanMD FHIR eReferral Integration Questionnaire.
Step 1: Complete the OceanMD Getting Started Guide
Start by completing the three steps in the OceanMD Getting Started Guide.
This includes: 1) creating your Ocean user account, 2) creating your Ocean Site, and 3) submitting your Ocean request form.
- When creating your Ocean user account and Ocean Site, you will be prompted to specify the EMR that you are using. Select 'Other' and then enter the name of your EMR in the field below.
-

- When submitting your Ocean request form, enter the name of your EMR in the 'Additional Details' field.
-

Step 2: Store your Shared Encryption Key in Ocean Cloud Connect & Enable Ocean Cloud Connect
Prerequisites
- This step requires Ocean Site Admin access.
To set up your Ocean Site with a FHIR eReferral Integration, your Ocean Site's Shared Encryption Key must first be stored in Ocean Cloud Connect, and Ocean Cloud Connect must be enabled within your Ocean Site.
- Follow the steps outlined in Storing the Shared Encryption Key in Ocean Cloud Connect without a Cloud Connect EMR Integration.
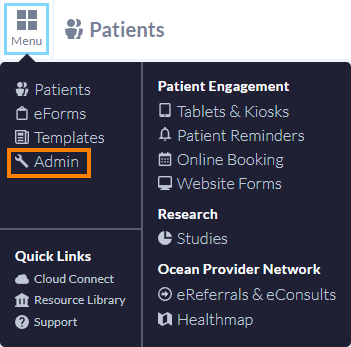
- In your Ocean Site, open the 'Menu' and select 'Admin'.
-
- Select 'Site Features'.
-

- Enable the checkbox labeled 'Enable Ocean Cloud Connect'.
-

- Click 'Save Changes'.
Step 3: Add your EMR Vendor Support Site to Your Ocean Site (if applicable)
Prerequisites
- This step requires Ocean Site Admin access.
Some EMR vendors offer assistance in configuring the integration in your Ocean Site.
Contact your EMR vendor to find out if they can assist you. If your EMR vendor does offer configuration assistance, follow the steps to Add their Support Site to Your Ocean Site.
Tip: If you are joining the Ocean Provider Network as part of a provincial program initiative, this is a convenient time to add the provincial program Support Site to your Ocean Site too.
Step 4: Configuring the Integration in Your Ocean Site
Prerequisites
- This step requires Ocean Site Admin access.
Each FHIR eReferral Integration may support different aspects and functionalities of the Ocean Provider Network. This variance can influence the steps you need to follow to configure the integration in your Ocean Site.
Contact your EMR vendor to learn more about the different aspects and functionalities of the Ocean Provider Network that your integration supports.
Please expand the relevant tab below for instructions specific to the nature of your EMR's FHIR eReferral Integration:
Configuring the Integration
- Log in to the Ocean Portal.
-

- Open the 'Menu' and select 'Admin'.
-
- In the Admin Settings page, select 'Integrations'.
-

- Select 'Register an Integration'.
-

- Select 'eReferrals' as the integration type.
-

- Contact your EMR vendor to determine the relevant values and configuration settings for your FHIR eReferral Integration.
-

- Click 'Save'.
- At this point, your Ocean Site's FHIR eReferral Integration has been successfully configured.
1. Find/Add and Claim your Directory Listing
- Follow the steps to Find or Add Your Clinic to the Ocean Provider Network.
- Follow the steps to Claim Your Directory Listing to Your Ocean Site.
2. Configure the Integration
- In the Ocean Portal, open the 'Menu' and select 'Admin'.
-
- In the Admin Settings page, select 'Integrations'.
-
- Select 'Register an Integration'.
-
- Select 'eReferrals' as the integration type.
-
- Contact your EMR vendor to determine the relevant values and configuration settings for your FHIR eReferral Integration.
-
- Click 'Save'.
3. Link the Integration with your Directory Listing
- In the Admin Settings page, select 'Directory Listings'.
-

- Click 'Edit' on the relevant listing.

-
In the 'Enablement' tab of the Directory Listing, locate the 'Integrations' section.
In the 'External Service Id' field, manually enter the name of the FHIR eReferral Integration that you configured earlier.
In the 'Integration' field, use the dropdown menu to select the FHIR eReferral Integration that you configured earlier.
-

- Click the 'Save' button.
4. Generate Ocean OAuth Credentials for your EMR Vendor
- In the Admin Settings page, select 'Manage Credentials'.
-

- Select 'Manage OAuth Credentials'.
-

- Enter the password for your Ocean user account and click 'Sign in'.
-

-
Enter a name for this set of credentials in the 'Name' field and click 'Add New Credential'.
Tip: We recommend naming your credentials in a way that is related to the integration that they are being used for. For example, if the name of your integration is "Example Integration", you could name your credentials as "Example Integration OAuth Credentials".
-

- Your OAuth Credentials will be generated and added to the table.
-

- Provide these credentials to your EMR vendor so they can configure your EMR to use them when communicating to Ocean.
Step 5: Link your EMR User Account to your Ocean User Account (if applicable)
Some EMRs support the ability for users to launch from the EMR directly into Ocean. This facilitates Single Sign-On between accounts and the ability to pre-populate eRequest forms in Ocean with information from the patient chart in the EMR.
Contact your EMR vendor to find out if your EMR supports this ability. If your EMR does support this ability, follow the steps below:
1. Provide your Ocean Site's SMART on FHIR details to your EMR vendor:
Prerequisites
- This step requires Ocean Site Admin access.
- Log in to the Ocean Portal.
-
- Open the 'Menu' and select 'Admin'.
-
- In the Admin Settings page, select 'Integrations'.
-
-
Under the 'SMART on FHIR' heading, locate your Ocean Site's SMART on FHIR launch URL and provide it to your EMR vendor.
-

- Click the "eye" icon to view the Base64-encoded value for your Ocean Site's Shared Encryption Key and provide it to your EMR vendor.
2. Performing the Account Linkage
- Contact your EMR vendor for instructions on how to launch from your EMR into Ocean.
- Follow your EMR vendor's instructions to launch from your EMR into Ocean.
- Sign in to your Ocean user account.
- After successfully signing in, your EMR User Account will be linked to your Ocean user account. This means the next time you launch from your EMR into Ocean, you will be automatically signed in to your Ocean user account.
Note: Performing the account linkage is a one-time step that must be individually performed by each EMR user that will be using Ocean.
Ensure that each person that will be using Ocean has been invited to join your Ocean Site and that they have created their Ocean user account before they attemp to link their accounts.