Prerequisites:
-
- Custom demographic fields have been created in Accuro

- Custom demographic fields are populated for at least 1 patient in Accuro
- Custom demographic fields must be enabled in Ocean Cloud Connect
-
-
Tag your custom demographic note in your Ocean eForm.
- When you are building your eForms, if you "tag" the 'Custom Note' (found under the item's 'Note Formatting' tab) by surrounding a single word with "@" and ": $$", then the value of that item will be available for use with EMR field mapping.

-
Multi-Word Responses
If the response value entered by a patient includes multiple words, Ocean will by default only capture the first word.
To fully capture a multi-word patient response, place quotation marks around the $$ characters in the Custom Note like so: @taggedField: "$$"
- If you would like to pre-populate the eForm field with the custom demographic value recorded for that patient in Accuro, ensure that the "Prepopulate this item with" field is set to: "@ptCustom.EMRField" (where 'EMRField' is the name of your custom demographic).
-
Important Note:
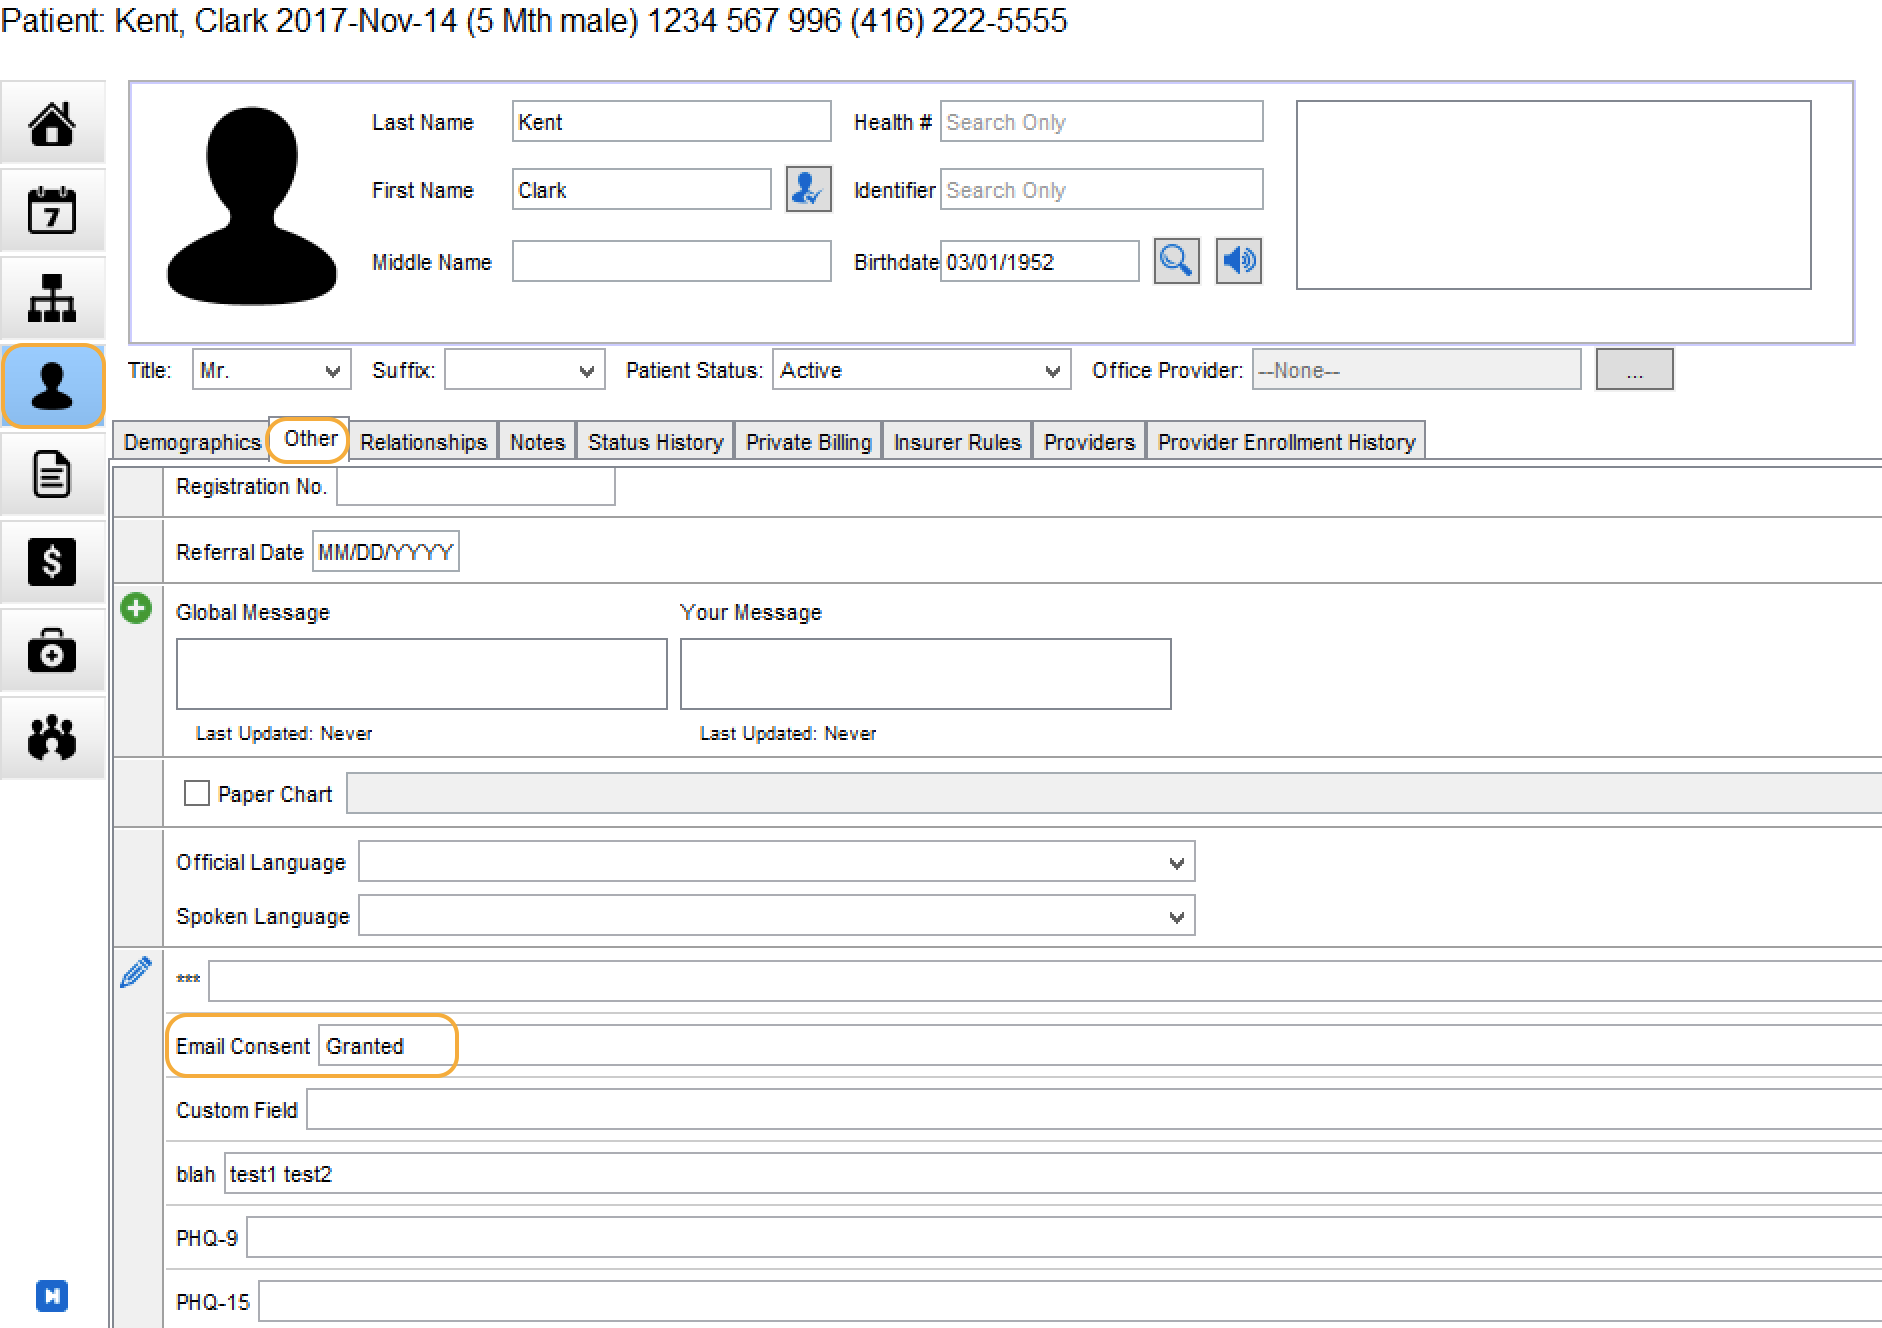
If your custom demographics field is more than one word in Accuro, you will need to combine the phrase into one word.
For example: If your custom demographic field is called "Email Consent" in Accuro, your "Custom Note" will be @EmailConsent in the eForm and your "Prepopulate this item with" field will be @ptCustom.EmailConsent.
-
Create the corresponding custom demographic in Ocean.
- Login to the Ocean Portal. Click the "Menu" button in the top left corner and select "Admin".
-

- From the Admin Settings page, click "EMR Field Mapping" and select "Add Row".
- Next, ensure the "Type" dropdown is set to "Custom Demographic."
- The "Tagged Field" column's value corresponds to the field in your Ocean eForm (all one word, without the leading '@' or ': $$' portions -- i.e. EmailConsent)
-

- Name the "EMR Field" the exact value of the custom demographic name in Accuro.
- Be sure to Save Changes before leaving this page.
-
Test out your new custom demographic.
- Now, if a patient completes an Ocean eForm that contains your custom demographic item, the result will be set in the corresponding custom demographic field in the patient's chart.