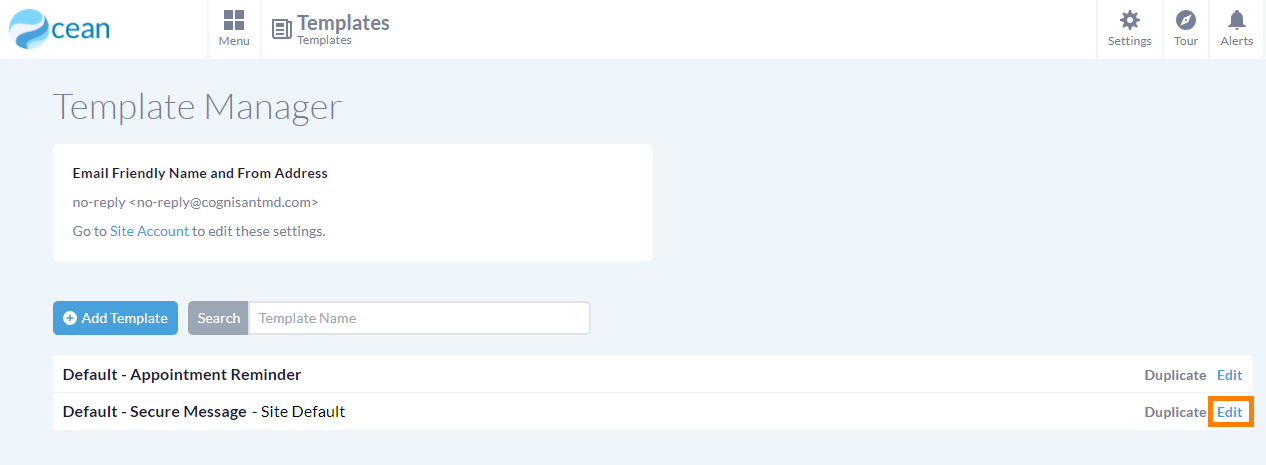
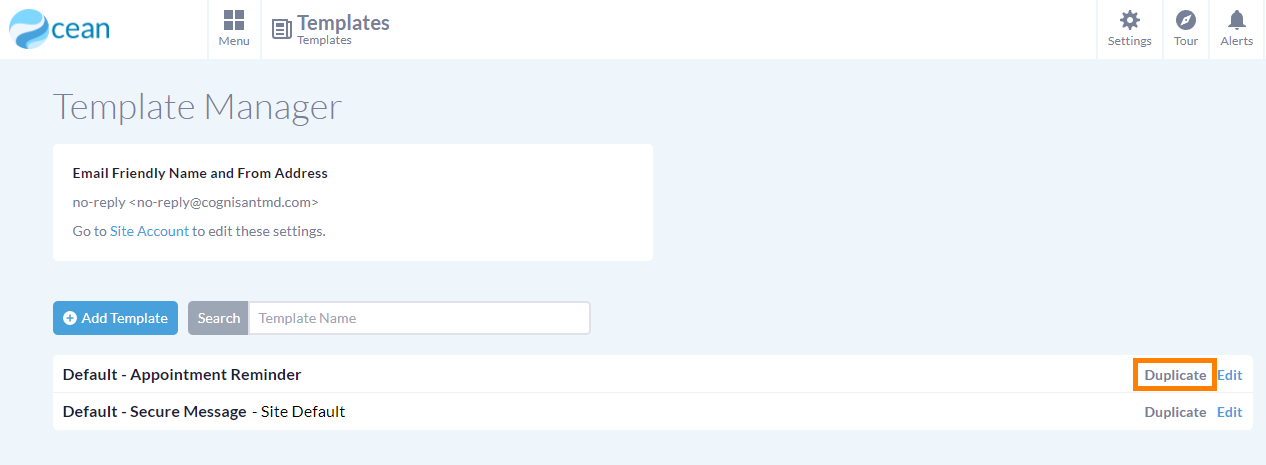
The Template Manager will allow you create and save templates, allowing you to have a collection of standard messages (with accompanying secure messages and/or forms) to send to patients through Patient Messages or Patient Reminders.
Customized templates are very useful if you often send the same specific message and/or a set of forms to patients. Additionally, a customized template is essential if you are using Patient Reminders.
Using the Template Manager, you're able to create a brand new templates from scratch, modify existing templates, or even duplicate a template to make a similar yet slightly different version.
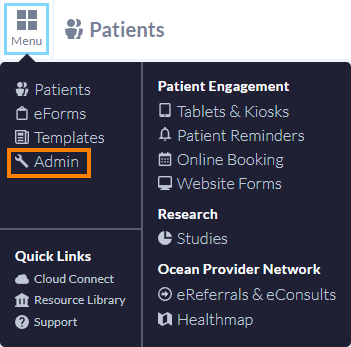
Note: You must be an Ocean Site Admin to customize Templates.
Template Settings
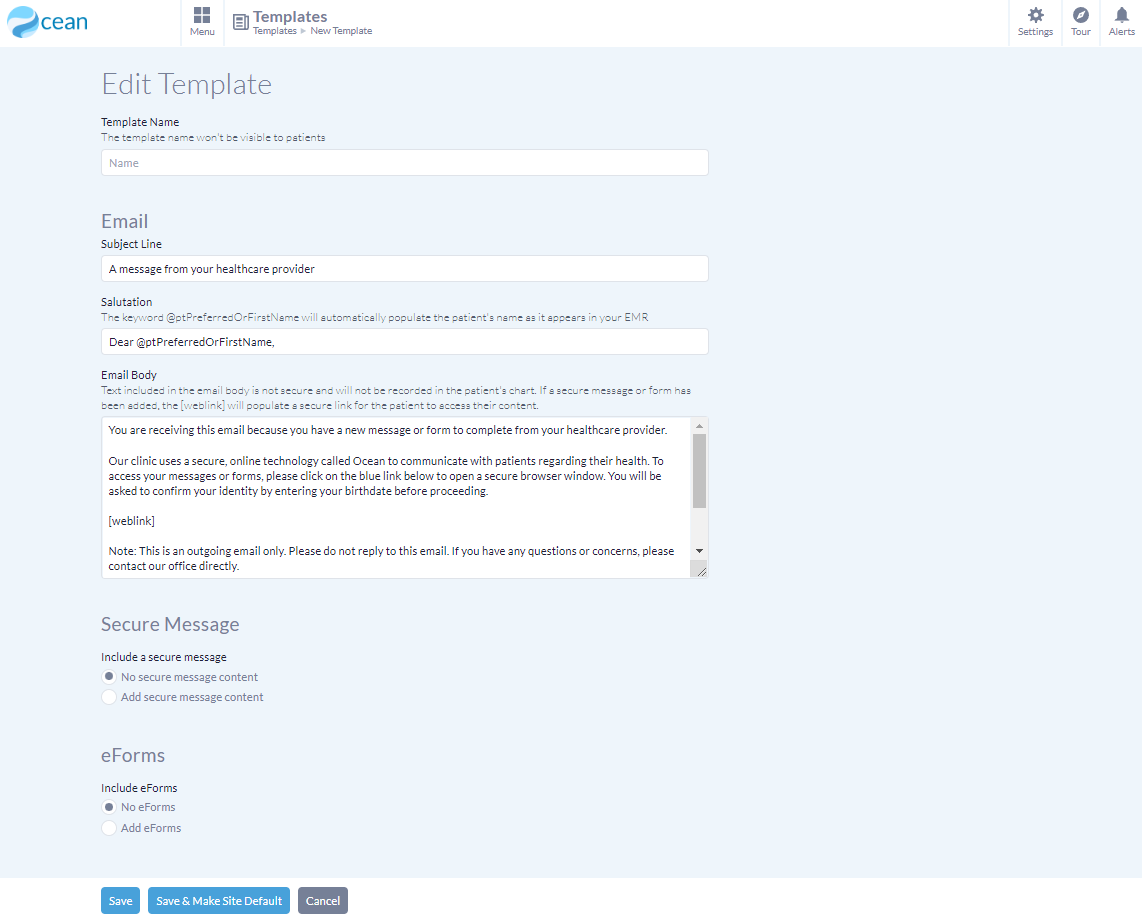
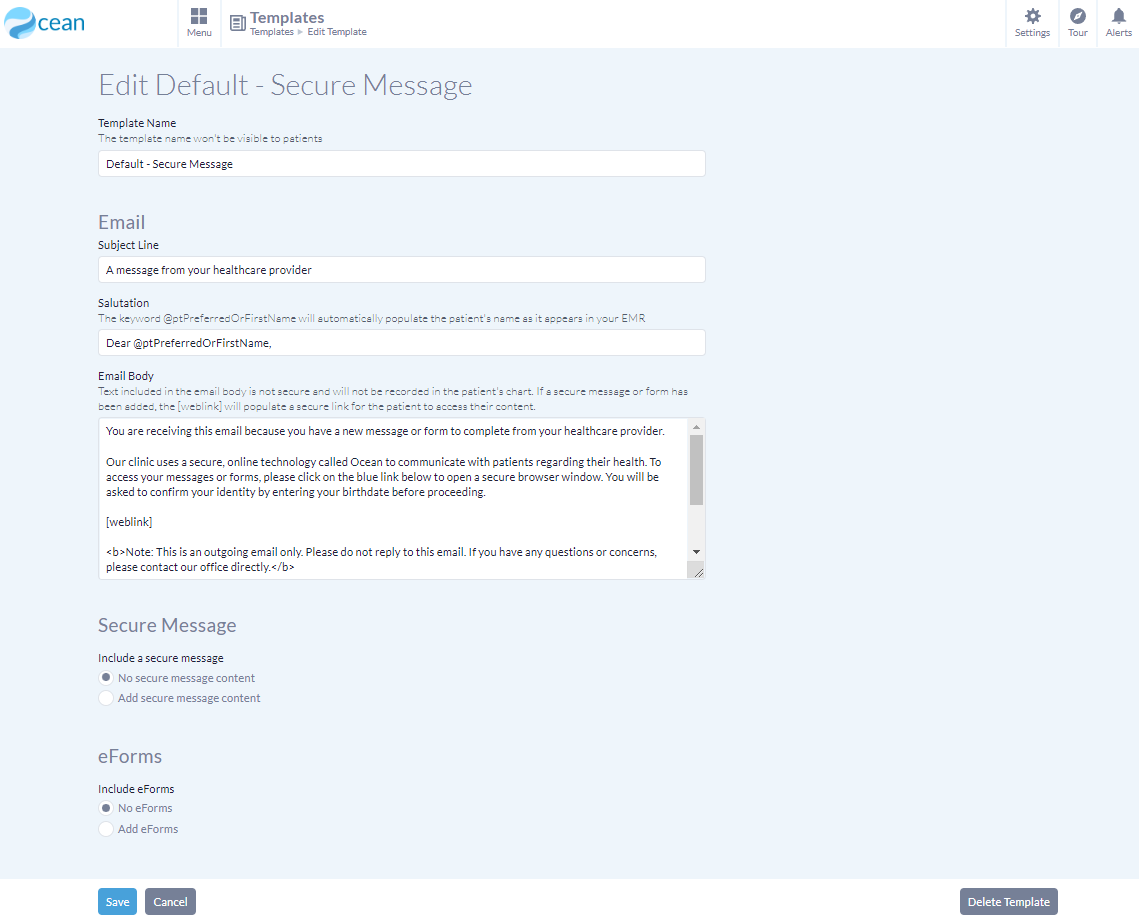
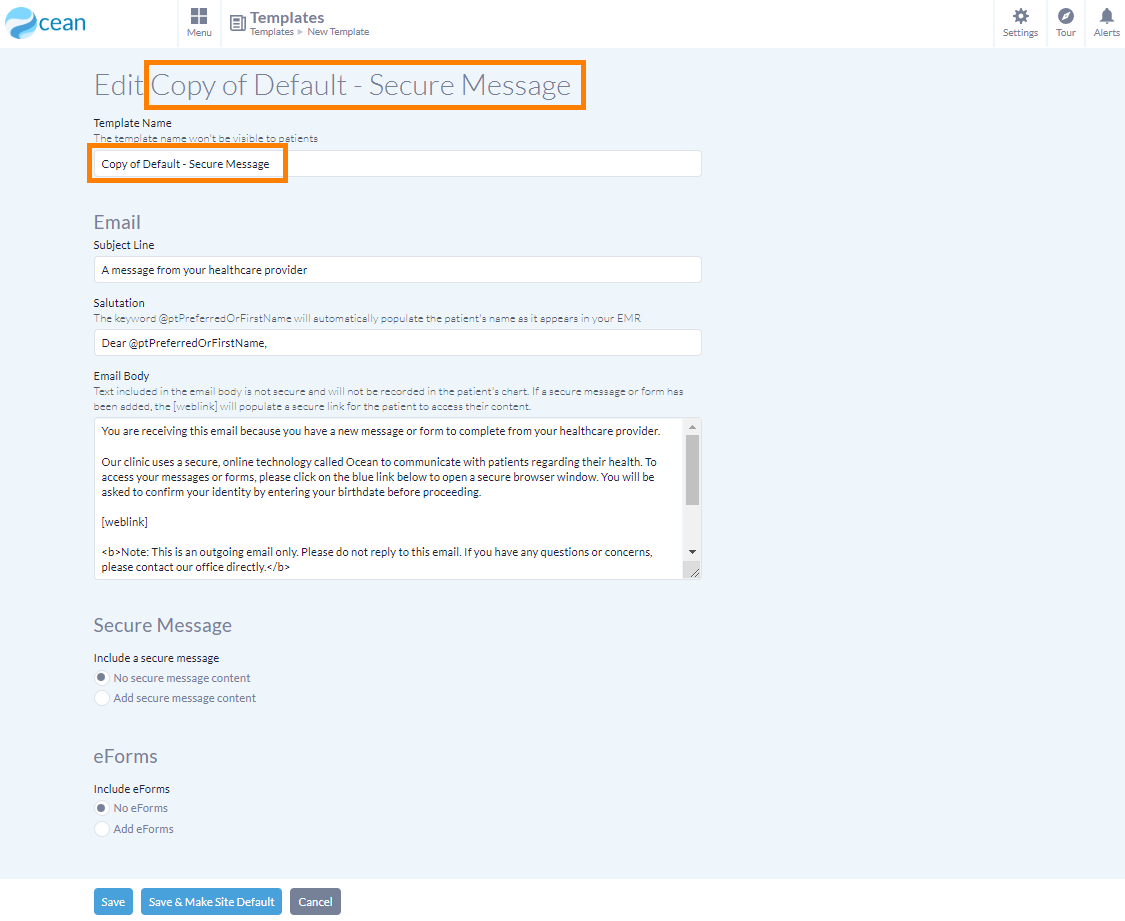
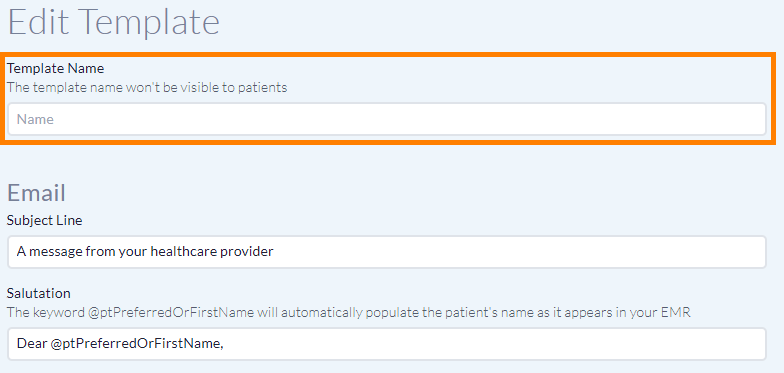
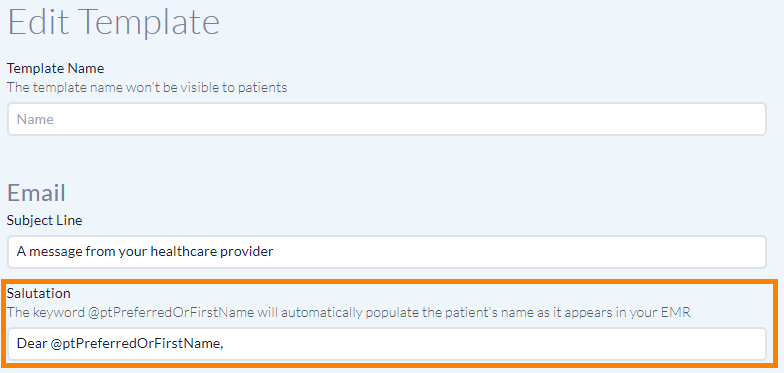
Template Name
- The template name is for you to easily recognize the contents of the template. It is never visible to patients, so you can use it to describe the purpose of the template for yourself and other users on your Ocean site.
-
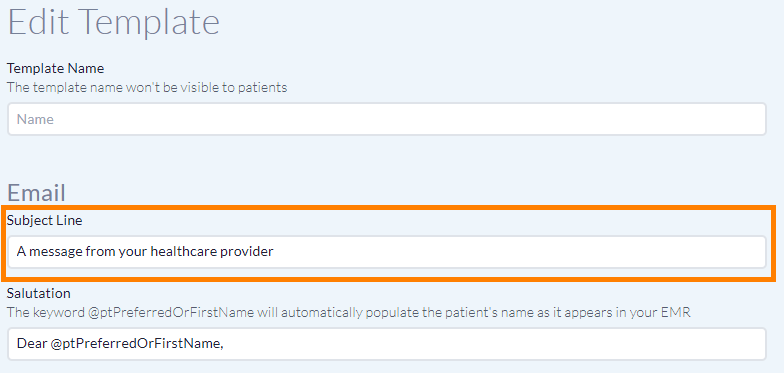
Subject Line
- The customizable subject line is what will appear in patients' email inbox when they receive a secure message or reminder using this template.
-
Salutation
- The saluation is the opening line of the email body.
-
-
Tip: The @ptPreferredOrFirstName keyword will automatically populate the patient's name as it appears in your EMR, providing an automatically customized salutation for your patients.
Email Body
- The email body allows you to customize the message that the patient will see in their email inbox.
-

-
Note: Content included in the email body will not be recorded into the patient's chart.
The '[weblink]' Keywords
The '[weblink]' keyword indicates where in your email body a hyperlink will automatically appear for the patient to click on to access any secure content. The hyperlink will appear as either: 'View Secure Message', 'Complete Questionnaire', 'Confirm Appointment,' or 'View Secure Message and Complete Questionnaire'.
The '[weblink_french]' keyword can be used to show the French version of the hyperlink. The hyperlink will appear as either: 'Afficher le message sécurisé', 'Remplir le questionnaire', 'Confirmer le rendez-vous', or 'Afficher le message sécurisé et remplir le questionnaire'.
- You can use the English and French keywords separately or together in your templates.
- If no keyword is included in the template, Ocean will automatically append the English '[weblink]' version of the keyword to the end of the email body.
Secure Message
- Choose if you would like to include a secure message in this template. A receipt of the secure message will be recorded in the patient’s EMR chart with a date and time stamp.
-

- Secure messages are accessed by patients when they click on the hyperlink in the email body.
- Secure Message Content
- You can type any information into this text box that you would like to have saved as the secure message for this template. The contents of the secure message will be recorded in the patient's chart.
- Allow patient to reply
-
When set to 'Yes', this option will allow the patient to provide a one-time typed response to the message. Patient responses can be found within their chart in your EMR, and you will receive an email notification alerting you that they have responded.
Note that this functionality is not available when using Group Messages with Ocean.
- Allow patient to reply with attachment
- When set to 'Yes', the option will allow the patient to respond with a file attachment(s). Patient-submitted file attachments can be found within their chart in your EMR, or in the Ocean Portal.
- Reply window
- If the 'Allow patient to reply' or 'Allow patient to send attachment' setting is enabled, you can optionally set a reply window to limit the amount of time that the patient has to respond.
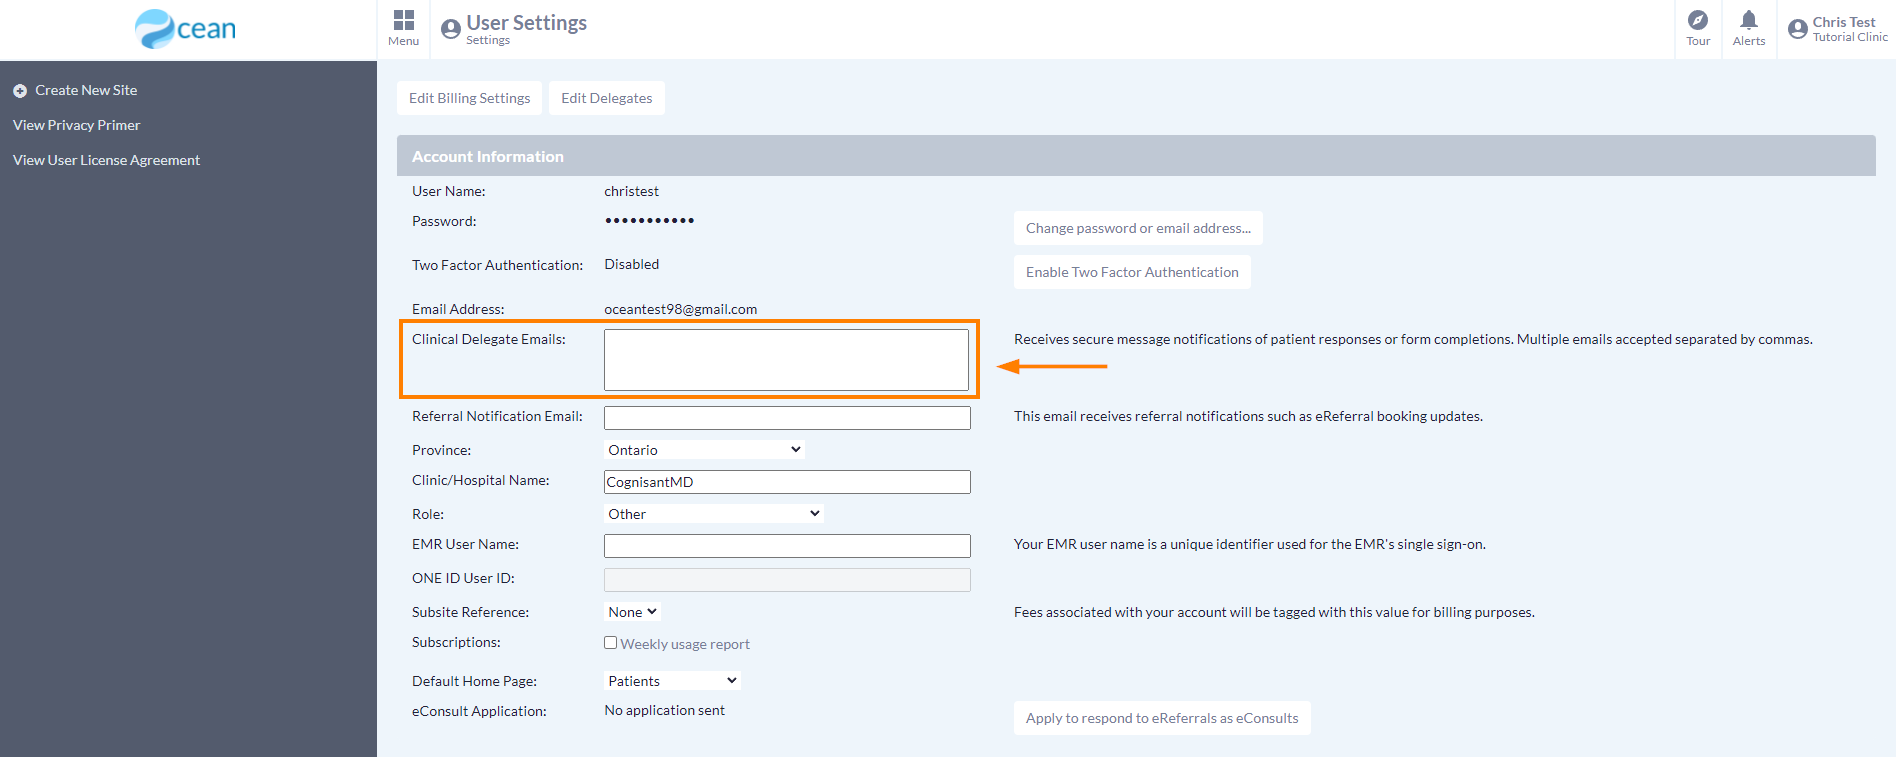
- Notify the sender when the patient has viewed the secure message
- When set to 'Yes', a notification will be sent to the sender’s email or the clinical delegate emails when the patient has viewed the secure message.
eForms
- Choose if you would like to add an eForm(s) to this template.
-
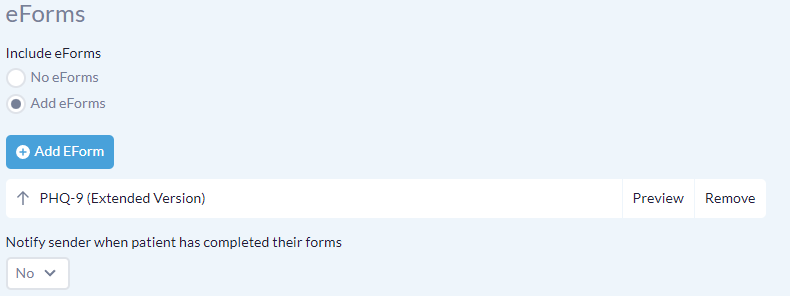
- Add eForm
- This button will open a window to search for and select an Ocean eForm. Once a form is added, it will be shown below the button.
- You can preview or remove the eForm by using the buttons to the right of its name.
- If you are adding multiple eForms, the "↑" arrow symbol to the left allows you to modify the sequence in which patients complete the eForms.
- Notify sender when patient has completed their forms
- When set to 'Yes', an email notification will be sent to the sender’s email or clinical delegate emails when the patient completes all of their eForms.
Advanced Settings
- This area allows you to customize advanced settings including the expiration time for the hyperlink in the email body, the identity verification requirements, a redirect URL, and an overdue response timeframe.
-

- Expiration Date
- This field determines the period of time during which the patient can access a secure message, attachment, or Ocean Form by clicking on the hyperlink in the email.
- If an Ocean Form is opened, completed and submitted by the patient, it cannot be accessed again. However, secure messages and attachments remain available until the link expires.
- Identity Verification
- Decide how patients can verify their identity to access secure messages and/or forms. By default, Ocean uses birth date as the required validation method. However, you can change this to the patient's health card number, EMR number, an access password (given to the patient beforehand), or an Alternate ID.
- Redirect URL
- This will allow you to redirect the patient to the URL of your choice once they've completed any Ocean Form(s) associated with the message. The patient can additionally access the URL by clicking the 'Visit Recommended Link' button on the associated secure message (e.g., in the case they do not have any Ocean Forms to complete).
- Overdue Notification
- Receive an email notification alerting you that the patient has not yet accessed their secure message by entering the number of days here.