Once your kiosk is assembled and your tablet is configured, the final assembly step is to connect the wires (i.e. peripheral items) properly within your kiosk.
Ensure that you've connected all the wires correctly so that your card reader and tablet work properly within the kiosk.
The diagram below shows the cables and connections required to set up the inside of the Ocean Kiosk (using the peripheral items and tablet that you ordered for the kiosk).
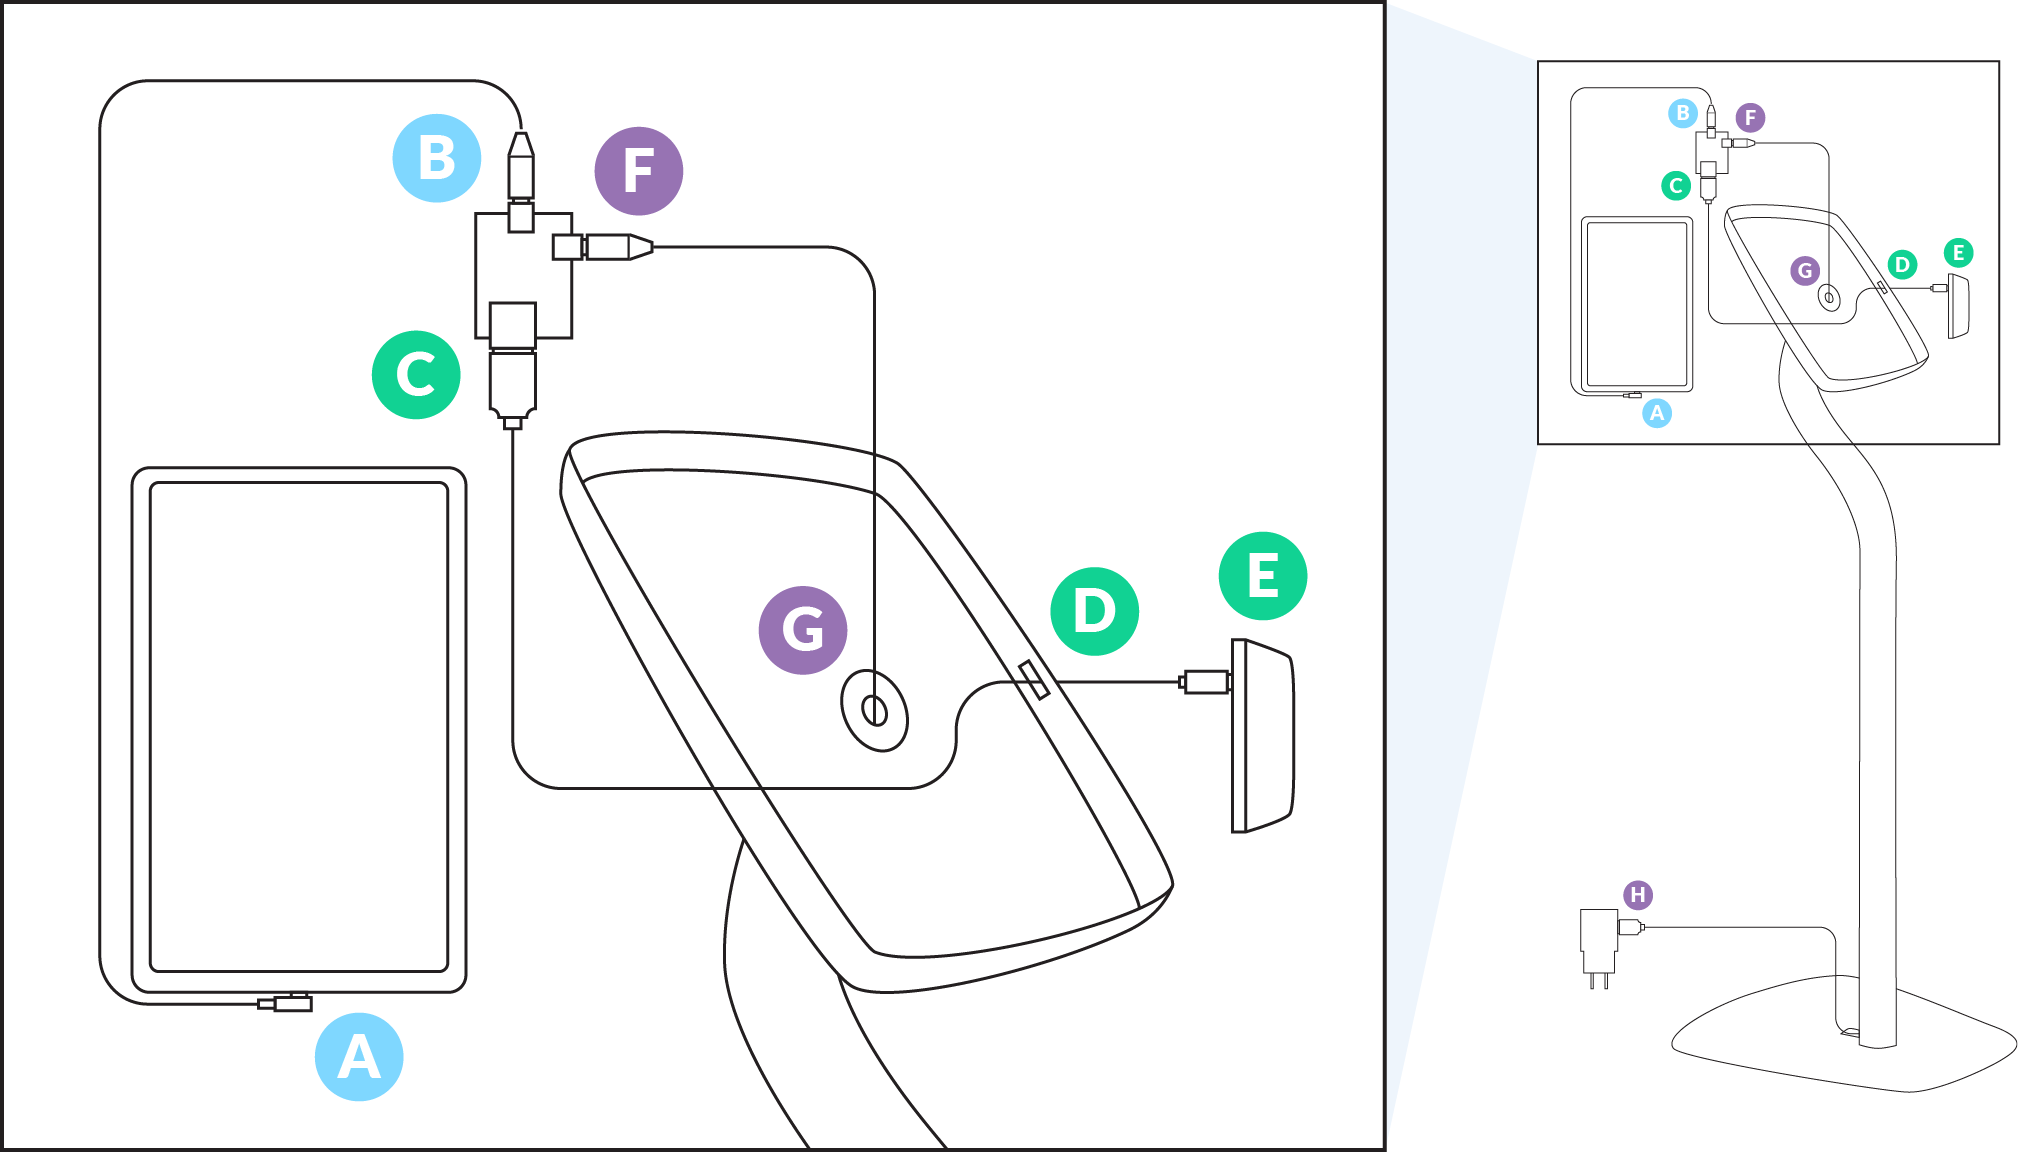
Short cable that comes with the Similcharge connector (USB-C to USB-C)
A Plug the 90-degree angle USB-C end into the Tablet.
B Plug the opposite USB-C end into the USB-C port on the shorter edge of the circuit board.
Medium length cable that comes with the reader (USB-A to microUSB)
C Plug the USB-A end of the cable into the USB-A port on the shorter edge of circuit board.
D Pull the cable through the mounting plate of the kiosk.
E Plug the microUSB end of the cable into the card reader. This one can be fussy and needs to be fully pushed into the reader.
Long cable (USB-C to USB-A)
F Plug the USB-C end of the cable into the USB-C port on the longer edge of the circuit board.
G Run the cord down the stand leg and out the opening by the floor.
H Plug the standard USB-A end of the cable into the charging block that came with your tablet. Make sure the charging block is plugged into a working electrical outlet.
Tips When Connecting Your Wires
- Ensure that you are not putting undue tension on the natural curve of the wire that connects the Simulcharge and the tablet.
- The ports on the circuit board can become a little loose sometimes, so please make sure that all 3 wires are plugged in snuggly into their ports.
- Make sure that there is nothing applying pressure straight down on the circuit board, especially on the top of the ports.