Can I change the way that calendar dates are formatted in my eForm?

Yes, you can change the way that calendar dates are formatted in resultant eForm notes. For example, while the default 'Date' 'eForm item type results in the YYYY-MM-DD date format, you may prefer a date format such as Month DD, YYYY.

This article walks through the steps of converting the output of the default 'Date' eForm item type into an alternative format using the core 'Date Formatting' eForm.

Note: The 'Date Formatting' eForm itself found in Ocean's core eForm library is not designed for use with patients. This eForm has been created as an additional pre-built resource for Ocean users who are editing other eForms.

Instructions

1. Open the form in the eForm Editor.

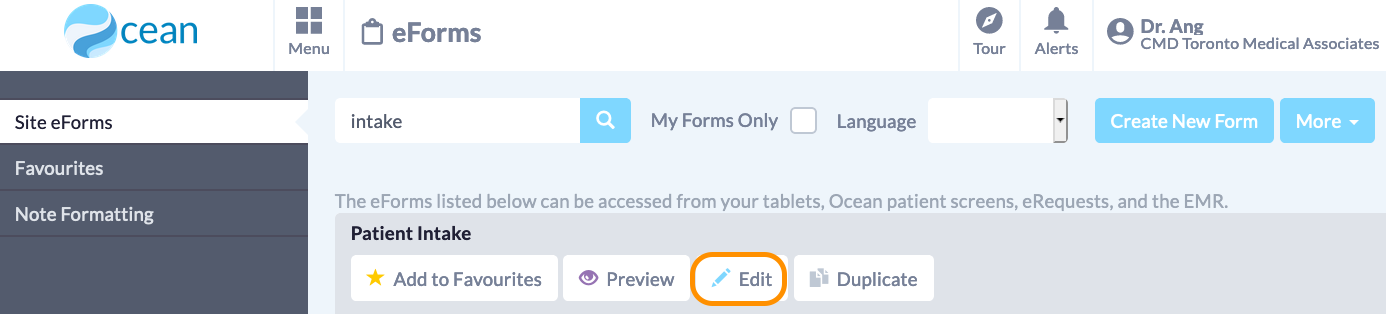
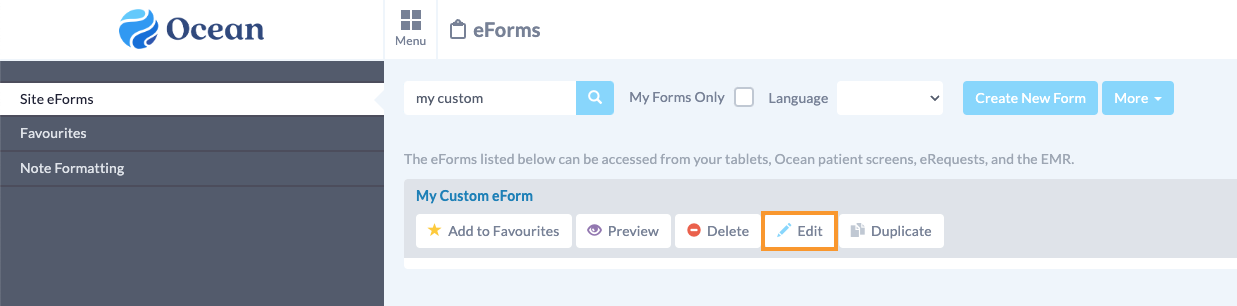
  • Open the eForm that you would like to apply the date formatting to in the eForm editor by locating it in your eForm library and clicking 'Edit'. An eForm editor will open in a new tab.
  • Additionally, locate the core 'Date Formatting' eForm in your eForm library and click 'Edit'. Another eForm editor will open in a new tab.
  • At this point, you should have three browser tabs open: one tab for the Ocean Portal, a second eForm editor tab containing your custom eForm that you want to apply the date formatting to, and a third eForm editor tab containing the core 'Date Formatting' eForm resources.

Note: It is assumed that the eForm that you want to apply the date formatting to has an existing 'Date' item type.

2. Copy your preferred Date Format.

  • Within the eForm editor for the core 'Date Formatting' eForm, select your desired date format and click the 'Copy' button.
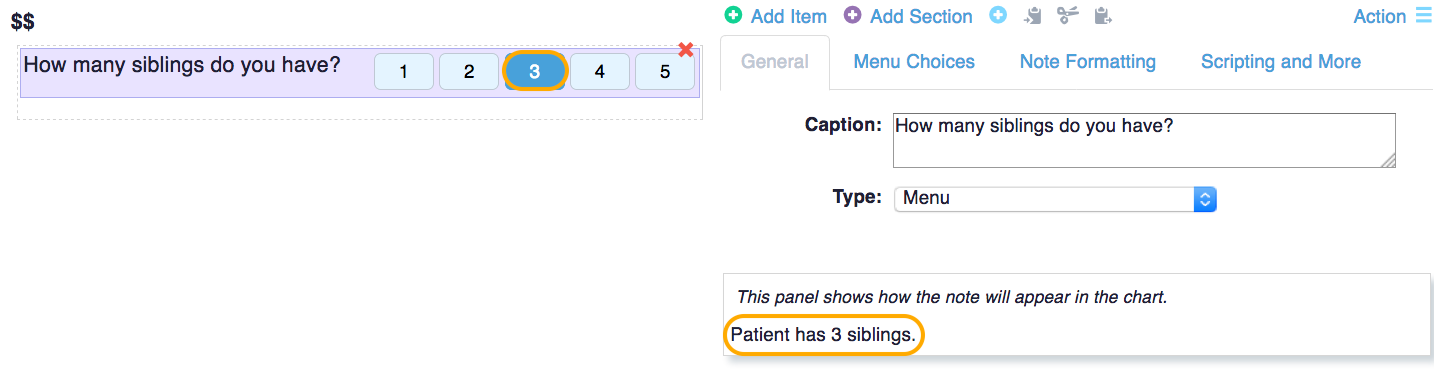
  • Tip: To assist in deciding on your desired format, you can preview the output of each date format by inputting a date in the standard date selector, and then reviewing the resultant eForm note output in the preview box.

3. Apply your preferred Date Format.

  • Navigate to the eForm editor tab for the eForm that you would like to apply the new date formatting to.
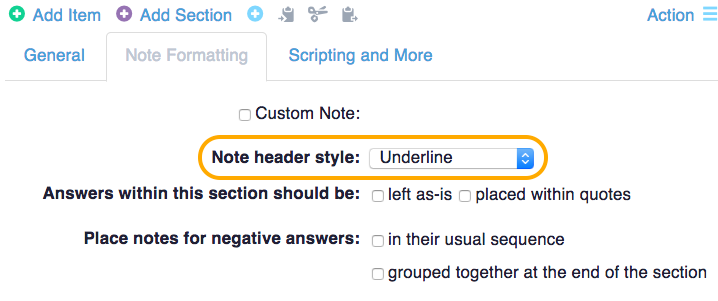
  • Prevent the existing 'Date' item from creating a resultant eForm note by selecting it, opening the 'Note Formatting' tab, and updating the 'Create a note for this item' setting to 'never'.
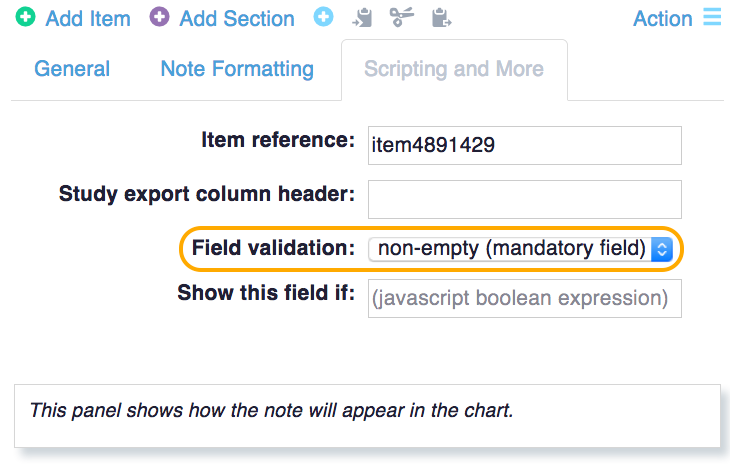
  • Navigate to the 'Scripting and More' tab for the existing 'Date' item, and copy or write down the 'Item reference' value.
  • Click the 'Paste' button to add the date format item you copied earlier (in Step 2) to your form. A scripting error will appear. This can be safely dismissed, as we will be updating the script next.
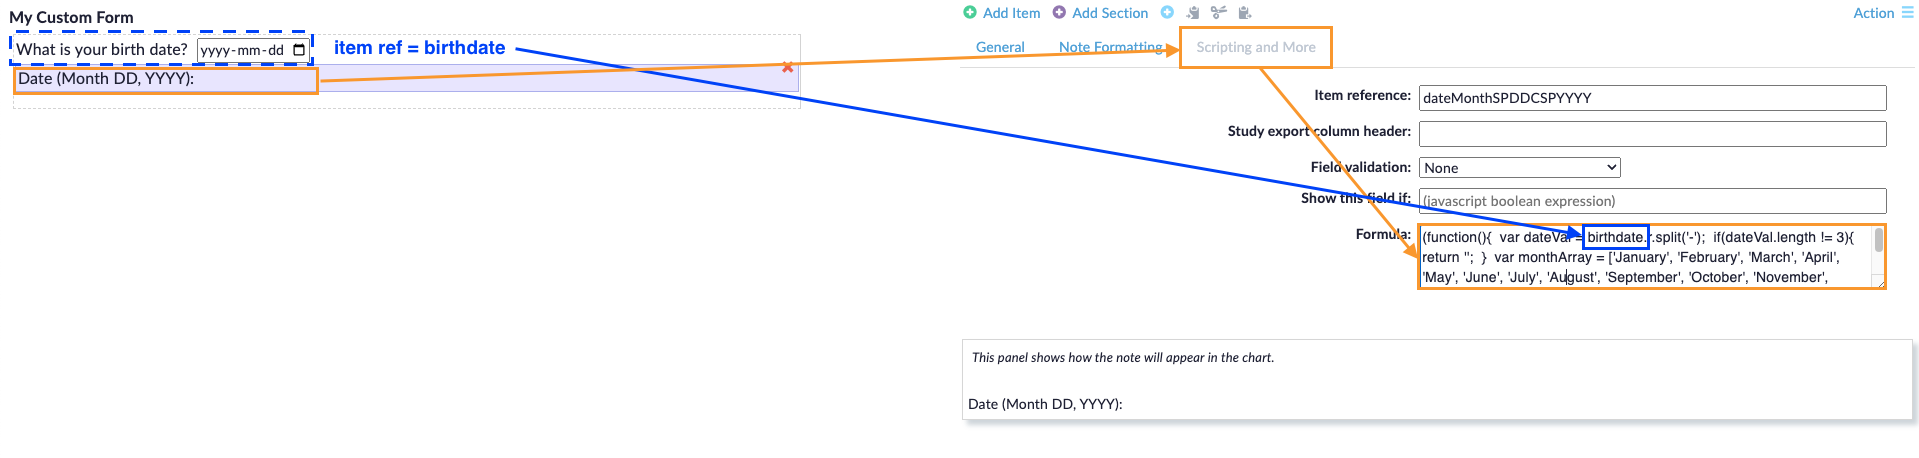
  • Navigate to the 'Scripting and More' tab for the newly pasted date format item and focus on the 'Formula' field. Replace the 'date' term highlighted in the screenshot with the item reference of the original date item you copied or noted earlier (in Step 3c).
  • For example, the screenshot to the right shows the change of the 'date' value in the formula to the 'birthdate' item reference for the original date item.

    Note: The exact item reference for the original date item within your exact form will vary. The term 'birthdate' was used for simplicity in this example.

  • In the 'Show this field if' setting for the new date item, type 'false'. This hides this item from the person who is filling out the form.
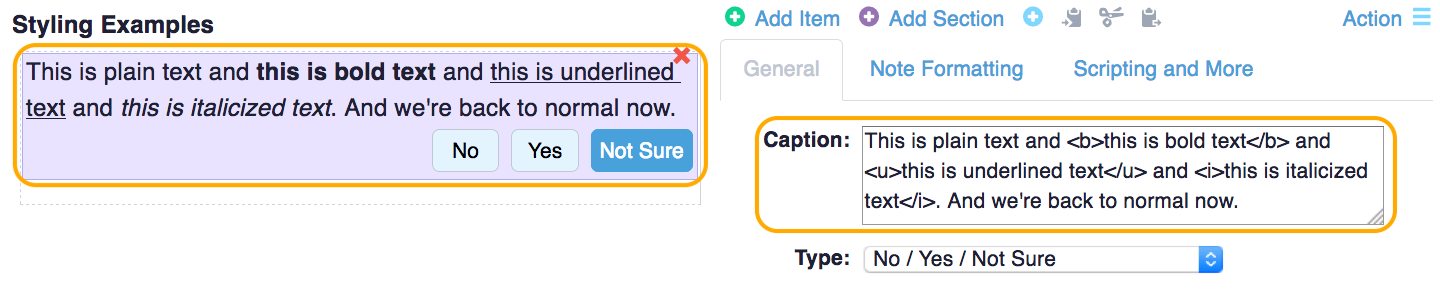
  • Navigate to the 'General' tab of the new date item, and update the 'Caption' setting to reflect how the progress note should appear. The screenshot to the right updates the caption to 'Date of Birth' as an example.

    Note: Do not remove the '$$' term from the caption. This key term is used to display the response value.

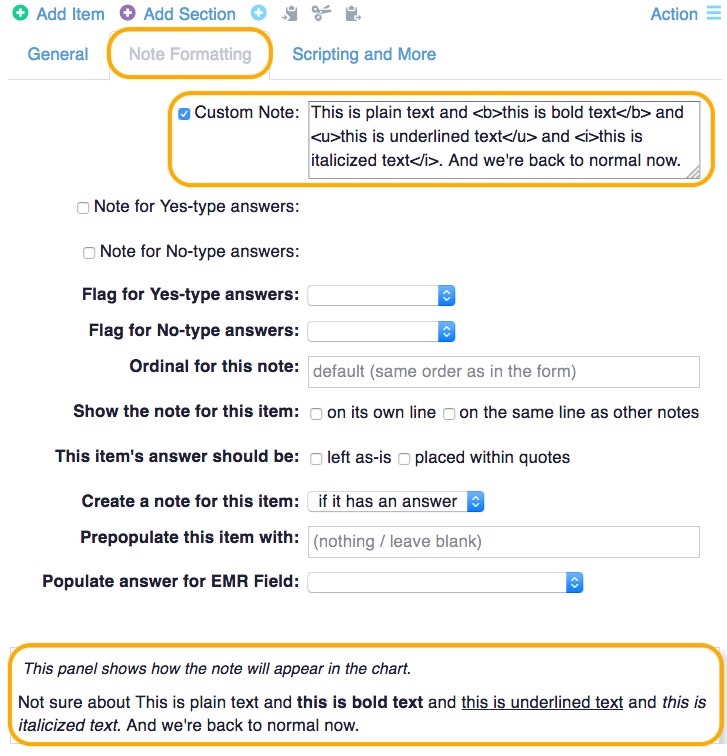
  • If you only want the note to be created when the patient inputs a date, navigate to the 'Note Formatting' tab for the new date item, and update the 'Create a note for this item' setting to 'if:'.

    In the text box that appears to the right, input the item reference for the original date item (from Step 3c) followed immediately by: .r != ''

    This ensures that a note is only created when a date is entered.

  • Click the 'Save Changes' button.

4. Preview your changes.

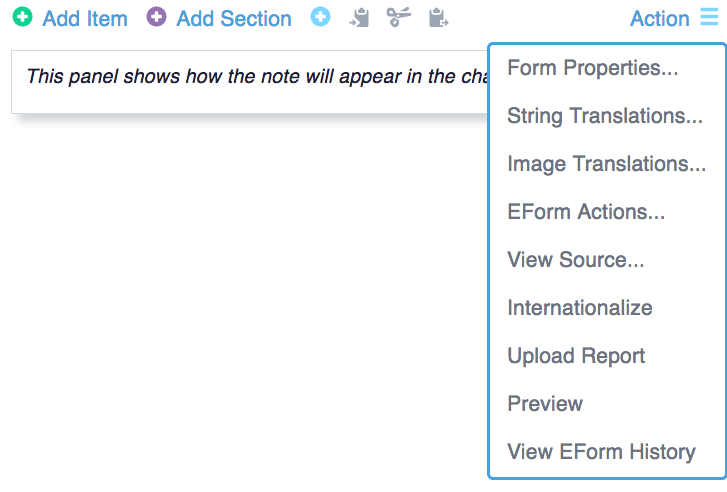
  • Open the 'Action' menu in the top right corner and click 'Preview'. A new tab will open with a preview version of your eForm.
  • In the form preview, enter a date into the date item. The preview box will display the resultant eForm note in your desired format.

Article Link

How do I show/hide questions in my eForm?

The "Show this field if" field in the Scripting and More tab of the eForm Editor can be used to show or hide items or sections (or make a clinical note), depending on answers to previous questions or other patient information.

For more information about how to set use this field, please refer to Scripting & More Tab - Show this field if

Article Link

Can I convert a PDF form into an Ocean eForm?

Unfortunately it's not possible to simply upload a PDF version of a form and have it turn into an Ocean eForm. This is because Ocean eForms are set up so that each question is its own discrete value, so it's very difficult to be able to convert a whole document into these separate, discrete values.

However, here are some suggested options to help you to build your eForms:

  • You can create a new eForm for each of your forms, using our eForm Editor. You can find some helpful tips and tricks in our Guide to Building eForms.
  • You can search through our eForm library to see if you can find an existing eForm that's similar to yours and edit that eForm to your liking (so you don't have to start completely from scratch).

Article Link

Why does nothing happen when I try to edit / create an eForm from the eForms tab?
  • Many web browsers will block the eForm Editor as a pop-up window because Ocean opens the eForm Editor in a new browser tab.
  • If you find this is happening, sometimes you will see a message in the address bar of your browser. If you disable your browser pop-up blocker for the Ocean Portal, the eForm Editor will appear as expected.

Article Link

How can I set a question or field as required on a form?

When building a form, you may want to prevent patients from skipping certain questions, or ensure that the information they provide meets a certain criteria (e.g. an email address must contain the @ sign).

You can easily make a question mandatory by editing the form in the eForm Editor.

  • Select the question that you want to set as a required field.
  • Navigate to the "Scripting and More" tab.
  • From the "Field Validation" drop-down menu, select the appropriate option. In the case of a required field, select "non-empty (mandatory field)".
  • Save your form.
  • Now, if a patient attempts to complete the form and fails to answer the required question, the required question will be highlighted in red and they will not be allowed to move to the next page or finish the form.

Article Link

How do I prepopulate a field for a patient on a form?

When building/editing your Ocean eForms, you can set certain fields to be pre-populated with information that is available from the patient's chart in the EMR. This can be helpful for demographic fields, so the patient doesn't need to fill in the same information every time they use Ocean to fill out forms.

  • To set this up, you will want to take advantage of the "Prepopulate this item with" field in the Note Formatting tab of the eForm Editor.
  • In this field, you can select from a long list of keywords to pre-populate the field with. You can browse through this list by typing the 'at' symbol (@) into the "Prepopulate this item with field" and scrolling down through the list of keywords that pops up.

To see a full list of keywords, please refer to: "Using Keywords to Automatically Insert Content".

Article Link

Do Ocean eForms support French? Other languages?

Yes, Ocean eForms support multiple languages with a few nuances.

The eForms themselves can be translated into any language. While most forms are English only, there are a few standard forms that are available in French as well (e.g. PHQ-9).

To learn how to translate your eForm into another language, please refer to "Translating an eForm into Another Language(s)".

  • Currently, the tablet provides the option to support: English, French, Arabic, Armenian, Chinese, Farsi, Filipino (Tagalog), Hindi, Italian, Japanese, Korean, Portugese, Punjabi, Romanian, Russian, Spanish, Tamil, Turkish, Ukrainian, Urdu, and Vietnamese.
  • Patients can choose which language to complete their forms in from the top of the Introduction screen.

Article Link

Can I set up a questionnaire in Ocean to show another form, based on the patient's answers?
  • Yes. You can use EForm Actions to trigger more eForms to appear, based on a patient's answers to the current form. You can find this option in the Action menu in top right hand corner of the eForm editor.
  • For more information about how to set up your eForm Actions, please refer to "Action Menu - eForm Actions".

Article Link

Can I bold / underline / italicize text in an eForm?

Yes. Simply add in standard old-fashioned HTML "tags" for bolding, underlining or italicizing around the text you want to style. These tags will work for a caption (i.e. question stem) or a custom clinical note. Common tags include:

HTML Tag Resultant Style
<b> </b> Bold
<u> </u> Underlined
<i> </i> Italicized
eForm Questions Clinical Notes
  • Select the item on your eForm that you would like to style. It will turn purple once selected.
  • On the right panel, in the "Caption" field, surround the text you want to highlight with the appropriate HTML tags (see the example to the right).

Note for eForm Section Headers

  • You can also bold/underline/italicize section headers by selecting the desired section, entering the Note Formatting tab, and picking an option for the "Note header style" field.

Article Link

How do I format a note to show the patient's answer to a question?

A useful trick that you can use to nicely format the clinical note that Ocean generates is the use of: $$

Entering $$ into the "Custom Note" (Note Formatting tab) will generate text that reflects the patient's answer to that particular question.

  • For example, if the first item on your form is a menu-type question that asks the patient how many siblings they have, you can type the following into your "Custom Note" field:
  • Patient has $$ siblings.
  • If you select a menu choice, you will notice that the Ocean-generated note will replace $$ with the menu choice that the you have selected:
  • Patient has 3 siblings.

Along these same lines, you can use $$ in your custom note, wherever you wish to insert the patient's answer into the clinical note.

Article Link

Can I copy and paste from one form to another?

Yes, it is possible to copy items and sections from one form to another.

  1. Open both forms in the eForm Editor.

  2. Copy the desired item.

    • Select the item or section that you wish to copy. The selection will turn purple.
    • Click the copy icon from the top of the eForm editor (i.e. the clipboard beside the blue plus sign, with arrow pointing into the clipboard).
  3. Paste the item into the other form.

    • Open the eForm you want to paste the copied item or section into.
    • Paste the selection into the second form by selecting the paste icon (i.e. clipboard on the right, with arrow pointing out of the clipboard).

Article Link

Why can't I copy and paste from Microsoft Word into my eForm?

Did you run into the error below?

The selected file has been rejected. Please make sure your image is in one of the following file formats: .jpeg/jpg/png/gif.

If so, try holding down the shift key when doing the "paste". This will tell your browser to paste the content that you've copied as free text.

Article Link

What is the difference between a diagram and a picture?

When adding an image to an eForm, you have two options: a diagram or a picture.

  • Diagram

    • A diagram is special kind of image that uses a single picture item and overlays a number of checkboxes on top. A diagram is best used for images such as body parts so that patients can select certain areas using the checkboxes. A good example of this is the Body Pain Diagram.
    • A diagram is added by selecting the blue plus (+) sign at the top of the eForm editor.
    • To learn how to create your own diagram, please refer to: "How do I create a diagram for my eForm?"
  • Picture

    • A picture simply displays an image file. A picture is best used for adding a logo to your form.
    • A picture is added by selecting "Add Item" and then choosing "Picture" as the item type, from the dropdown menu.

Article Link