Sending an eReferral/eConsult with Attachments from OSCAR Pro

The following workflows can be used to include file attachments from OSCAR Pro in an Ocean eReferral/eConsult.

Unsupported File Types: Please note that the integration between OSCAR Pro and Ocean does not currently support attaching the following file types from OSCAR Pro: "tiff", "tif", "mp3", "mp4", "txt".

Scenario 1: Initiating an eReferral/eConsult with an attachment

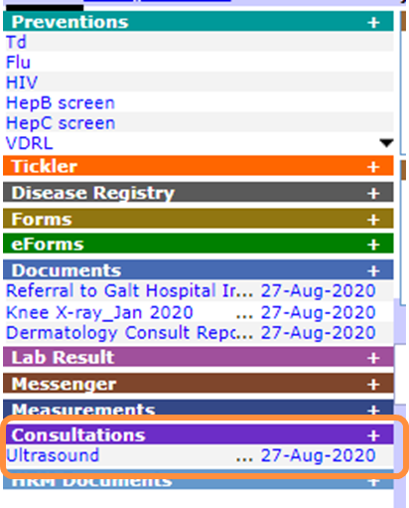
  • In the patient chart in OSCAR Pro, create a new 'Consultation'.
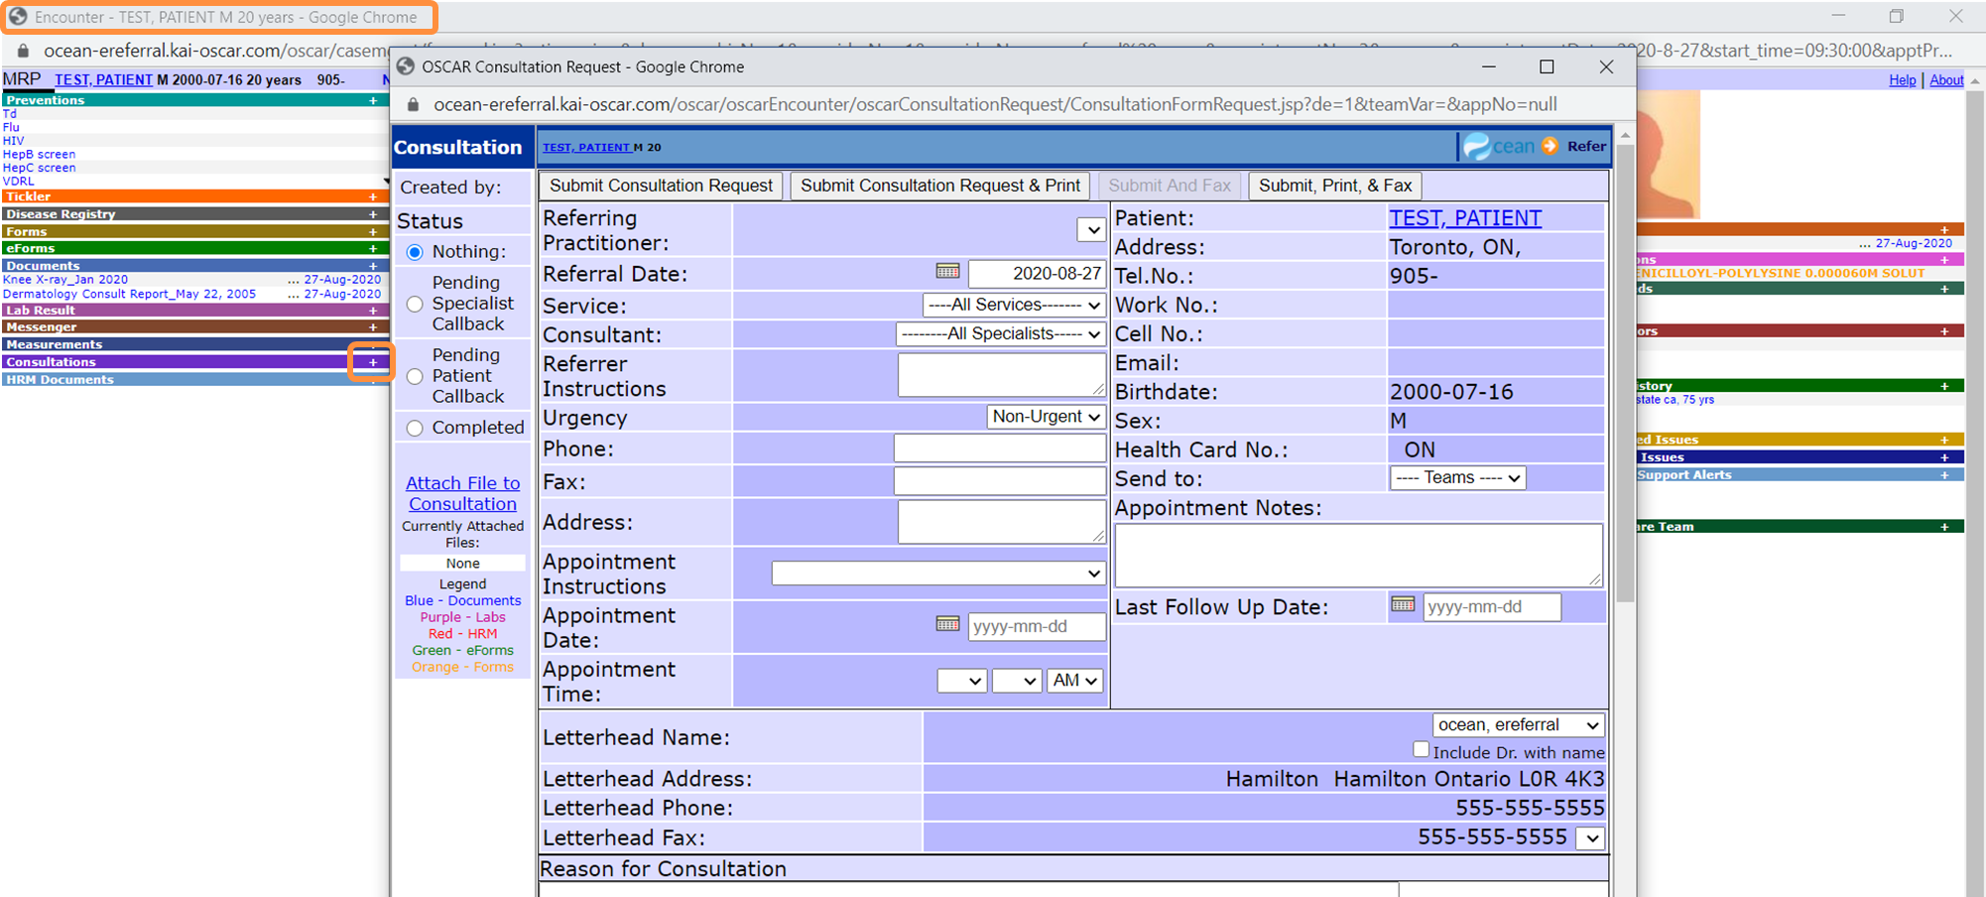
  • Click 'Attach File to Consultation'.
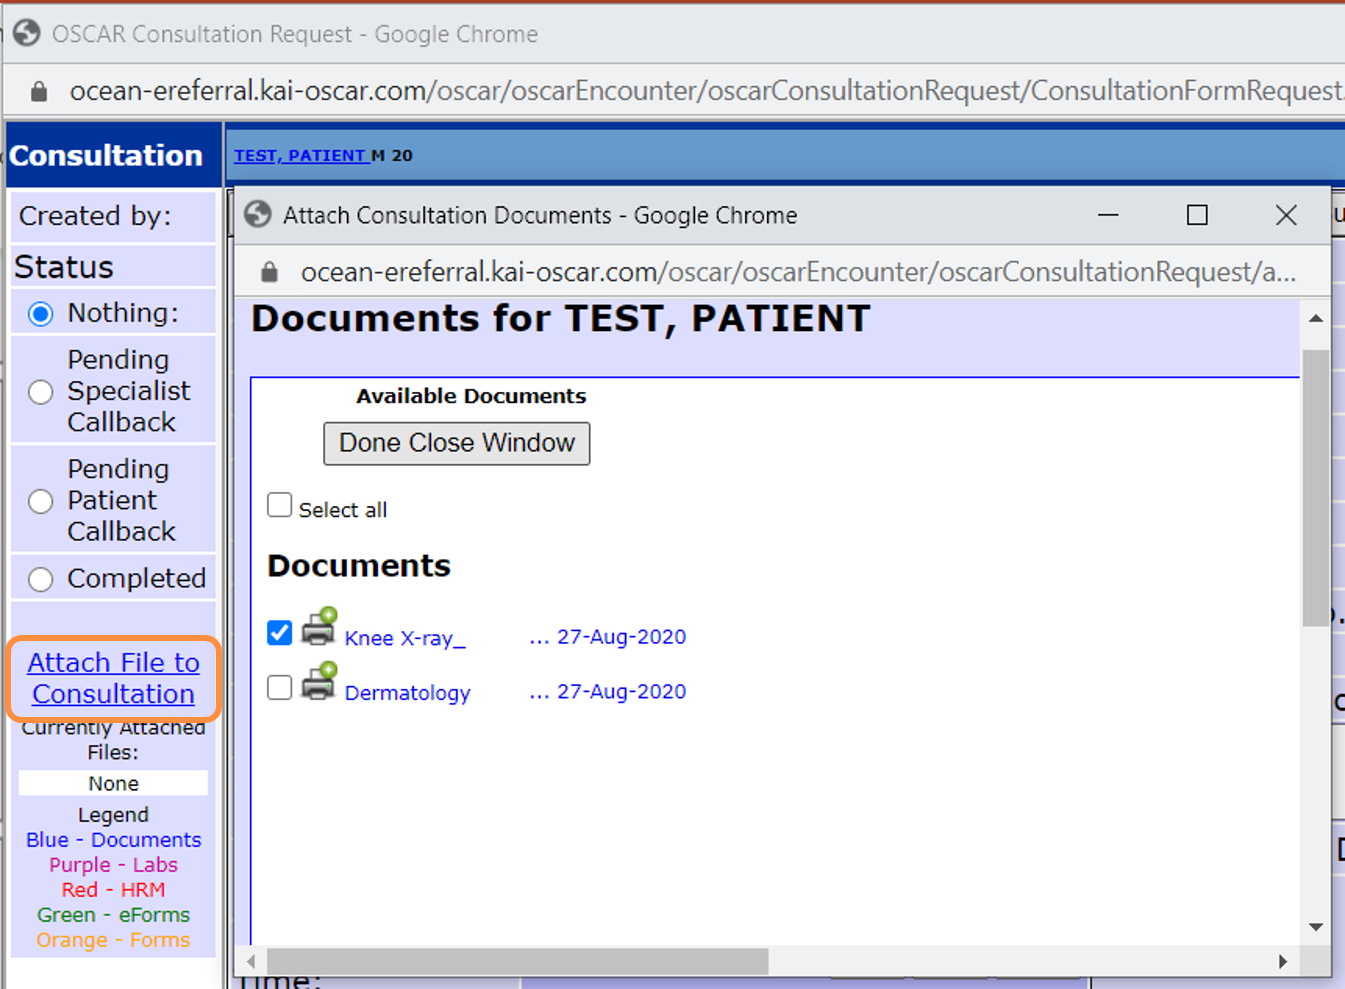
  • Select the desired items from the patient chart to include as an attachment, and then click 'Done Close Window'.
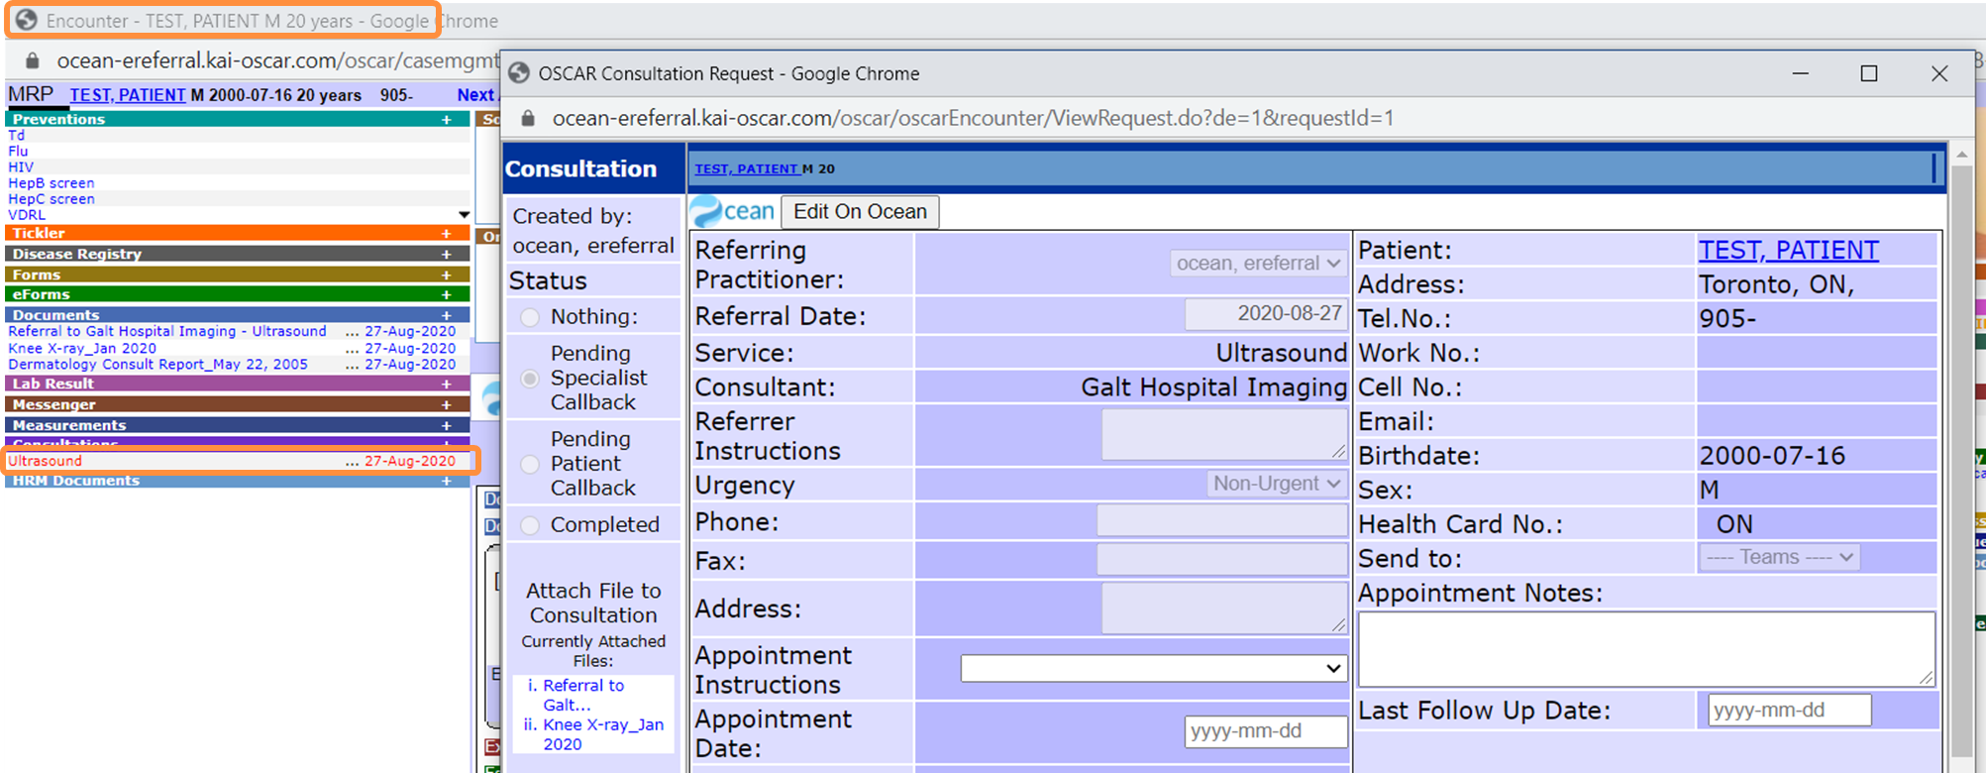
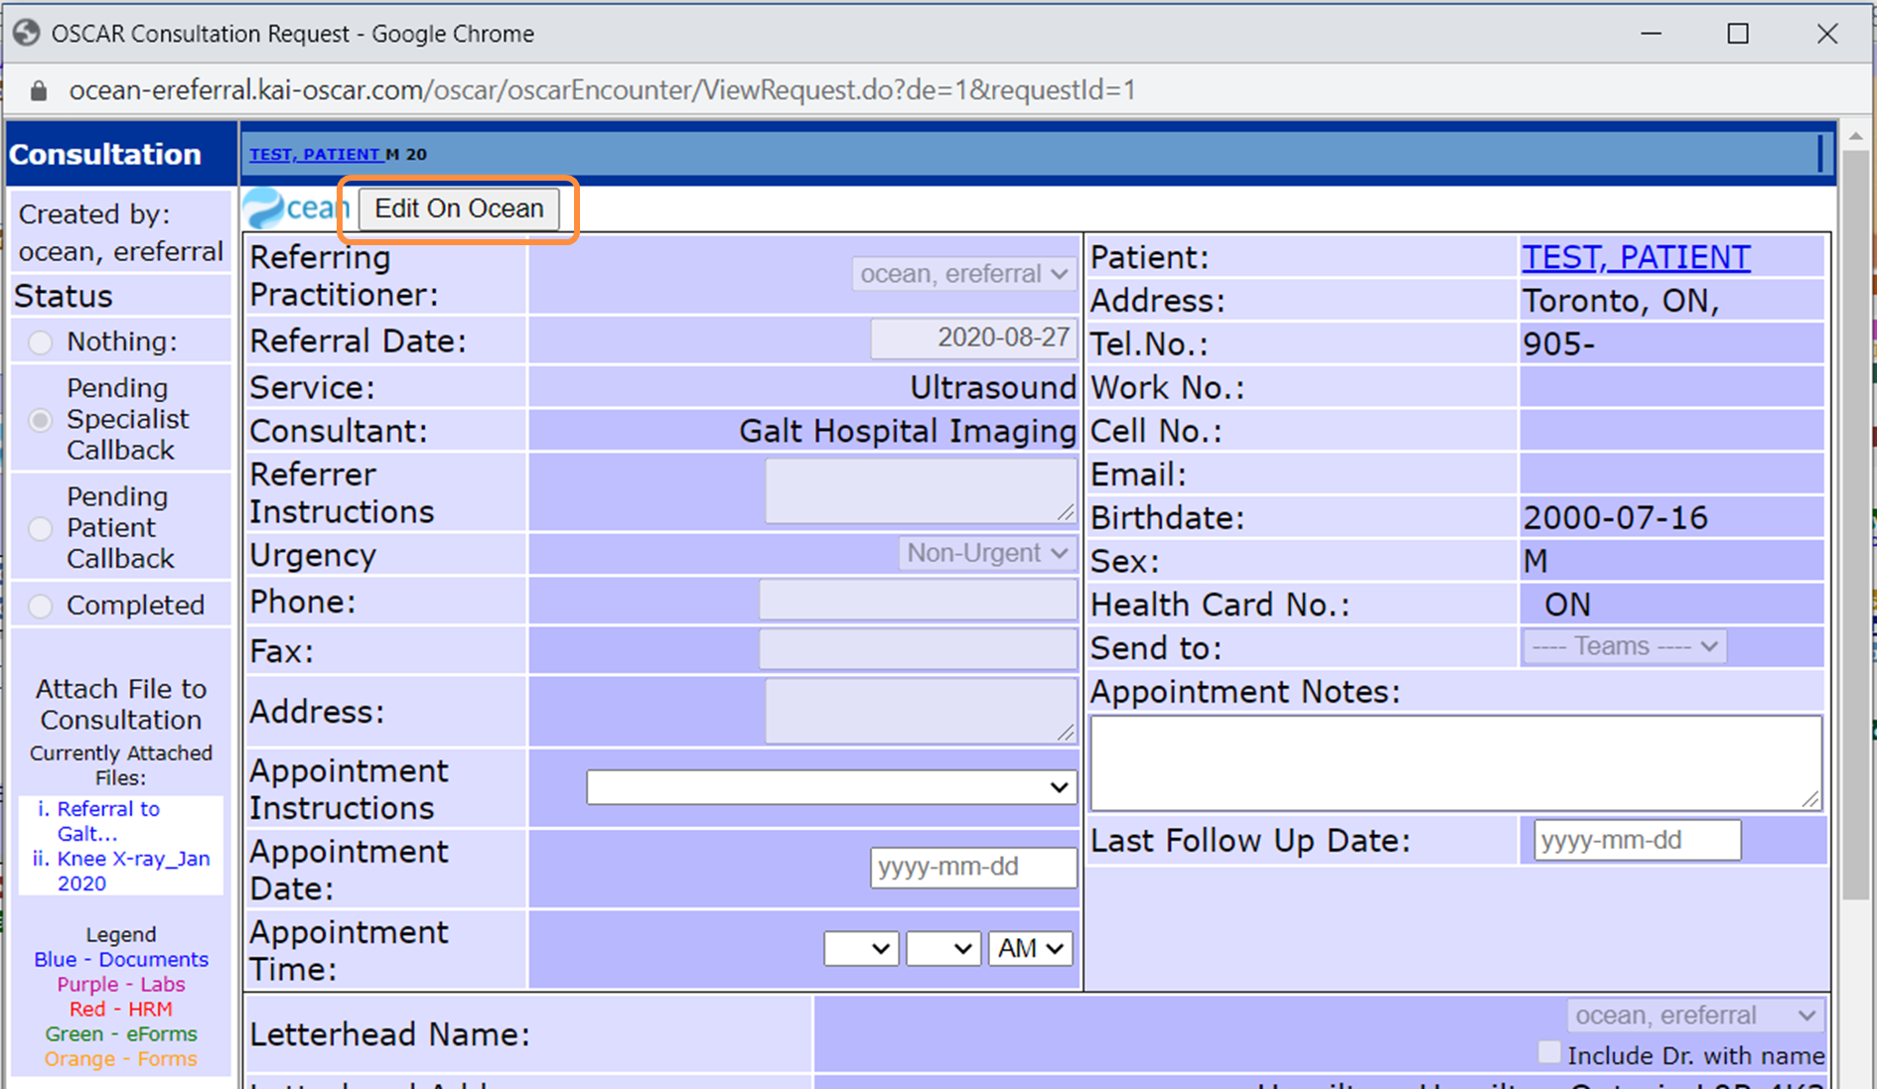
  • The selected attachments will appear in the left hand side of the Consultation window. Next, click the 'Refer' button in the top right corner.

  • Note: The 'Consultation' window will automatically close after clicking the 'Refer' button. Any text that was input in the 'Consultaton' fields will not be transferred into Ocean. Do not make any further edits in this window, beyond simply adding the attachments.
  • The Ocean Healthmap will launch in a new browser tab. After searching for and selecting an eReferral recipient, the file attachment(s) will be automatically included near the bottom of the referral form.
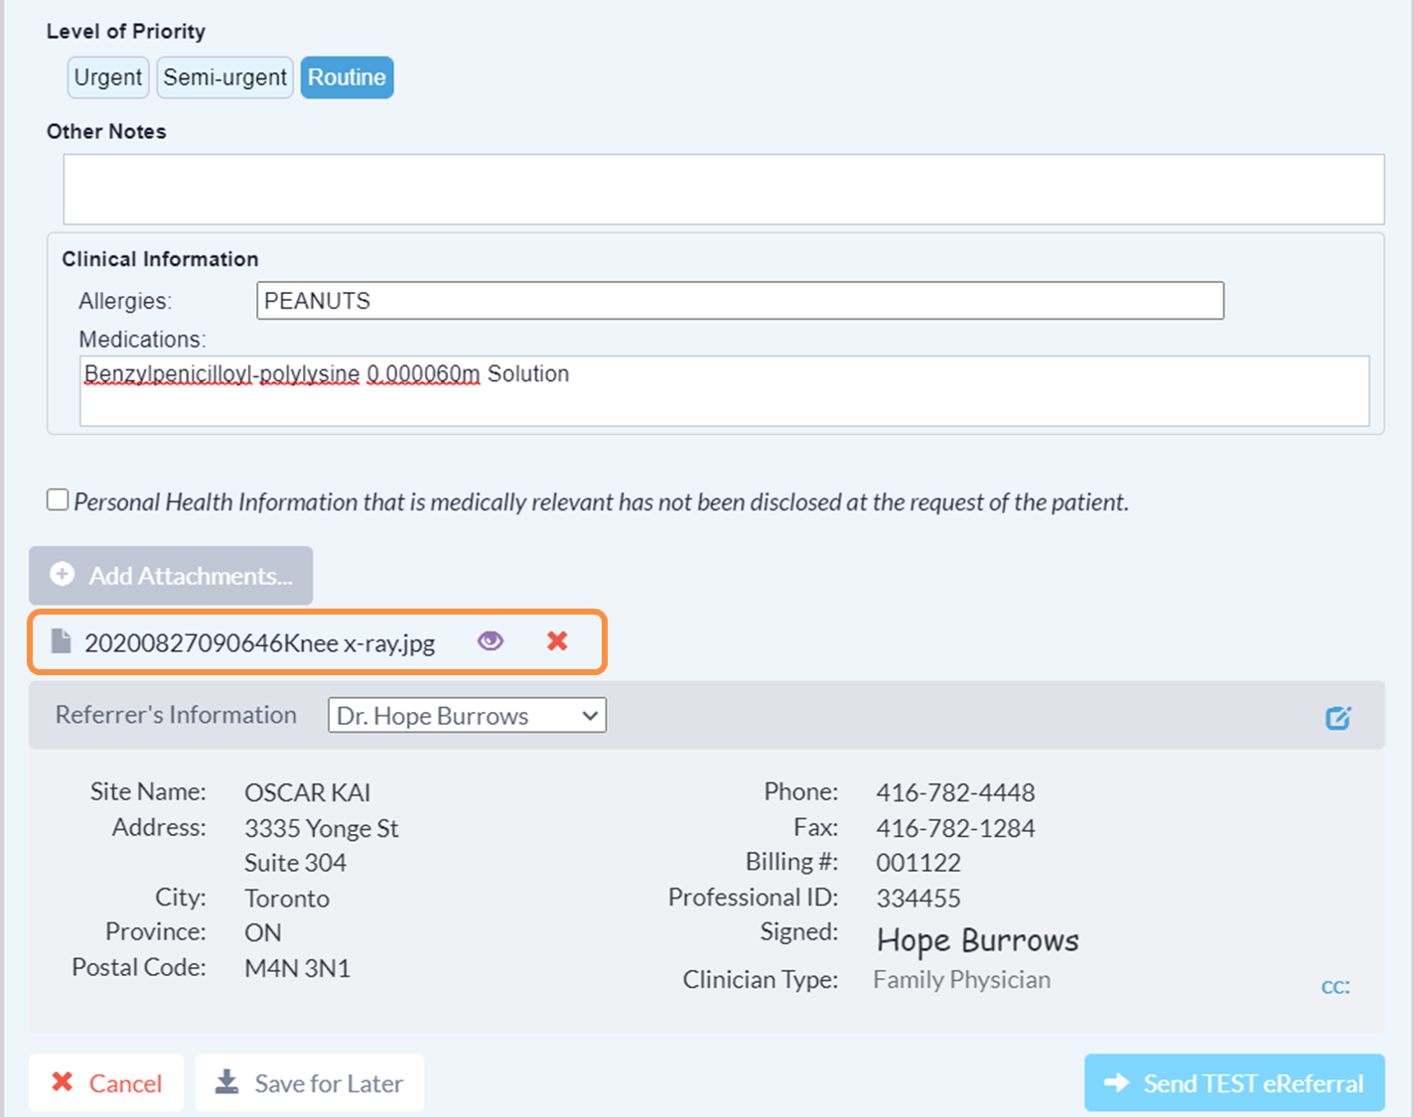
  • Click the "purple eye" icon to preview the attachment before sending the eReferral. If needed, you can click the red "X" to remove it from the referral.
  • After filling out the referral form and previewing your attachments, send your eReferral by clicking the 'Send eReferral' button.

Scenario 2: Adding attachments after an eReferral/eConsult is sent

Warning

This workflow uses the Attachment Manager functionality within OSCAR Pro, which is not officially supported by OSCAR Pro for use with Ocean eReferrals/eConsults at this time.

If an eReferral/eConsult has already been sent, but you would now like to include an attachment from OSCAR Pro, follow the steps below:

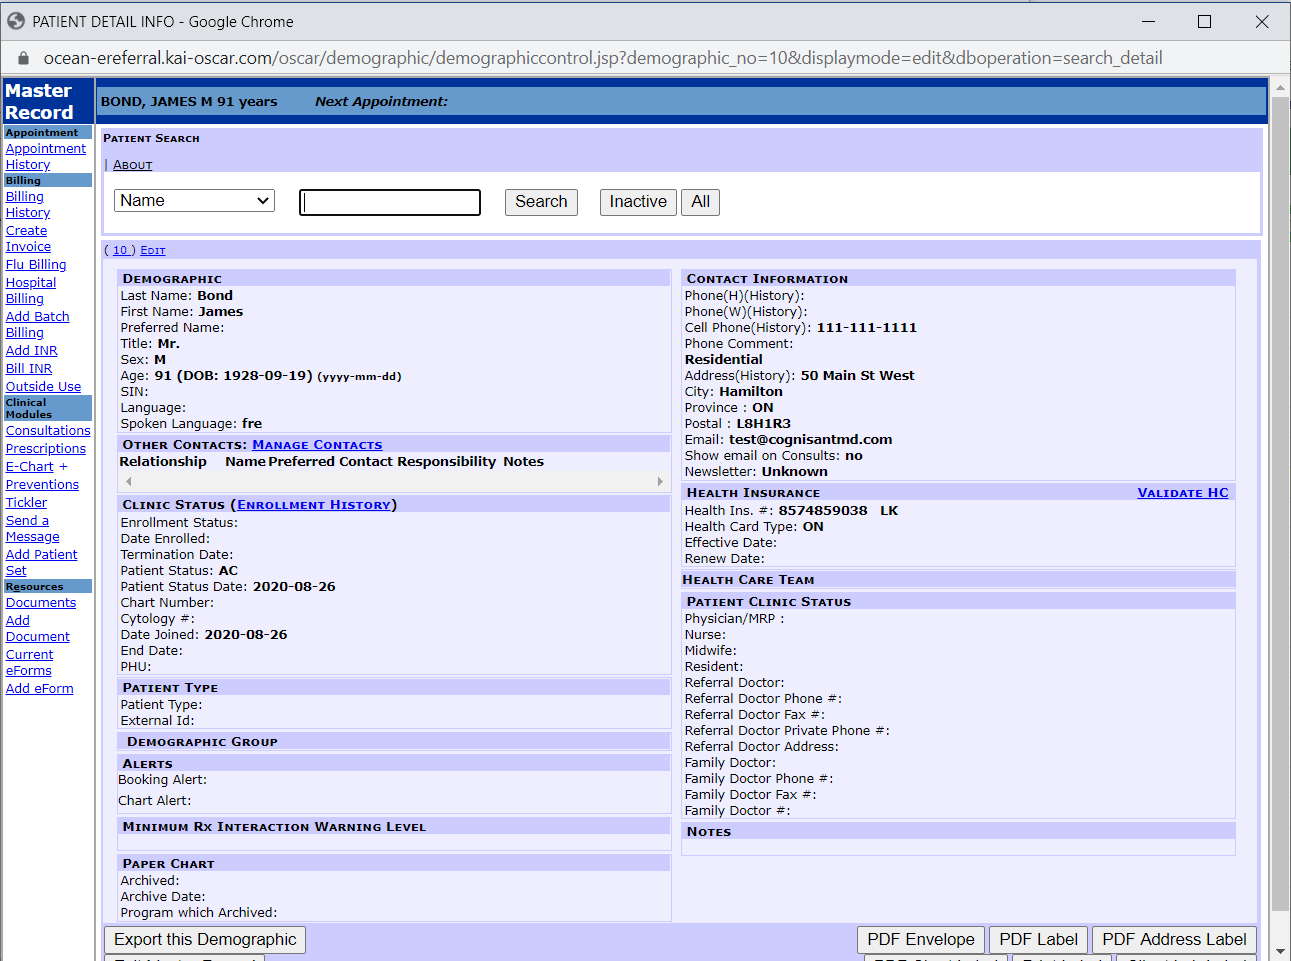
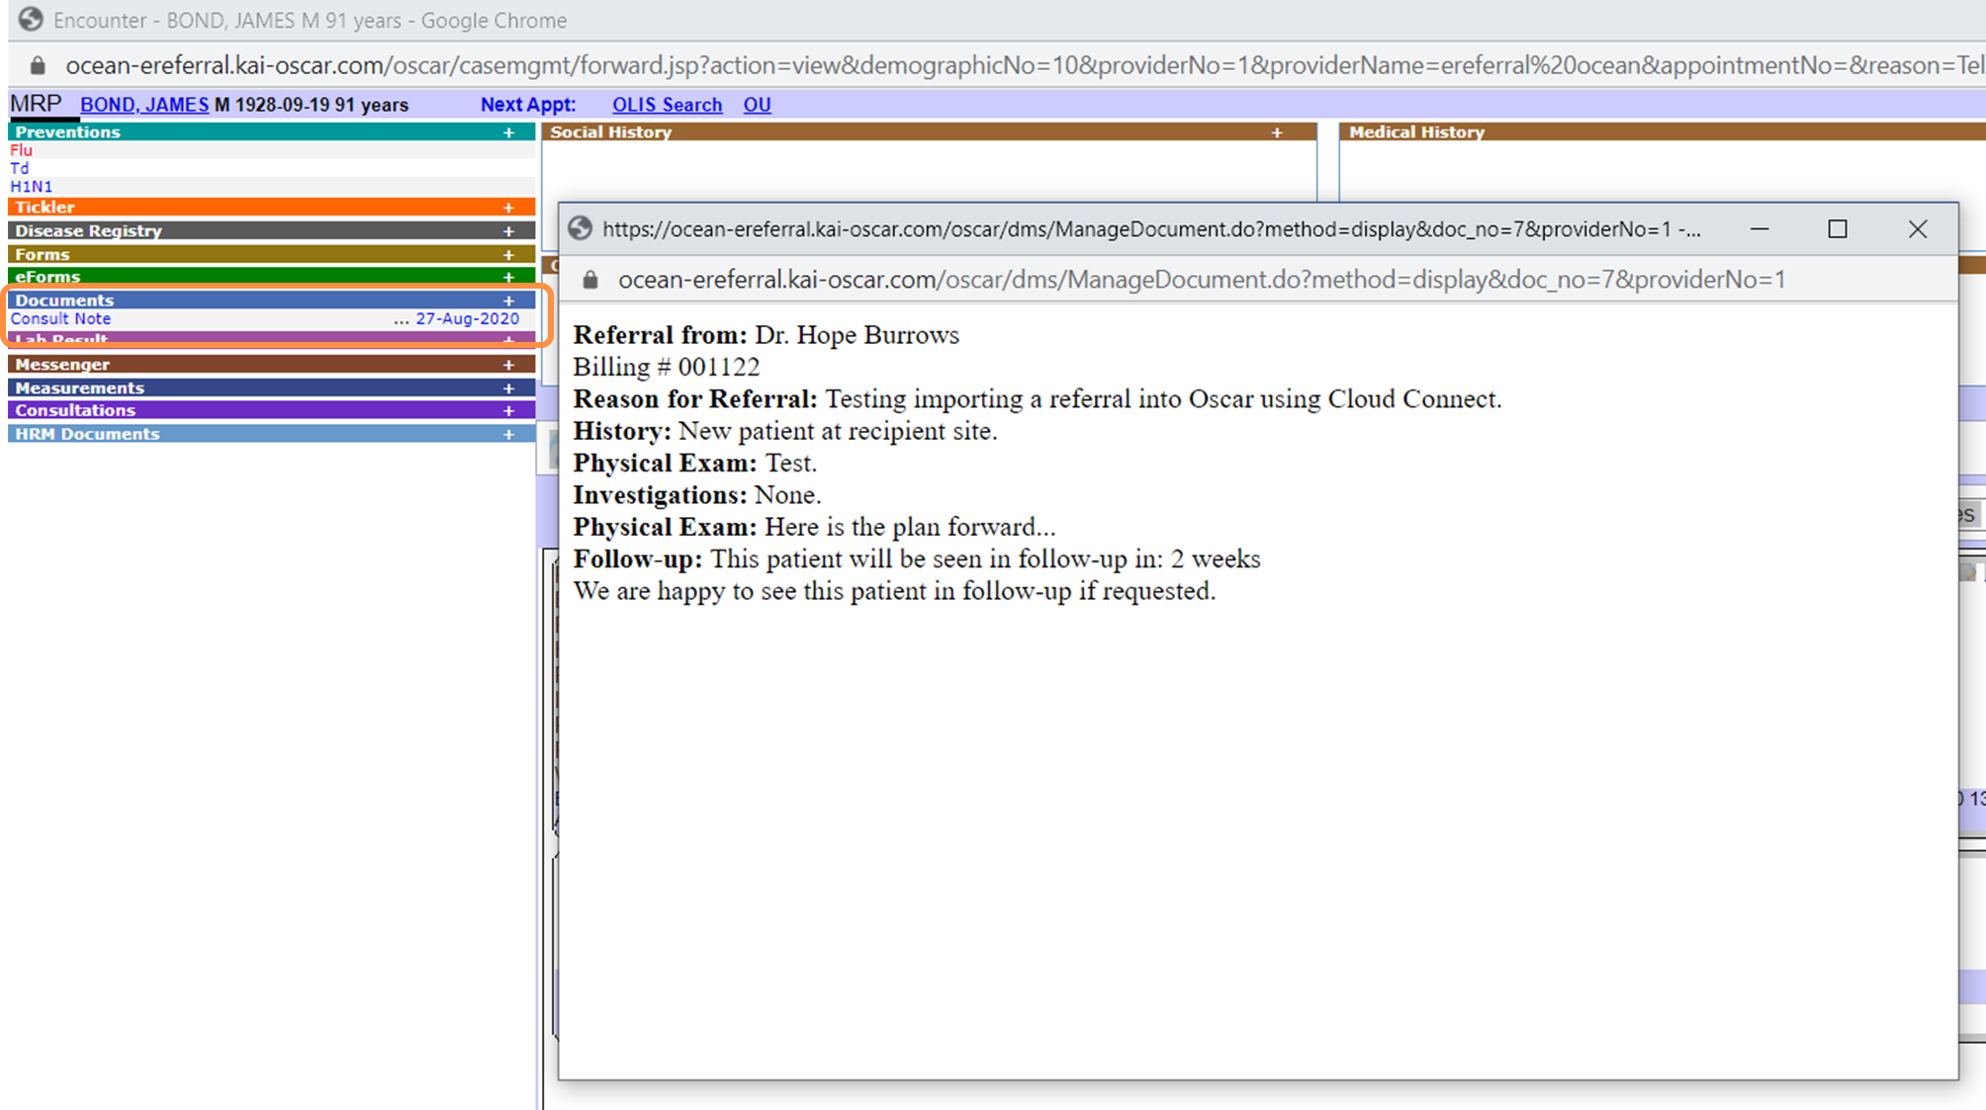
  • In the patient chart in OSCAR Pro, open the 'Attachment Manager'.
  • Enable the checkbox for the desired attachment(s), and then click the 'Save for Ocean' button.

    Note: Only items from the Documents, HRMs, Labs, and eForms sections can be saved for Ocean.

  • Close the Attachment Manager window.
  • Click the 'Patient Summary' button on the Ocean Toolbar.
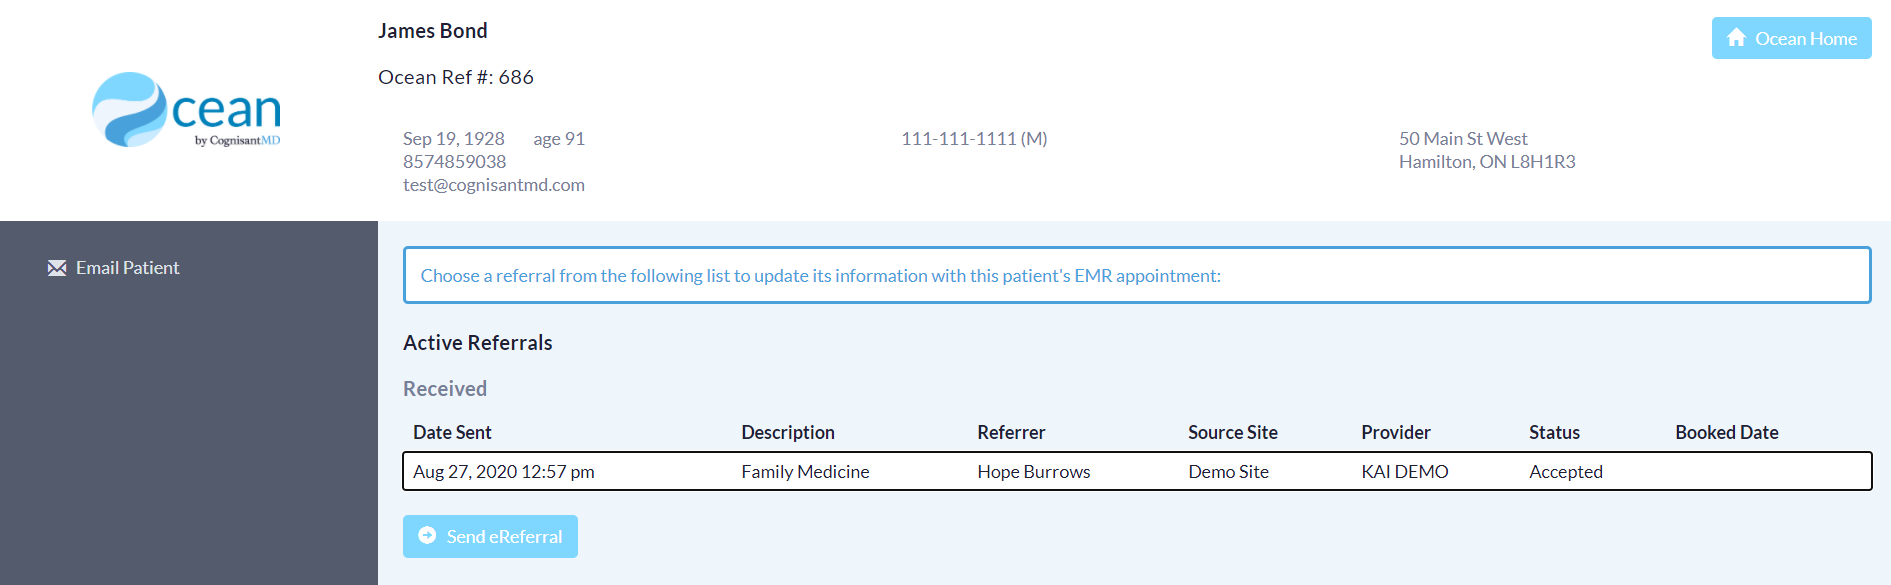
  • Under the 'Sent' heading, click on the sent eReferral/eConsult that you would like to add the attachment(s) to.
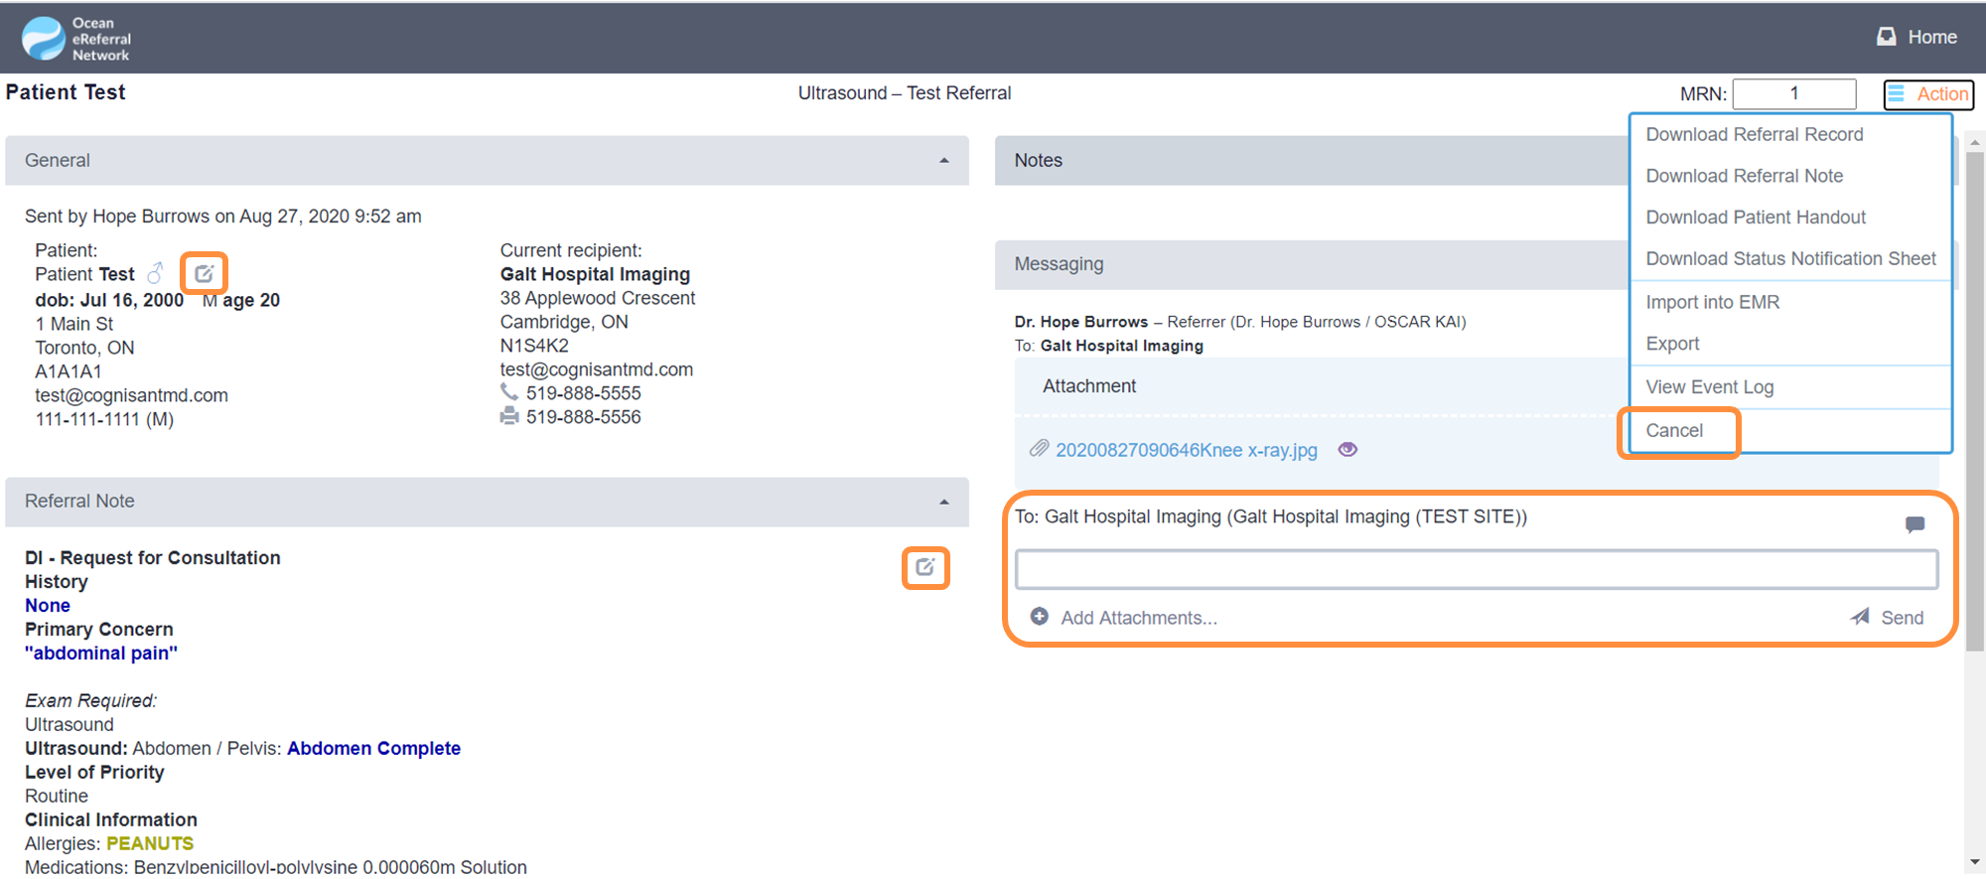
  • In the 'Messaging' area, click the 'Add Attachments' button, and select an uploaded attachment.

    If you have multiple attachments to upload, repeat this step. The attachment(s) will be uploaded into the 'Messaging' area.

  • Click the purple eye icon to preview each attachment before sending them.
  • Optionally include a typed message, and then click the 'Send' button to send it to the recipient.

Scenario 3: Adding attachments to an eReferral/eConsult that has been initiated but not yet sent

Warning

This workflow uses the Attachment Manager functionality within OSCAR Pro, which is not officially supported by OSCAR Pro for use with Ocean eReferrals/eConsults at this time.

If you initiated an eReferral/eConsult without an attachment and decide that you would like to include an attachment prior to sending it, but you do not want to lose any progress you made when filling out the referral form, follow the steps below:
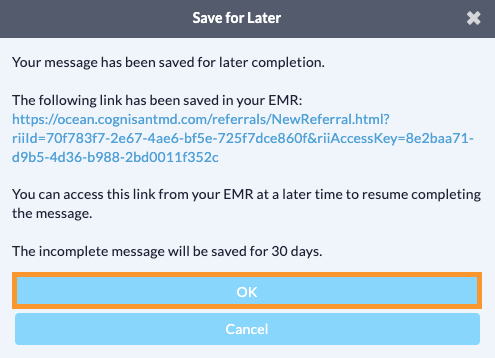
  • A confirmation message will appear indicating that your referral has been successfully 'Saved for Later'. Click 'OK'.
  • Return to the patient chart in OSCAR Pro and open the 'Attachment Manager'.
  • Enable the checkbox for the desired attachment(s), and then click the 'Save for Ocean' button.

    Note: Only items from the Documents, HRMs, Labs, and eForms sections can be saved for Ocean.

  • Close the Attachment Manager window.
  • Click the 'Patient Summary' button on the Ocean Toolbar.
  • Under the 'Outbox - Saved for Later' heading, click on the incomplete eReferral/eConsult that you would like to add the attachment(s) to.
  • The partially-filled referral form that you saved earlier will open in a new tab. Click the 'Add Attachments' button and select an uploaded attachment.

    If you have multiple attachments to upload, repeat this step.

  • Click the purple eye icon to preview each attachment before sending the referral.
  • After filling out the rest of the referral form, send your eReferral by clicking the 'Send eReferral' button.

Viewing Sent eReferral Updates in OSCAR Pro using the Consultation Window

Prerequisites

These steps are for Oscar WELL EMRs, using Oscar Pro. Please ensure you have enabled Ocean Cloud Connect using the following setup guide.

Oscar EMR users can access and update their sent Ocean eReferrals directly from the Consultation window in the patient's Encounter chart.

  • Enter the patient's Encounter chart and click on the Consultation you wish to view and/or update.
  • To update the eReferral in Ocean, choose the "Edit on Ocean" button at the top of the window.
  • This will open the Ocean eReferral in a new window. Here, you can perform actions such as editing the patient information, editing the referral note information, sending a message, or cancelling the referral.
  • Note: Ocean will automatically notify other stakeholders on the referral of any updates made.

Status updates regarding the sent eReferral can be viewed from the Ocean Patient Dashboard (accessed from the eReferral link on the Ocean Toolbar), OR directly from the Consultation in Oscar.

  • Enter the patient's Encounter chart and click on the Consultation you wish to view the status of.
  • The Consultation window will display the corresponding Oscar consultation status for the Ocean eReferral on the left hand side. For example, when the eReferral is first sent and accepted, the status displayed will be "Pending Specialist Callback".
  • When the Ocean eReferral is booked by the recipient site, and the patient has not yet confirmed the appointment details, the Consultation status will update to "Pending Patient Callback". The appointment date, time, and notes will be updated with any information the recipient added to the eReferral's scheduling pane.
  • Once the patient has confirmed the appointment, either by email or directly with the referral sender or recipient, the Consultation status will update to "Booking Confirmed".
  • When the Ocean eReferral is marked as either Completed or Cancelled/Declined, the Consultation status will update to "Completed".
  • After the eReferral has been marked as Completed by the recipient, the colour of the Consultation in Oscar will update from red text to blue text.

Receiving an eReferral into OSCAR Pro with Ocean Cloud Connect

Prerequisites

These steps are for Oscar WELL EMRs, using Oscar Pro. Please ensure you have enabled Ocean Cloud Connect using the following setup guide.

For Oscar WELL EMR users the workflow for receiving Ocean eReferrals, and importing them into the EMR, is more streamlined than the legacy recipient flow.

Two main benefits include:

Ocean automatically creating the patient chart in Oscar (if the patient does not yet exist), and Ocean automatically downloading the referral note into the patient's Documents.

  • Note: In order to allow Ocean to create patient charts from accepted eReferrals, you MUST ensure that within your eReferral Settings configuration, the "Create Charts for New Patients" option is set to "Yes".

The recipient flow can be accomplished through the following steps:

  • Open the Ocean portal by selecting the Ocean logo on the Ocean Toolbar in a patient's Encounter chart, OR by opening the OCEAN eForm and selecting the logo there.
  • Navigate to the eReferrals view of your site, and click on the New folder in the left hand menu.
  • Open the new eReferral and click "Accept".
  • An Import window will appear. When Cloud Connect has finished creating a new Oscar patient chart and downloading the referral, the import window will update to state that the patient information was successfully imported into the EMR.
  • Note: To create a patient, Ocean needs at least: first name, last name, health number, sex, and birthdate from the referral. If the patient has an EMR ID, the import process will use that to match the patient. Otherwise health number is used to match a patient. If the eReferral does not contain a health number, or if Ocean finds more than 1 match based on health number, the patient will not be created.
  • Search for the patient in your Oscar EMR. The master record will contain all of the demographic information received on the Ocean eReferral.
  • In the patient's Encounter chart a copy of the referral note can be found in the patient's Documents area.
  • The Ocean Toolbar in the Encounter chart will update to display an active eReferral for the patient. Click on the number of eReferrals displayed, to open the Ocean Patient Dashboard. This will allow you to review all of the patient's active referrals and update them directly in Ocean.

Sending eReferral Appointment Notifications from OSCAR Pro

Prerequisites

These steps are for Oscar WELL EMR users, using Oscar Pro. Please ensure you have enabled Ocean Cloud Connect using the following setup guide.

Ocean Cloud Connect allows Oscar referral recipients to continue to schedule any eReferral appointments within their Oscar scheduler. From there the user can then launch the OCEAN eForm to update the referral appointments within Ocean. Steps to do so are outlined below.

  • Make the desired changes to the patient's appointment(s) in the Oscar scheduler (book, cancel, or reschedule an appointment, etc.)
  • When ready, select the OC. link on the appointment. If you have not setup this preference for appointment shortcuts, please follow these steps to do so.
  • The Ocean eForm will open. Click the Update Referral button.
  • The Patient Dashboard will launch in a new window, and you will be prompted to choose the referral to update. Click on the referral that is associated with the appointment notification to open it.
  • In the scheduling pane of the referral, click on the appointment you wish to add to the referral.
  • Quick Tip: All of the patient's future appointments from the Oscar scheduler will be listed. If more than one appointment is related to the referral, you can click each applicable appointment. Alternatively you can click the "+" icon to add a second appointment slot to the referral scheduling pane, then choose the second appointment listed to populate the newly added slot.
  • Add any desired booking comments and/or attachments to the scheduling pane of the referral. Then choose Done to save and close the referral. This will trigger a booking email notification to the referring provider, and one to the patient, IF the patient consented to email notifications.
  • Note: If would like to cancel an appointment on an eReferral, follow steps A to D above. The recently cancelled appointment will be listed in the scheduling pane with an 'X' beside it. Select it to remove the appointment from the Ocean eReferral. Click 'Done' to save and close the referral. Appointment notifications will be triggered to the referring provider and the patient, IF the patient consented to email notifications.