


To ensure that the necessary security and encryption protocols are in place for patient privacy, all Ocean Sites hosting Website Forms must be registered in the Ocean Provider Network.
To ensure that the necessary security and encryption protocols are in place for patient privacy, Website Forms take advantage of the Ocean Provider Network. This means that all Ocean Sites hosting a Website Form must be listed in the Ocean Provider Network by following the steps below.
Note: If your Ocean Site already has a validated Directory Listing(s) for use in the Ocean Provider Network (e.g., for accepting eReferrals or eConsults), you can re-use it for your Website Form Link and skip this step in the setup guide.
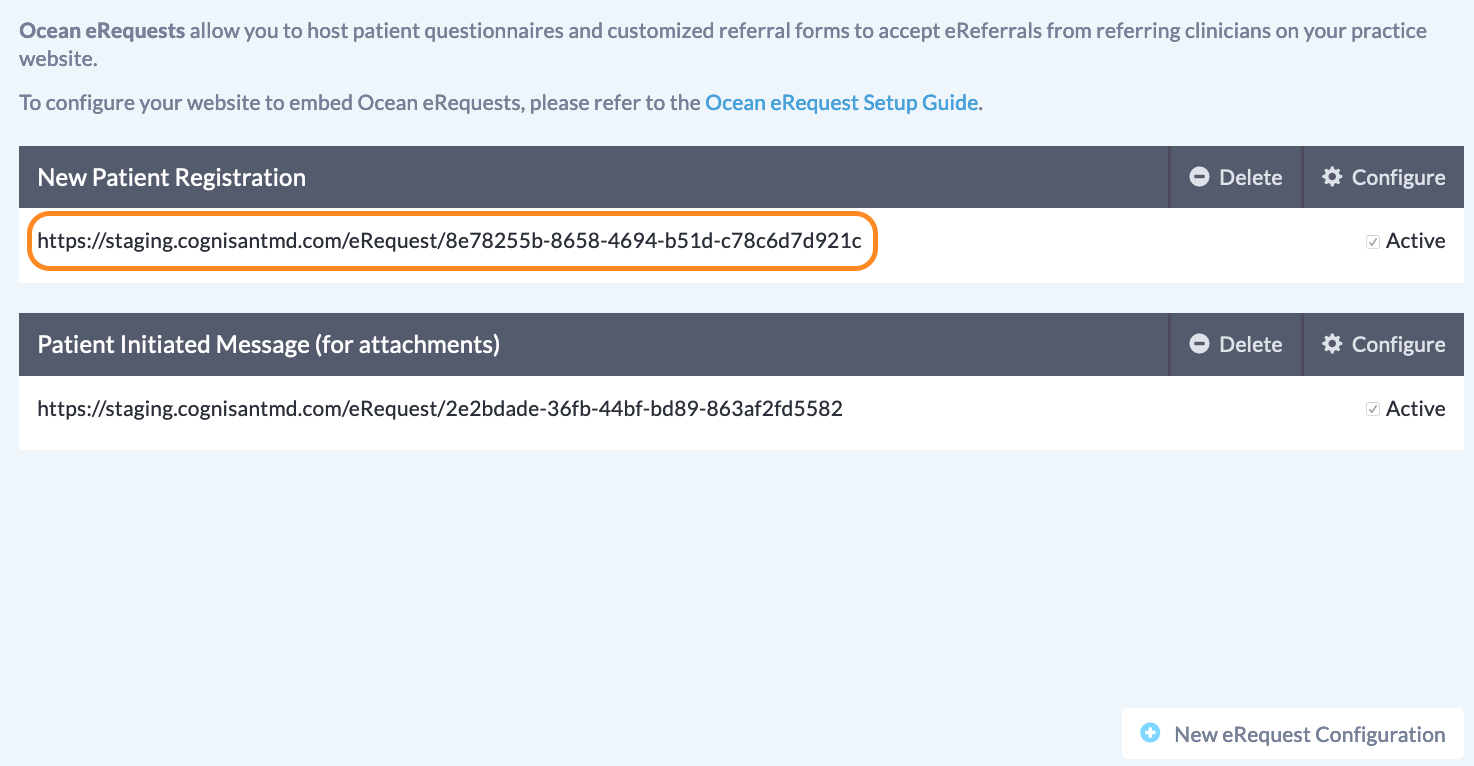
1. Create a Directory Listing for Your Ocean Site
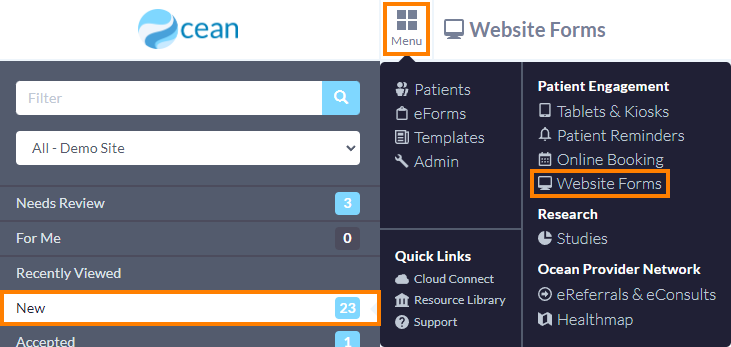
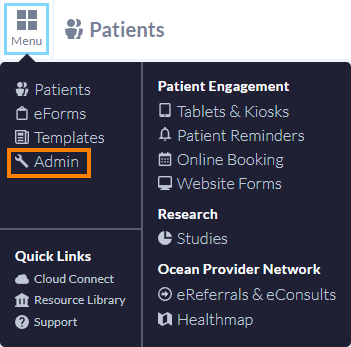
- Log in to the Ocean Portal, select 'Menu', and click 'Admin'.
- Within the Admin Settings page, select 'Directory Listings'.

- Create a new Directory Listing by clicking the 'Add New Listing' button.

- In the 'Listing name' field, enter a name for your Directory Listing (e.g., "Dr. John Smith" or "ABC Medical Clinic"). This name is publicly visible in the Ocean Healthmap. This listing name can be made bilingual by selecting the 'Add French' button.

-
Under the 'Listing Purpose' section, set the 'Will this listing accept eRequests?' setting to 'No'. This hides the settings in your Directory Listing that are only relevant when you plan on accepting eRequests.
Note: If you are re-using a Directory Listing that you have already configured for accepting eRequests (e.g., eReferrals, eConsults) in the Ocean Provider Network, you do not need to modify your Listing Purpose.

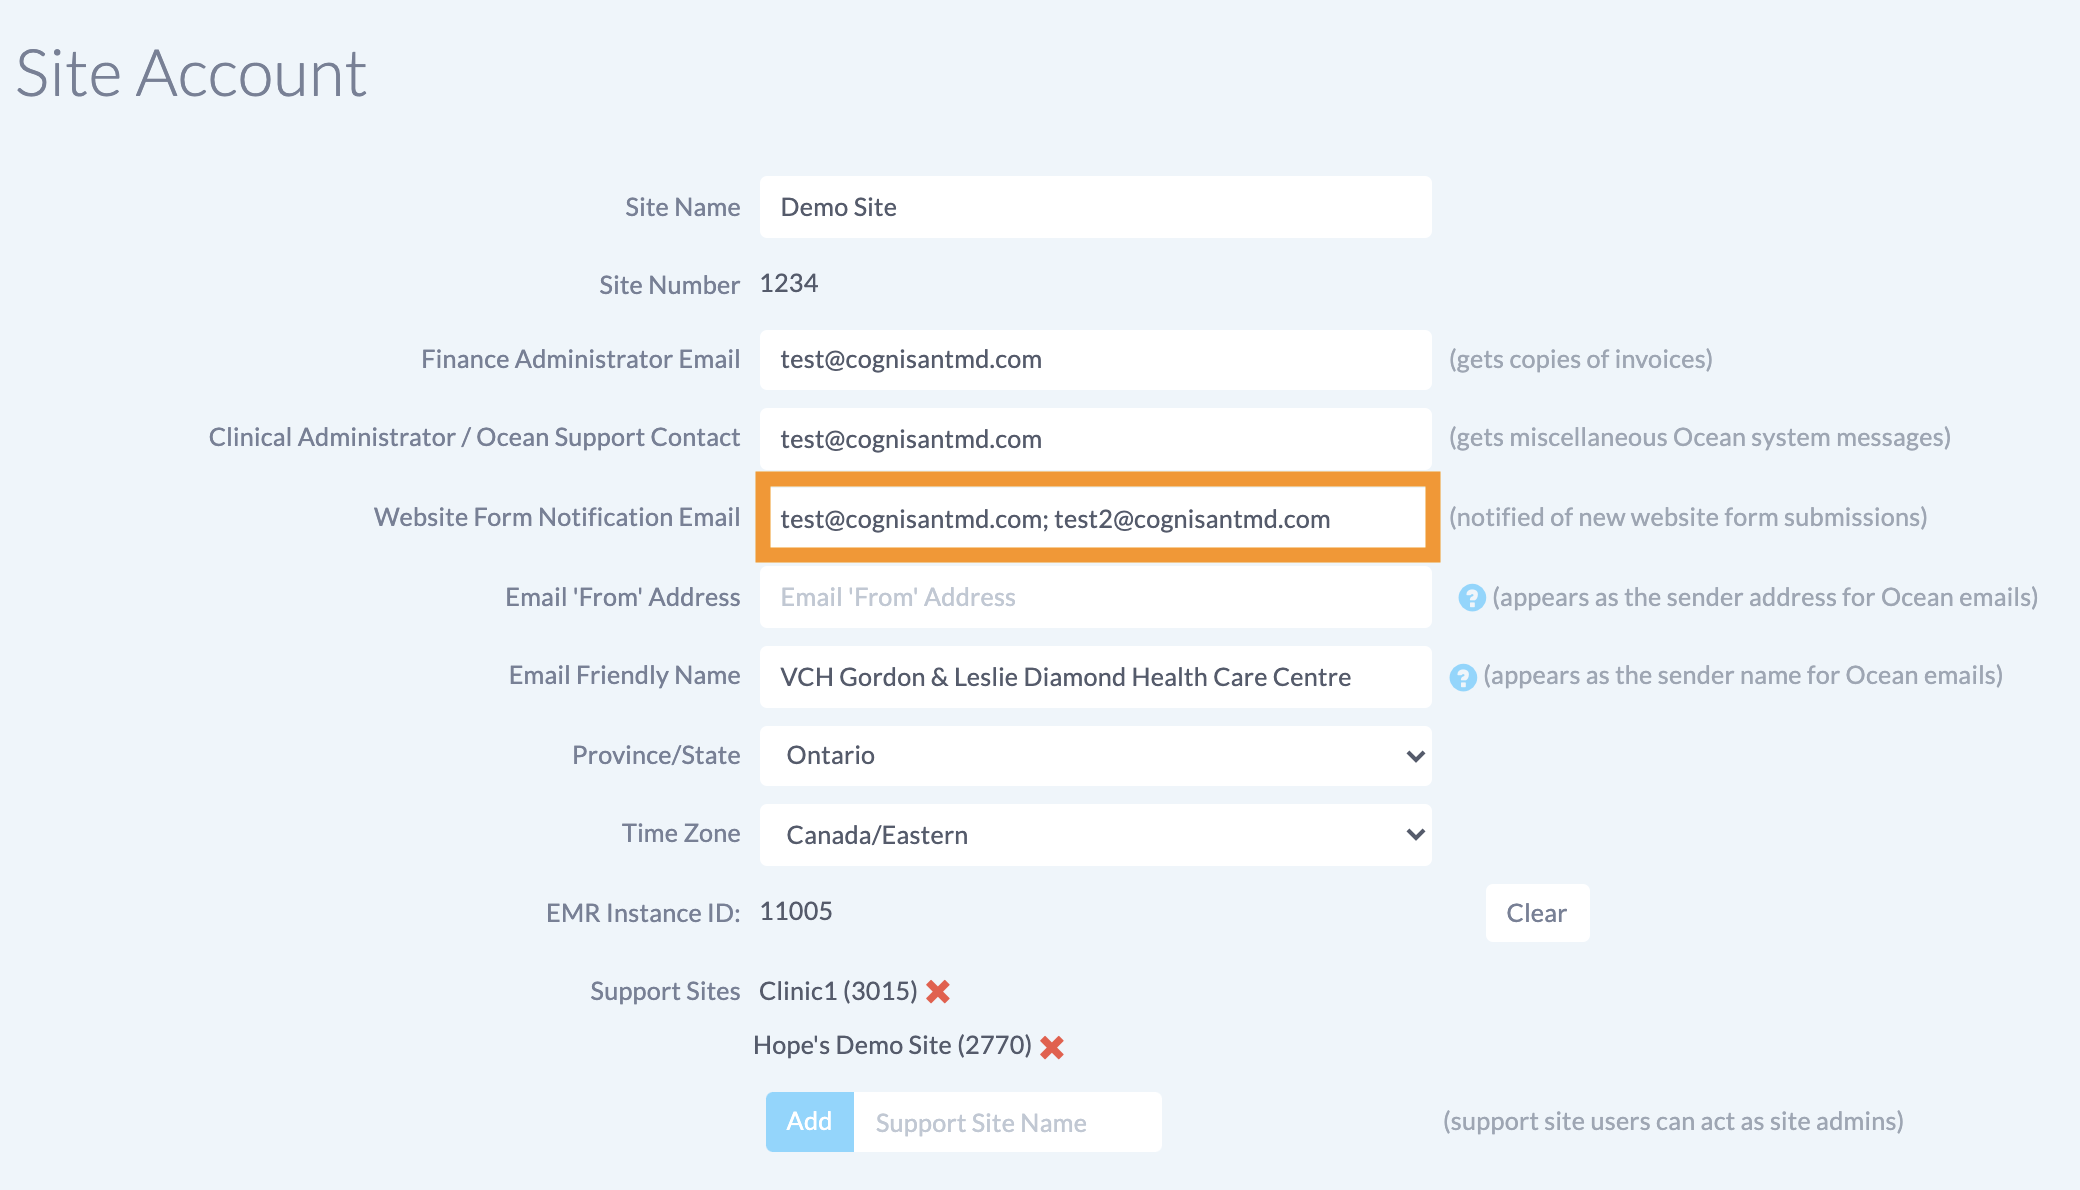
- Under the 'Contact Information' section, enter your clinic's contact information. Mandatory fields are indicated with a red asterisk. Contact information can be made bilingual by selecting the 'Add French' button.

-
Under the 'Clinician Information' section, indicate if this Directory Listing represents a group of healthcare providers or an individual healthcare provider.
If this Directory Listing represents an individual, you must enter that healthcare provider's clinician information before saving your listing.
Note: This information affects EMR task assignment, and is stored and maintained independently from any Clinician Information that a user may enter into their individual Ocean user account settings.

- Under the 'Service Details' section, optionally enter general 'Description' for your listing to be publicly shown on the Ocean Healthmap and any additional 'Languages spoken' at your clinic. The description can be made bilingual by selecting the 'Add French' button.

- Once you're satisfied with your Directory Listing configuration, click 'Save'.

2. Request Validation
Once you have created your Directory Listing, contact the OceanMD Support team so that we can validate your Directory Listing as a legitimate organization for accepting patient data.
You will be notified once your Directory Listing has been validated.
Deleting/Unclaiming a Directory Listing?
Please Note: If a Directory Listing is deleted or unclaimed, any associated Website Form links will be automatically deactivated.