You can create and configure the settings for your Website Form Links from within the Ocean Portal.
1. Create a new Website Form Link
- Log in to the Ocean Portal, select 'Menu' and click 'Admin'.
-
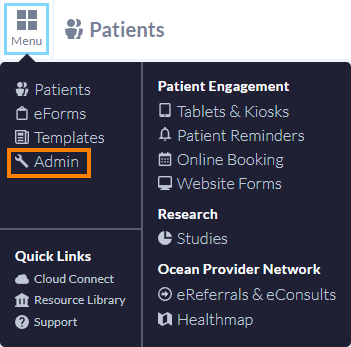
- Within the Admin Settings page, select 'Website Form Links'.
-

- Click the 'New Website Form Link Configuration' button in the bottom right corner.
-

2. Configure your Website Form settings.
-
- Name
- The name of your Website Form link, for internal purposes. This name is not visible to patients.
- Directory Listing
- Select the Directory Listing to be associated with this Website Form link. The name of the Directory Listing will appear under the 'Provider' column in the Website Forms inbox area of the Ocean Portal.
- Website Forms Type
- Indicate the type of Website Form link you are creating. In this case, select 'Website Form'.
- Redirect URL
- If a URL is entered, the patient will be automatically redirected to the provided URL upon submission of the Website Form.
- Subsite Reference
- Only applicable if your Website Form fees are covered by different payers. More information about subsites can be found in "Creating Separate Bills for Different Ocean Services".
-

-
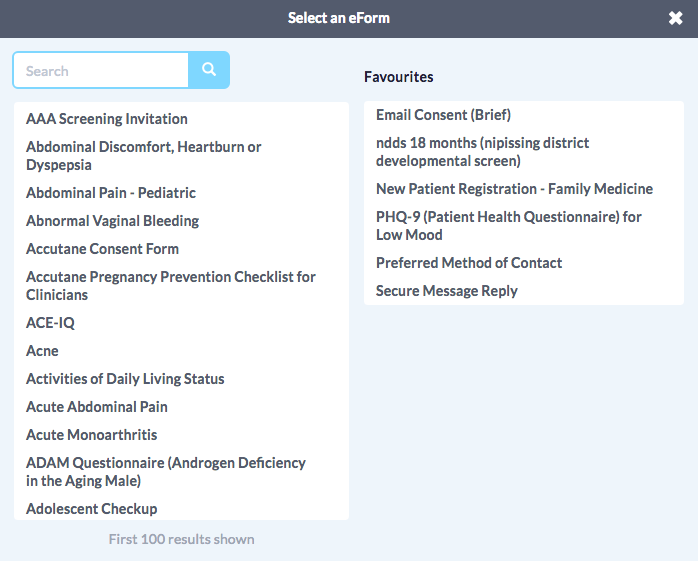
- eForm
- Select the Ocean eForm(s) that patients will complete when accessing your Website Form Link. If multiple eForms are selected, patients will complete them in the same order in which they were added here.
- Send a notification email to the requester when accepting this website form
- If enabled, patients will receive an email notification when you accept the submission.
- Note: Your selected eForm must be configured to collect patient email addresses to use this feature.
- Active
- Once enabled, your Website Form Link can be accessed using the provided URL after creation and billing will begin. If you are not ready to activate the link yet, simply keep this setting disabled until you're ready.
- Once you're ready, click the 'Create' button to complete the configuration of your Website Form Link.

3. Set your Website Form Notification Email
- Within the Ocean Portal, select 'Menu' and click 'Admin'.
-
- Within the Admin Settings page, select 'Site Account'.
-

-
Enter the email address that should receive notifications for new website form submissions in the 'Website Form Notification Email' field.
Multiple email addresses can be included, separated by commas or semicolons.
-

4. Deactivate/Activate your Website Forms.
Once you have created and configured your Website Form Link, you can deactivate or activate it at any time.
- Within the Website Form Links settings area, simply click the 'Configure' button to adjust any settings.

- Make your desired changes to the link configuration (e.g., enabling or disabling the 'Active' checkbox), and then click the 'Save' button.

Directory Listing Deleted/Unclaimed?
Please Note: If the Directory Listing associated with your Website Form Link(s) is deleted or unclaimed from your Ocean Site, any Website Form Links associated with it will be automatically deactivated.