-
Receive a submission from your Website Forms.
-
Once a new submission is completed, the 'Website Form Notification Email' (which can be set in the "Site Account" section of the Admin Settings page) will receive a notification of its completion.
Note: If no 'Website Form Notification Email' has been set, new Website Form submission notification emails will be sent to the 'Clinical Administrator / Ocean Support Contact' email.

-
-
Review the submission.
- Follow the link to the Ocean Portal. Click on the "Menu" button in the top left corner and select "Website Forms".
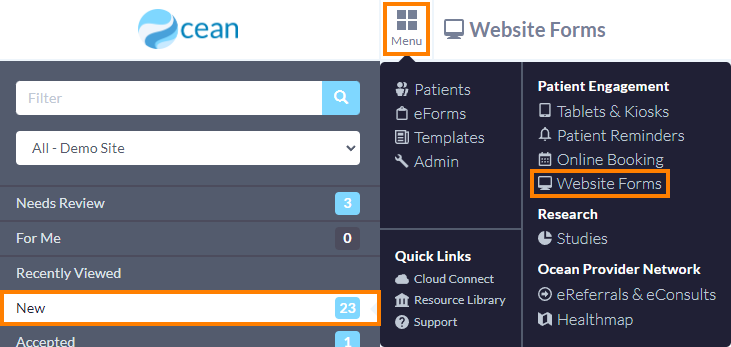
- You will find the new submission in the "New" folder.
- Click on the submission to view its details and confirm that it's a legitimate patient request.
-
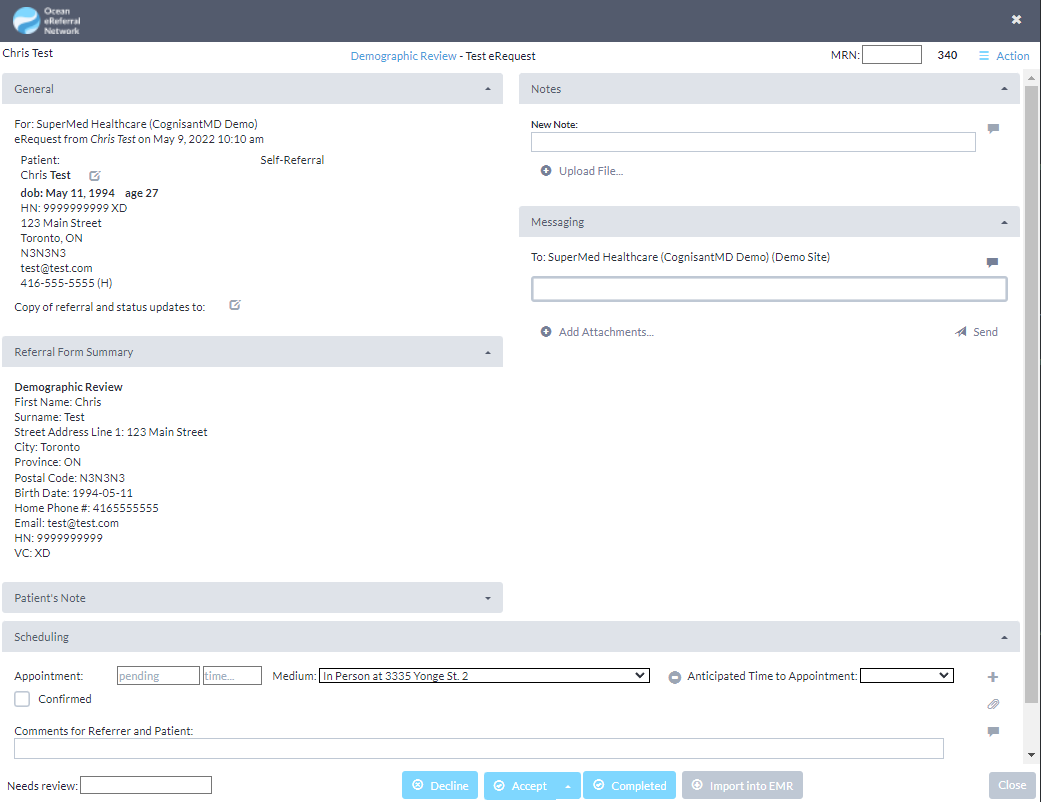
Accept or Complete the submission.
- If this is a simple patient inquiry that can be answered with one reply, simply type your response in the "Comments for Referrer and Patient" box (in the Scheduling pane) and mark the request as "Completed".

- If this is an appointment request, once you've verified that this is a legitimate patient request, accept the submission.
-
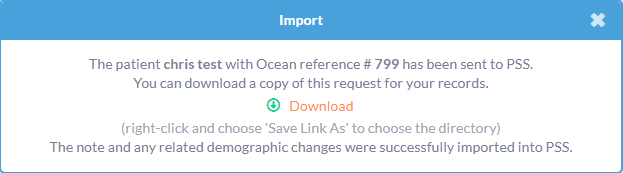
Import the information into your patient's chart.
- Once you've completed or accepted the request, you'll be presented with the Import window.
PS Suite Cloud Connect Integration
For PS Suite users integrated with Ocean Cloud Connect, if you have an existing patient chart with a matching healthcard number, the notes will import into the patient chart automatically.
- If the 'Automatically Import Attachments to EMR' setting is enabled in your Cloud Connect configuration, the submission will be imported as a textual Progress Note and as a PDF attachment.

- If the 'Automatically Import Attachments to EMR' setting is disabled in your Cloud Connect configuration, the submission will be imported only as a textual Progress Note.

PS Suite Custom Form Integration (Legacy)
-
For PS Suite users that use the Custom Form integration (i.e., not Cloud Connect) will may need to open the relevant patient chart in PS Suite, use the "Import" button in the Ocean toolbar and enter the import number provided in the import window manually.

For Med Access users, if you have an existing patient chart with a matching healthcard number, the notes will import into the patient chart automatically as an active Task with a PDF attachment once it has been accepted.
If the import fails, you can manually download the submission and upload it into your EMR as a PDF document.
For Accuro users, if you have an existing patient chart with a matching healthcard number, the notes will import into the patient chart automatically.
If the import fails, you can manually download the submission and upload it into your EMR as a PDF document.
For OSCAR Pro users, if you have an existing patient chart with a matching healthcard number, the notes will import into the patient chart automatically.
If the import fails, you can manually download the submission and upload it into your EMR as a PDF document.
For OSCAR Classic users, an import number is provided in the "Import" window. Use the "Import" button on the Ocean Toolbar within the patient's chart in your EMR and enter the import number. The request will download into the patient's chart.
If you use non-integrated EMR, you can download the submission and upload it into your EMR as a PDF.
Note: If this was a simple patient inquiry, once you've marked the request as "Completed" and imported the note into the patient's chart in your EMR, then you are done processing this request (and can skip the rest of the steps outlined below).
-
Confirm the appointment booking (if applicable).
- If you have an "Email" field on your Website form, once you've saved the appointment booking, the patient will be sent an email containing their appointment details and an option to confirm their scheduled appointment.
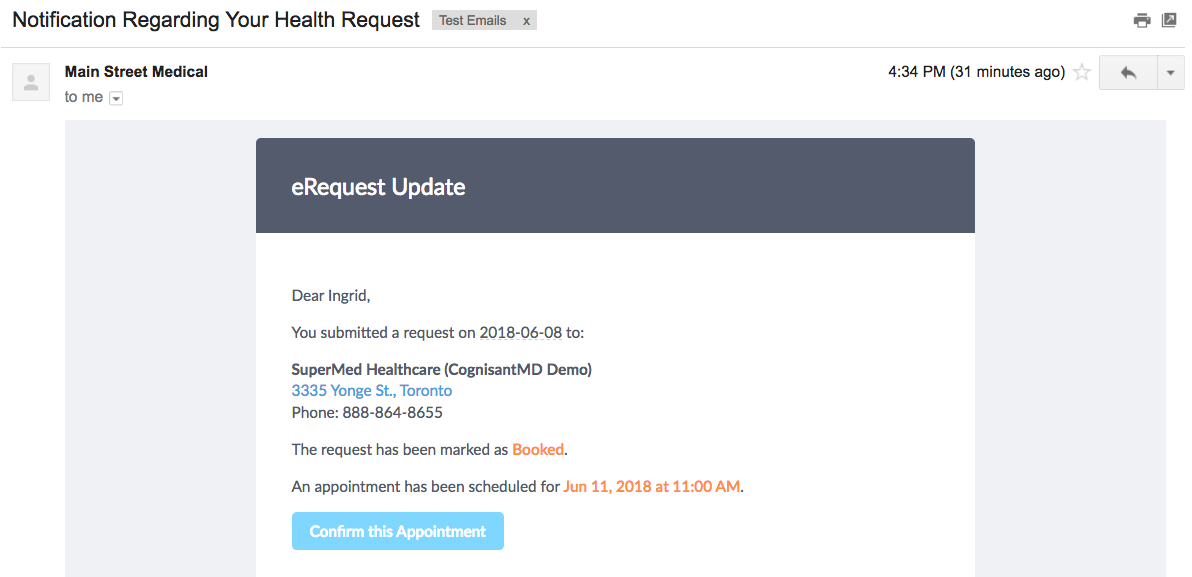
- The patient will then move into the "Booked Unconfirmed" folder until either they confirm their appointment by clicking the button in the email notification sent to them or you manually mark them as confirmed.
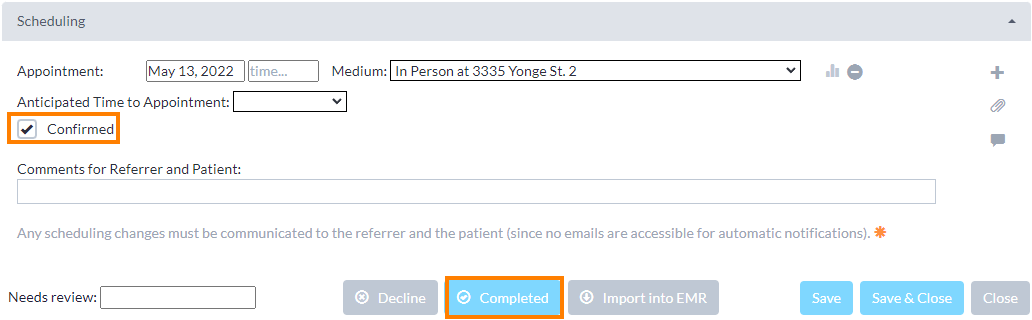
- Once the patient has confirmed their appointment, they will then move into the "Booked Confirmed" folder of the Website Forms view.
-
Mark the request as completed.
- Once the patient's appointment date has passed, you can go back into the Website Forms view of the Ocean Portal to find their submission and mark it as "Completed".
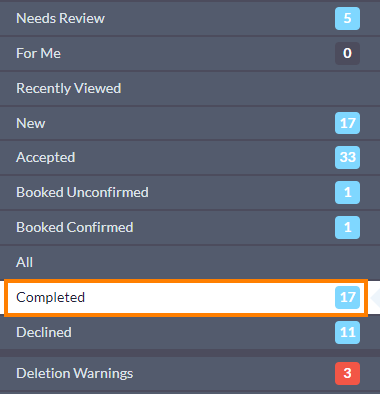
- This will move the request to the "Completed" subfolder of the "Processed" folder.