Learn how to create a special type of item that allows patients to select certain points on a picture (e.g. Body Pain Diagram).
Diagrams can be useful tools for patients to demonstrate where they are perceiving discomfort. The Body Pain Diagram is a great eForm for this purpose, but you can also customize your own diagram. This article describes how to create your own diagram.
Add a "Diagram" item.
Open your eForm in the eForm editor.
Click the blue plus (+) sign and select "Diagram".

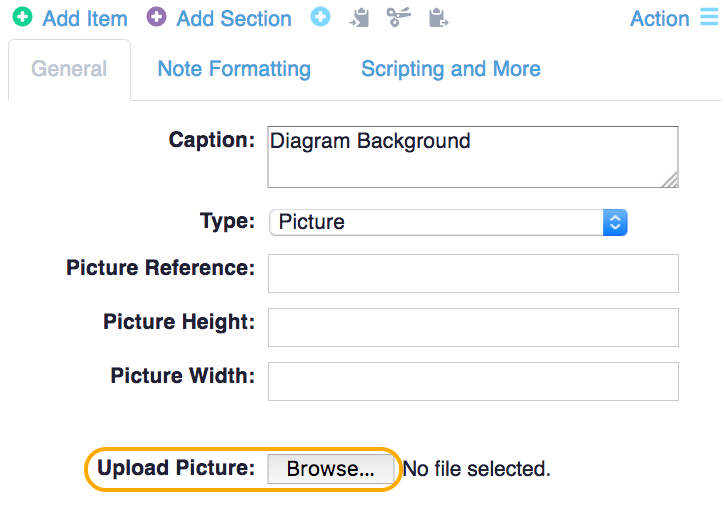
Rename your diagram and choose a picture background for your diagram.
Add "Labels" to your diagram.
Once you've uploaded your picture, you can add labels at various locations on the diagram. You can do this by clicking "Add Item".

Move the 'X' to the appropriate spot on the background picture and label it using the "Caption" field.
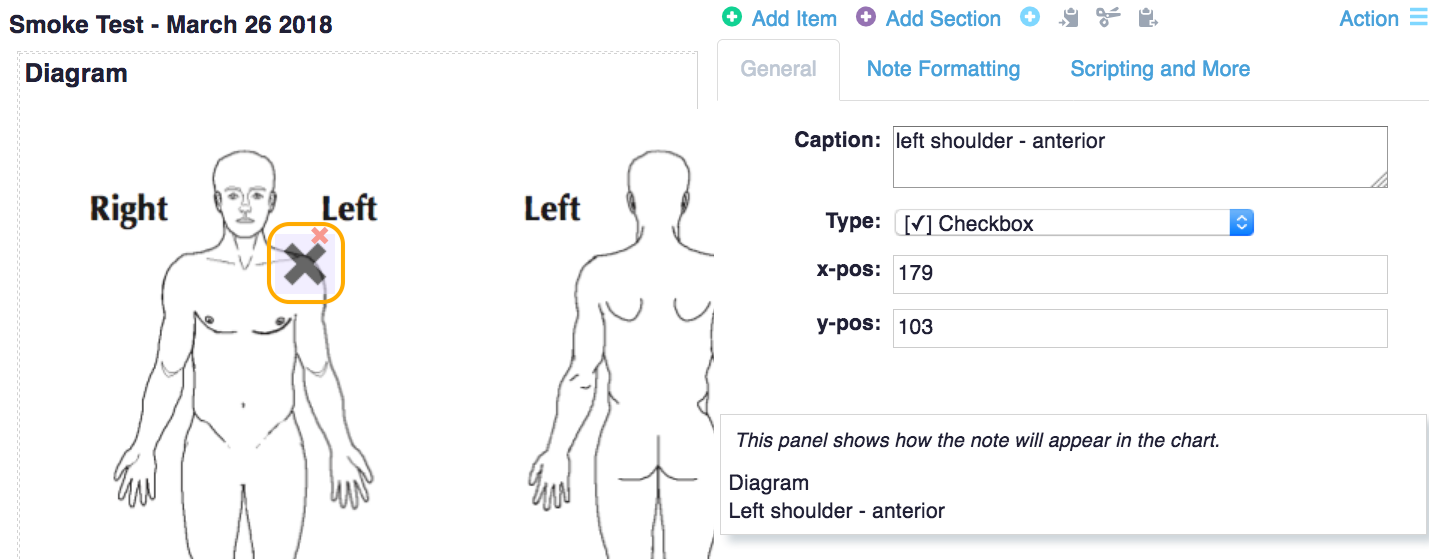
Note: The diagram image itself will not be added to the patient chart. The note in the patient chart will include the caption applied to the selected diagram item.
Continue adding items until you're happy with all your diagram's labels.
Save your eForm and your diagram will be ready for use!