


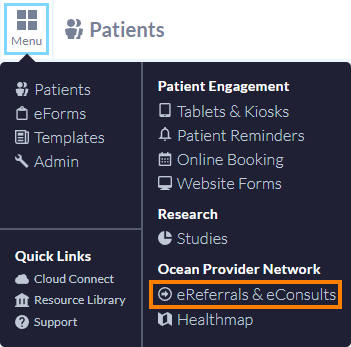


You can access the Ocean eReferral Network from the link in your EMR (for integrated EMRs) or directly from the Ocean Healthmap to initiate your eConsult.
With an Ocean account, you can initiate an Ocean eConsult at any time directly from the Ocean Healthmap. If you are using an EMR which is integrated with Ocean, you can also initiate an eConsult at any time by following the steps below.
Initiate your eConsult (without an attachment)
- Click the "Refer" button on the Ocean toolbar in the patient record.

- Press the "Launch" icon from within the patient's chart.

- Locate the "Ocean" extension, and select "View Patient".

- Press the "Send eReferral" button from within the patient's dashboard.

- With your desired patient in context in Accuro, click the "Send eRequest / Find Health Service" global CDS link.
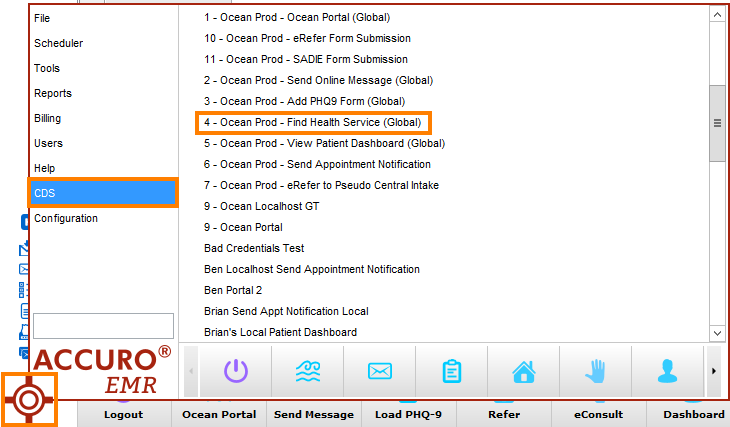
- Alternatively, you can click your equivalent user-friendly CDS link on the action bar.

- Click the 'Refer' button on the Ocean Toolbar.

- Alternatively, click the 'Oc.' shortcut on the relevant patient's appointment from the schedule, and then click 'Find Health Service' on the Ocean eForm.

In a web browser, navigate directly to the Ocean Healthmap.
Initiate your eConsult (with an attachment)
Before following the steps in this guide, ensure you have downloaded and installed the latest version of the Ocean Attachment Exporter (click here to download CFM file.) Version 2.0 and above will now upload attachments directly to Ocean instead of exporting them as a file.
Ocean makes it easy to select and "green bar" notes in a patient chart in PS Suite that can be uploaded directly to Ocean. The file can then be automatically included in an eConsult sent through the Ocean Healthmap.
To attach a note from PS Suite to an eConsult:
- Find the note(s) in the patient's chart that you want to generate as a PDF attachment.
- Check the checkbox next to the note to enable the “green bar”.
- Click the Attach link on the Ocean Toolbar.

- This will pop up an input box allowing the user to specify the attachment file name. Rename the file, if desired, and select OK. (By default, the file name will include the patient initials, EMR user initials, and current date).

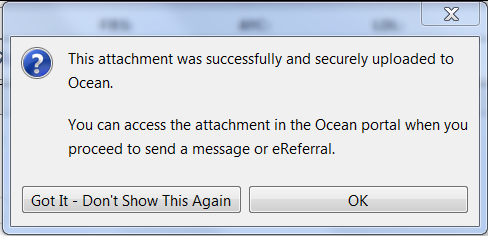
- A prompt will then appear to confirm that this attachment has been successfully uploaded to Ocean. Select the desired option. (Note, it will not appear if you previously selected "Don't Show This Again", or toggled it off in the Attachment Exporter's custom form settings).
- Select Refer on the Ocean Toolbar to launch the Ocean Healthmap. Choose the desired listing and select to Send eReferral. The attachment will automatically be included at the bottom of the consult form.

- Quick Tip: If you "green bar" an item and then select "Refer" on the Ocean Toolbar to initiate an eConsult, the attachment will automatically get generated to attach to the eConsult (without having to click the "Attach/Paperclip" link). You will need to click "Yes - Create Attachment" on the confirmation prompt, before continuing with step D to F above.

- You can preview your attachment by clicking on the “eye” icon, or remove it by clicking on the “X” icon.

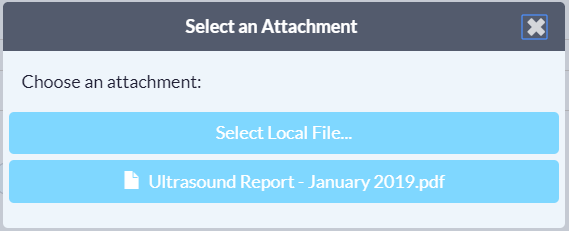
- If you remove an attachment and would like to add it to the eConsult again, select the Add Attachments button at the bottom of the consult form. A list of any attachments uploaded to Ocean for that patient will appear. Choose a file from the list or choose “Select Local File...” to browse for a file on your computer.
To customize the settings of the Ocean Attachment Exporter form:
- Open the Ocean Attachment Exporter form in a test patient chart, and click the Settings button.

- Select "Toggle the Display of the Export Information Message" if you would like to show the user an explanatory message about the attachment, after the upload to Ocean is complete.

- Select "Toggle the Prompt to Export Lab Table" if you would like to be prompted to include the lab table each time an attachment is generated.
- Use the Ocean-MA Extension for Google Chrome and Microsoft Edge to capture the desired attachments from the patient's chart in Med Access.

- Press the "Launch" icon from within the patient's chart.
- Locate the "Ocean" extension, and select "View Patient".
- Press the "Send eReferral" button from within the patient's dashboard.
Prerequisite
- Ensure that you have enabled the 'Save for Ocean button within your Accuro system settings.
- Select the patient in Accuro that you wish to generate an attachment in Ocean for.
-
If you do have an Encounter Note Template and corresponding Quick Action Button configured, use your Quick Action Button to create a new Encounter Note.
If you do not have an Encounter Note Template and corresponding Quick Action Button configured, create a new blank Encounter Note in the patient chart.
Tip: You can use the 'CTRL+F11' keyboard shortcut to create a new note from any section of Accuro, as long as you have the patient selected first.

- Specify a filename for your attachment by using the 'Title' field in the bottom left, and then click Generate Letter.

- Ensure you have the correct 'From:' Provider selected in the top left, then go to the Attachments pane and click the green plus icon to add an attachment.

- In the Select Attachments window, choose the items from the patient chart that you would like included, and then select OK.

-
The list of selected attachments will appear on the left. Click the 'Save for Ocean' button.

- An Encounter Note and the Generated Letter will be created in the patient chart.

-
Use the 'Send eRequest / Find Health Service' CDS link or action button to launch into the Ocean Healthmap.
Ocean will automatically include any unused Generated Letters with the current date as an attachment on your eConsult.
Initiating an eConsult from the 'Consultations' area in OSCAR Pro allows you to attach Documents from the patient's chart to your eConsult.
- From within the patient chart, create a new consultation by clicking the '+' icon on the purple 'Consultations' ribbon.

- Click 'Attach File to Consultation' on the left side.

- Select the desired Document(s) to attach using the checkboxes on the left side, and then click 'Done Close Window'.

- The chosen Document(s) will now appear in the left hand side of the Consultation window.

-
Click the 'Refer' button in the top right corner of the window to launch into the Ocean Healthmap.
Note: The Consultation window will automatically close after clicking the 'Refer' button. Any text typed in the OSCAR Pro Consultaton window will not transfer into the Ocean eConsult. 
- Use your clinic's pre-existing process for creating documents for fax or mail in your EMR (e.g., consults, referrals).
-
Rather than printing your document to paper, save your document as a PDF file to your computer.
Note: After sending the eConsult, ensure that you delete any attachments saved to your computer to ensure any personal health information is appropriately cleansed.
- In a web browser, navigate directly to the Ocean Healthmap.
- The EMR-specific actions above will take you directly to the Ocean Healthmap.

- Note: Log in to the Ocean Healthmap with your Ocean user credentials if your user name does not appear in the top right so that your provider details are autopopulated in the eConsult.