


Prerequisites for OSCAR Pro (WELL Health) Clients
The minimum OSCAR Pro build version required is 1.0.0.23.04.7. You can find your OSCAR Pro build listed at the bottom of the EMR login page below the "Sign In" button. If you are on a version lower than the minimum build, please contact the OSCAR Pro Helpdesk to request an EMR update.
There are a few steps that WELL Health must complete on your OSCAR Pro EMR instance before getting started with Ocean. Please complete the OSCAR Pro Ocean Request form to initiate this process. Once complete, an OceanMD team member will then follow up with you to confirm you are ready to proceed with the integration.
Link the Ocean eForm with OSCAR Pro to allow staff to automatically sync patient data from charts.
1. Access the Ocean eForm
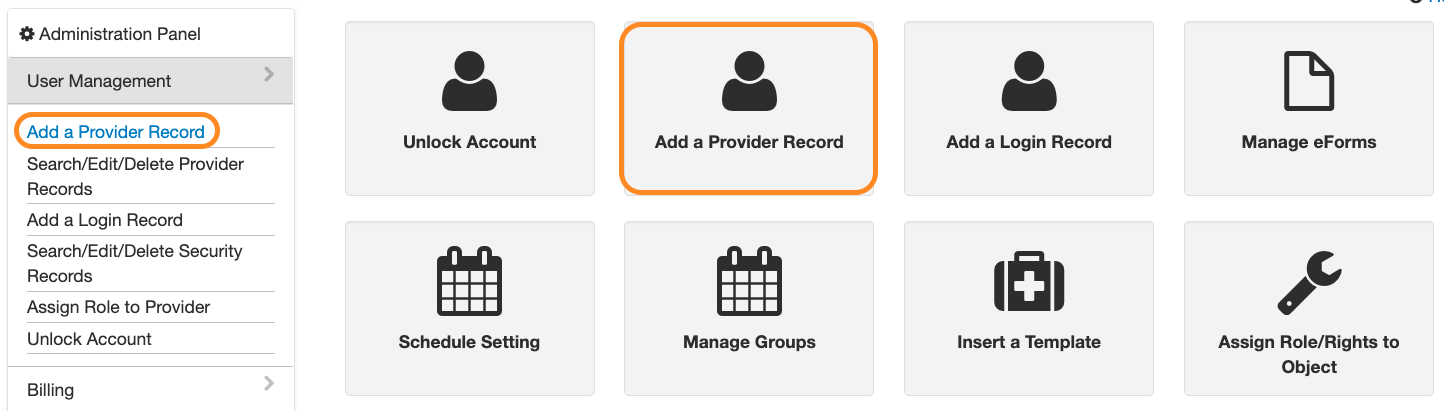
- Log in to your OSCAR Pro EMR and open the 'Administration' panel using the button at the top of the page.

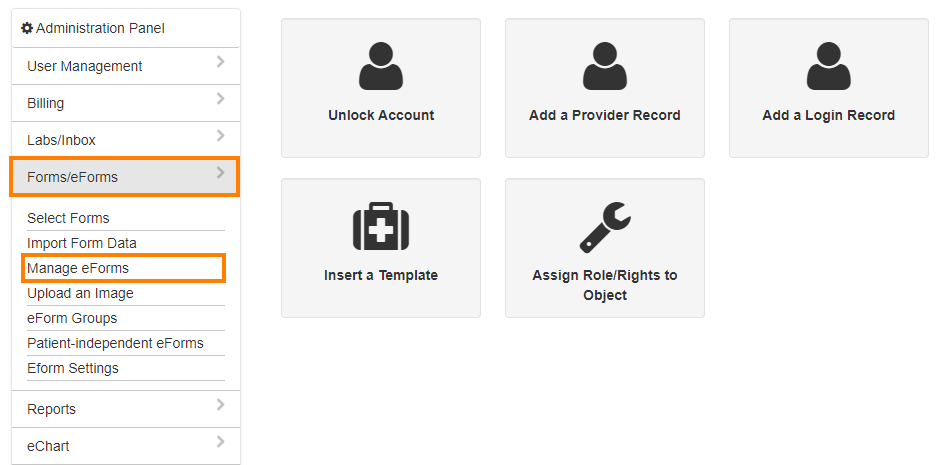
- Select 'Forms/eForms' on the sidebar menu, and select 'Manage eForms'.
-
Under the 'Current Resources in OSCAR' heading, click the 'Ocean' eForm entry. This opens the Ocean eForm window.
Note: If the Ocean eForm is not already installed, you can download and install the eForm & Toolbar manually.

2. Link your OSCAR Pro EMR to Ocean
- Enter your Ocean account username and password and click 'Next'.

-
You will be prompted to enter your Ocean Site Number, Shared Encryption Key, and OSCAR Server URL.
Note: Ensure that your OSCAR Server URL includes your EMR directory (i.e., the '/oscar' component or equivalent at the end of the URL).
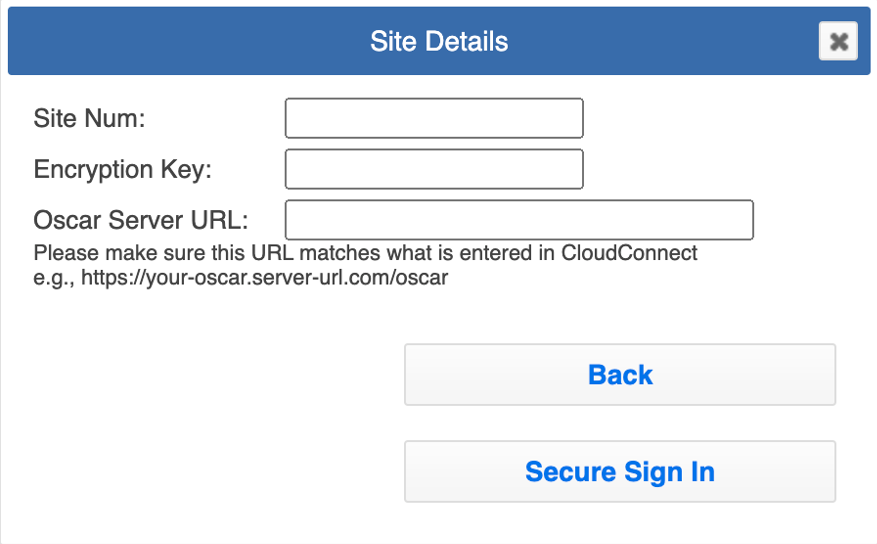
- Once entered, click the 'Secure Sign In' button.
- Once successfully signed in, you may close all Ocean eForm and eForm Library windows.
Patient Demographic doesn't exist?
- Upon signing in, you may be presented with an error message stating "Error: Patient Demographic doesn't exist".

- This message can be safely ignored and dismissed by pressing the 'OK' button, and you can be assured that this stage of setup has been properly completed.