- Clinical Delegate
- A Clinical Delegate is an Ocean User that has been assigned privileges to act on behalf of another Ocean User. Clinical Delegates are enabled by an Ocean User from their User Settings.
- Clinic Support Staff
- The term Clinic Support Staff refers to users on an Ocean Site with one of the following User Roles: MOA/Secretary, Administrator, Nurse, Resident, Medical Student, or Physician Assistant.
- Directory Listings
- Directory Listings appear on the Ocean Healthmap and provide contact information, additional details, and health service offerings for a specialist, clinic, or other healthcare provider. They also indicate if that physician/program/provider is accepting eReferrals or eConsults. Directory Listings must be claimed by an Ocean Site in order to accept eReferrals or eConsults.
- EMR User Account
- An EMR User Account is an account that an individual uses to log in to their EMR
- Health Service Category (HSC)
- Health Service Categories are a defined list of terms that are used in the Ocean Healthmap to support simpler searching, filtering, and Directory Listing creation. This defined taxonomy is used to help categorize the Health Service Offerings on a Directory Listing in the Ocean Healthmap.
- Health Service Offering (HSO)
- A Health Service Offering is a customizable, searchable description of a service that is listed on the Directory Listing in the Ocean Healthmap. Health Service Offerings are mapped to the most appropriate Health Service Category. In many cases, a Directory Listing may simply use a defined Health Service Category as their Health Service Offering, however, the option for full customization is possible using Health Service Offerings.
- MRN
- MRN is an acronym for 'Medical Record Number', also known as an 'EMR ID', which is a unique value assigned to each patient chart in the EMR/EHR.
- Ocean eConsult
- An Ocean eConsult is a request for specialist advice sent through the Ocean Healthmap. Ocean eConsults can provide primary care providers with timely access to specialist advice and often eliminate the need for a patient visit. An eConsult can be converted to an eReferral and vice-versa.
- Ocean eForms
- Ocean eForms is a section of the Ocean Portal that includes tools designed to support the sharing and development of Ocean forms. This includes the Ocean Forms Library, the Ocean Form Builder, Form Uploader, and Form Favourites.
- Ocean Form
- An Ocean Form is a digital tool for collecting, sharing, and exchanging patient health information (PHI) safely and securely between patients, providers, and systems.
- Ocean Platform
- The Ocean Platform is a secure, cloud-based digital healthcare technology platform that connects electronic health records, provincial resources, and other digital health solutions. The Ocean Platform includes two main product modules: the Patient Engagement Suite and the Ocean Provider Network. It also includes the Ocean-FHIR Integration Layer, the Ocean Forms Library, and the Ocean Forms Editor.
- Ocean Portal
- The Ocean Portal is a browser-based application that Ocean Users log in to in order to view, manage, enable and configure Ocean products.
- Ocean Site
- An Ocean Site is a shared account for a clinic or healthcare team. An Ocean User must log in to their Ocean Site to view, manage, or configure Ocean products. All team members should be invited to their Ocean Site and should have their own unique Ocean User login. An Ocean Site may be linked to an Electronic Medical Record (EMR) to sync patient information.
- Ocean Site Admin
- An Ocean Site Admin is an Ocean User who has been granted administrative privileges. These users have access to the Admin View in the Ocean Portal which allows them to update, edit and configure Ocean site settings, and add or remove users. It is recommended that clinics limit administrative access to a select number of trusted users.
- Ocean User Account
- An Ocean User Account allows an individual to log in to Ocean and manage their user settings including contact information, notification emails, and delegates. Every Ocean User Account must be connected to one or more Ocean Sites.
- Ocean Username
- Each Ocean User has a unique Ocean Username associated with an email address. This is used to log in to your Ocean User Account.
- Patient Authenticated Website Form
- A Patient Authenticated Website Form is a Self-Serve Website Form (SSWF) that has enabled patient authentication. Patient authentication is an extra step that is displayed before a SSWF, asking for the patient’s date of birth, first and last name, and medical record number/health card number. This is used to complete a patient look-up in an integrated EMR and allows a clinic to restrict the SSWF to their existing patients. Patient Authentication is required for any form that allows a patient to upload files or documents.
- Primary Delegate (Discontinued)
- The term "Primary Delegate" previously described a feature that allowed one Ocean User to share a single Patient Message & Reminder Licence with another user (eg. MOA). As of February 8th, 2024, this feature was discontinued and was replaced with a new policy that allows all Clinic Support Staff on an Ocean Site to send Patient Messages at no additional cost, provided that the Ocean Site has at least one Patient Messaging & Reminders Licence activated.
- Receiving Site
- A Receiving Site is an Ocean Site with at least one Directory Listing that has been configured to receive eReferrals. Please note that Ocean Sites may be configured to be both a Sending Site and a Receiving Site.
- Regional Authority
- A Regional Authority (RA) site is an Ocean site that has been configured by OceanMD to assist with the rollout of provincially funded programs. RA Site Users have unique privileges including validating & approving Directory Listings, exporting analytics, and assigning regional licenses.
- Self-Serve Website Forms
- Self-Serve Website Forms are Ocean Forms that are made available online through a URL/weblink to provide a secure, self-serve way for patients or providers to complete and submit a form to an Ocean Site. Self-Serve Website Forms are commonly used for clinic inquiries, patient intake forms, and self-referrals. Once submitted, Self-Serve Website Forms can be reviewed and managed in the Ocean Portal, and results can optionally be pushed into an integrated EMR to update an existing patient chart or create a new one.
- Sending Site
- A Sending Site is an Ocean Site that has been configured to send eReferrals. Please note that Ocean Sites may be configured to be both a Sending Site and a Receiving Site.
- Support Site
- A Support Site is an Ocean Site that has been configured by OceanMD to enable users to provide support to other Ocean Sites. Support Site Users can be granted administrative privileges to other Ocean sites to assist in configuring settings without having access to PHI or being a user on those sites.
- Trusted User
- A Trusted User is a user permission setting that can be applied to an Admin User on a Support Site. When a Directory Listing is created or claimed by Trusted User, it is automatically validated in the Healthmap. This permission must be enabled by an OceanMD team member.
General Ocean Guides
This section describes various Ocean features and tips to start with that are not EMR-specific.
Guide to the Ocean Portal
- The Ocean Portal can be accessed at ocean.cognisantmd.com.
-

-
Signing into the Ocean Portal will allow you to view and configure all the various features of Ocean.
Click the 'Menu' button in the top left corner to open the navigation menu with access to all areas.
Patients
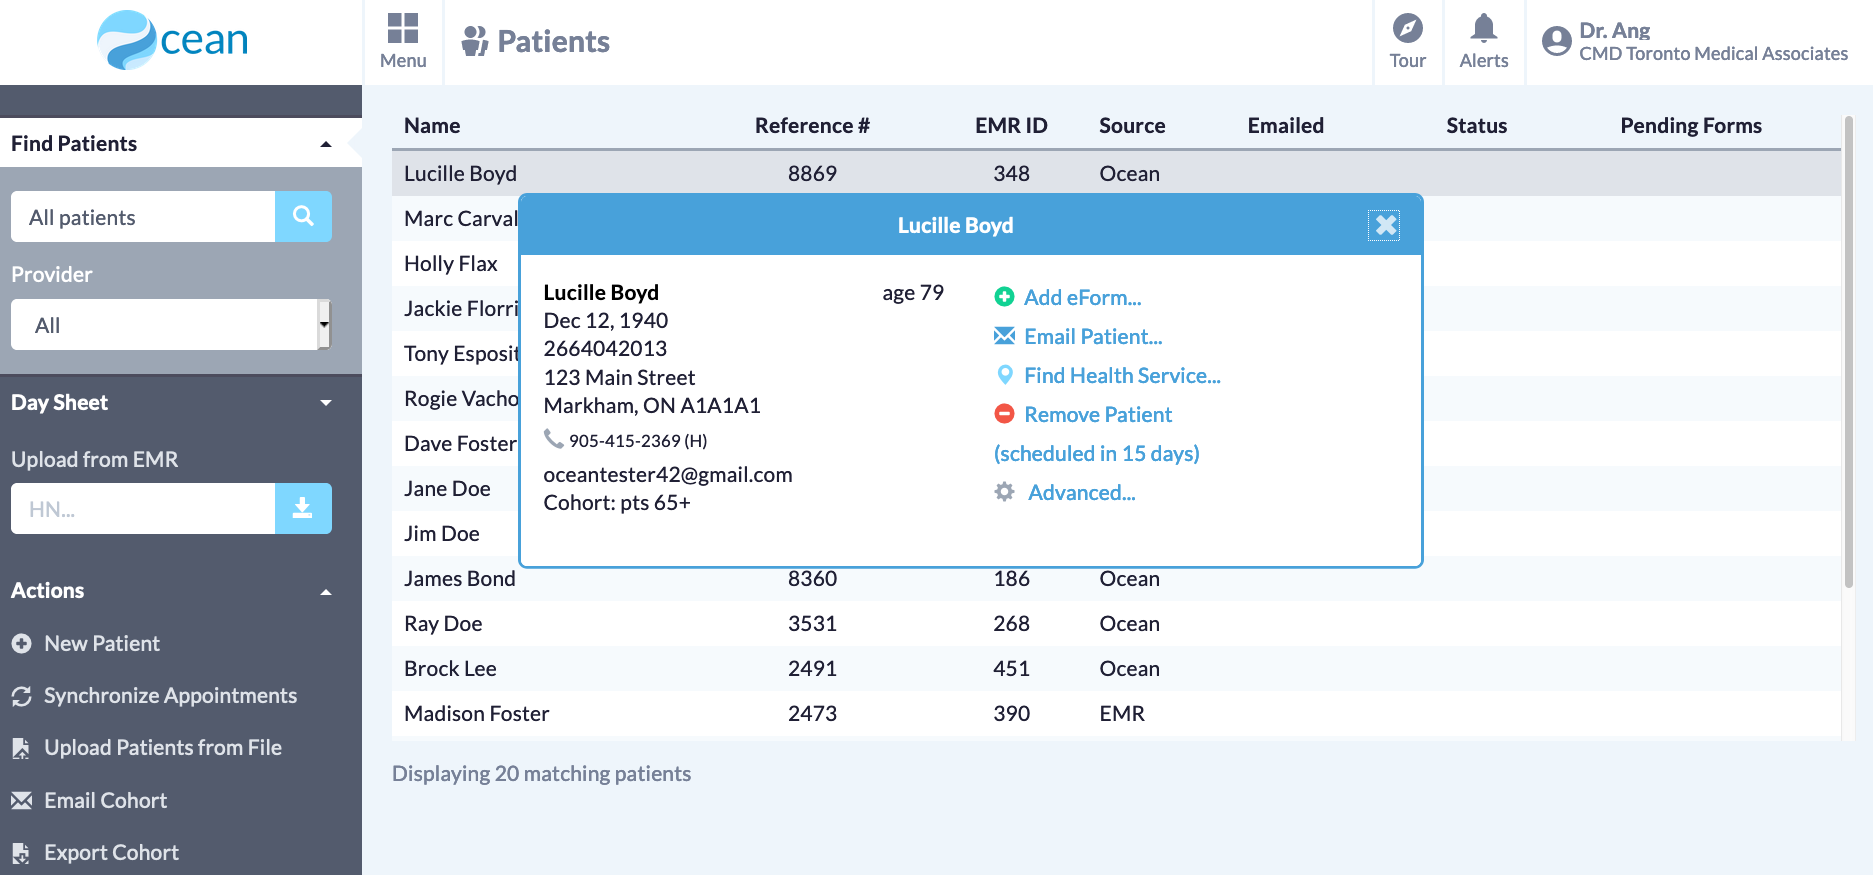
In the Patients view, you can see all of your patients who have been loaded into Ocean.
- You can click on any of the patients listed to view any clinical notes that have been generated from this patient completing eForm(s). From this window, you can also queue an eForm for a patient, email a patient, view their status and pending forms, initiate an eReferral for them through the Ocean Provider Network, remove a patient from Ocean, and access advanced settings for a patient.
- In the left side bar, you have the option to filter your patients. You can search for a patient by surname, Ocean Reference Number or EMR ID.

- You can also filter by message status by clearing the search bar and selecting the options from the drop down.
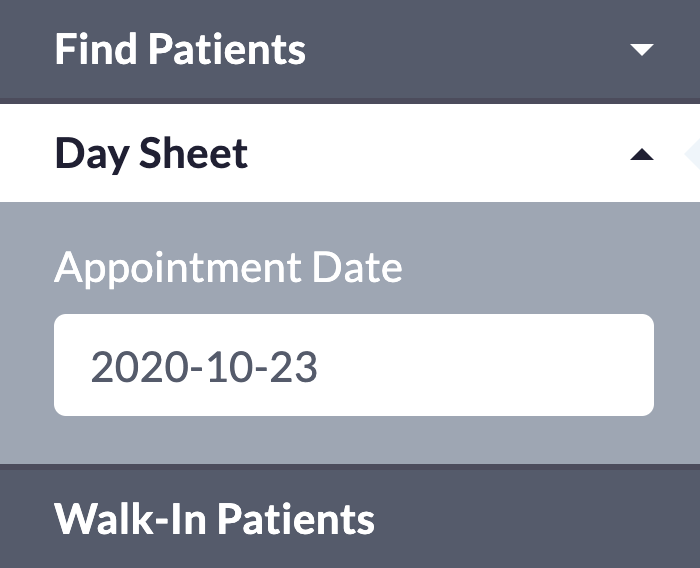
- You can additionally filter by a specific Provider, or use the Day Sheet to view all patients with appointments on a specific date, or view your walk-in provider's patients only.
- You also have more options available to you in the Actions menu, located at the bottom left of this tab, including: creating a new patient in Ocean, synchronizing your appointments (for Accuro clients only), uploading a cohort of patients, emailing a patient cohort, or exporting a patient cohort.
eForms
- In the eForms view, you can browse through, create, and edit your site's library of eForms. To learn more about customizing your eForms, please refer to our Guide to Building eForms.

- From the menu on the left, you can also configure your eForm Favourites and customize how your Ocean-generated clinical notes are formatted.
Templates
- The Template Manager offers an accessible way to view, edit, and even duplicate your templates. Using the Template Editor, you can easily create new templates to use for your secure patient communications.

- Please refer to Customizing Your Templates for more detailed information.
Admin
-
Note: Only users with Site Admin access to your Ocean Site can access this area.
In the Admin view, you can configure all of the administrative settings for your Ocean site.
To learn more about all the different administrative settings in this view, please refer to our Guide to the Admin View.

Quick Links
-
Quick Links give you access to other helpful Ocean links.
Cloud Connect will take you to Ocean Cloud Connect where you can edit your Ocean and EMR integration settings.
Note: Only users with administrative access to your Ocean site can login to Cloud Connect and edit your Ocean and EMR integration settings.
Resource Library will take you to the Ocean resource library, where you can search through a list of Ocean forms and PS Suite Custom Forms.
Support will bring you to our support portal.

Tablets & Kiosks
-
Note: Only users with Site Admin access to your Ocean site can access the Tablets & Kiosks area.

- In the Tablets & Kiosks view, you can configure the settings for all the tablet(s) registered to your site.
- Configurable tablet settings include: creating an introduction screen for your tablets, automatically queuing forms for patients, and more.
- Please refer to "Customizing Basic Tablet Settings" to learn more about what tablet settings are available for you to customize to your liking.
Patient Reminders
- The Patient Reminders dashboard allows you to view your daily reminder run time, a history of reminders sent in the last 7 days, and the ability to download a more detailed log of sent reminders.
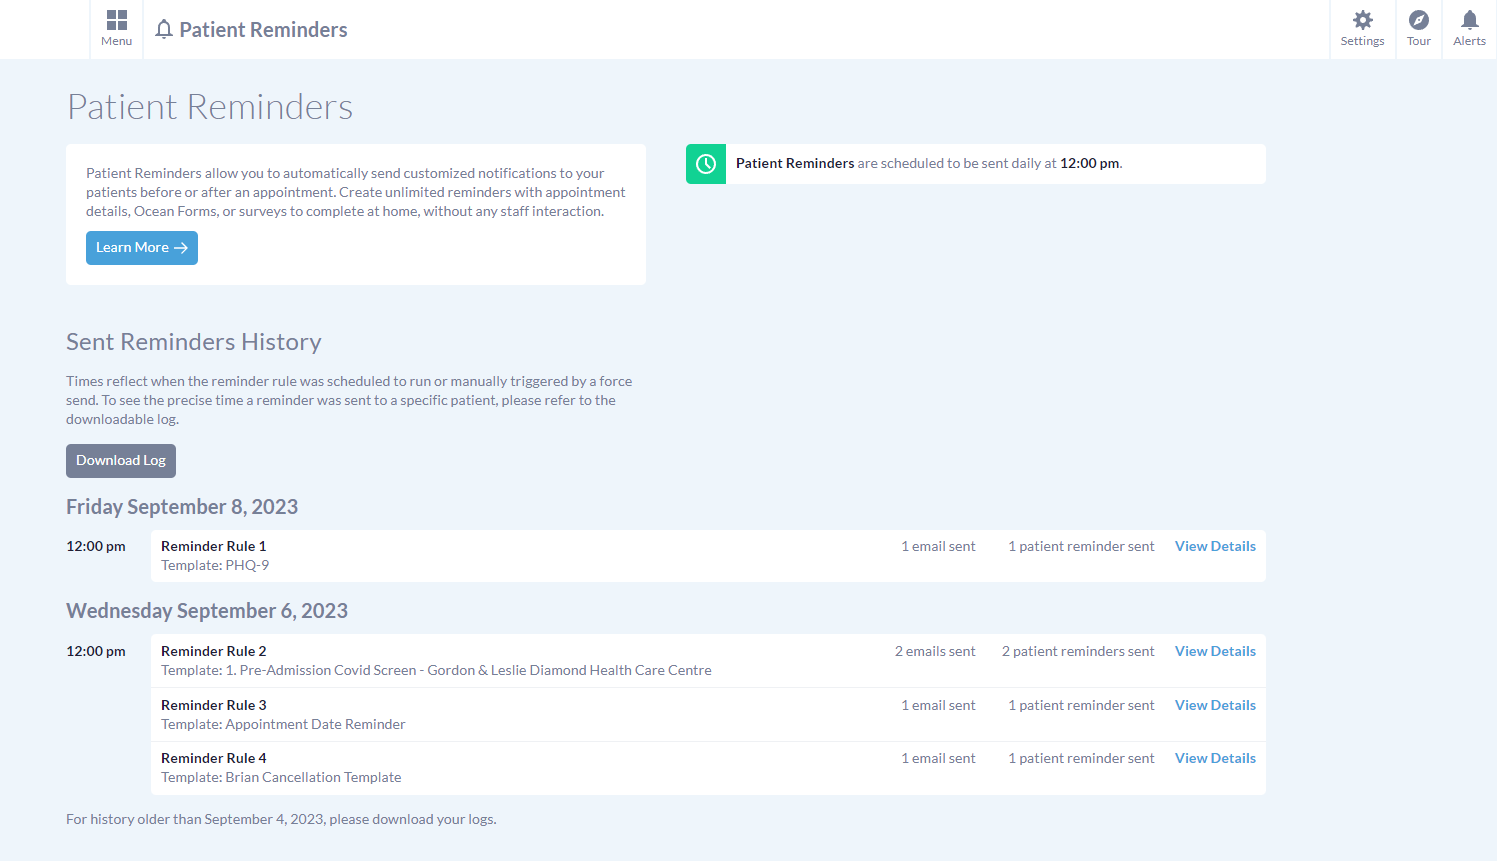
- The 'Settings' button in the top right corner allows you to update your reminder configuration, as well as create or modify your Reminder Rules.
- For more detailed information, please refer to the Patient Reminders Set Up guide.
Online Booking
- In the Online Booking area, you can view all online appointmnet bookings made by patients, and change your online booking configuration by pressing the 'Settings' button.

Website Forms
- In the Website Forms view, you can view all website form submissions in the various folders of your inbox.

Studies
- In the Studies view, you can create, configure, and export data from your Ocean Studies.
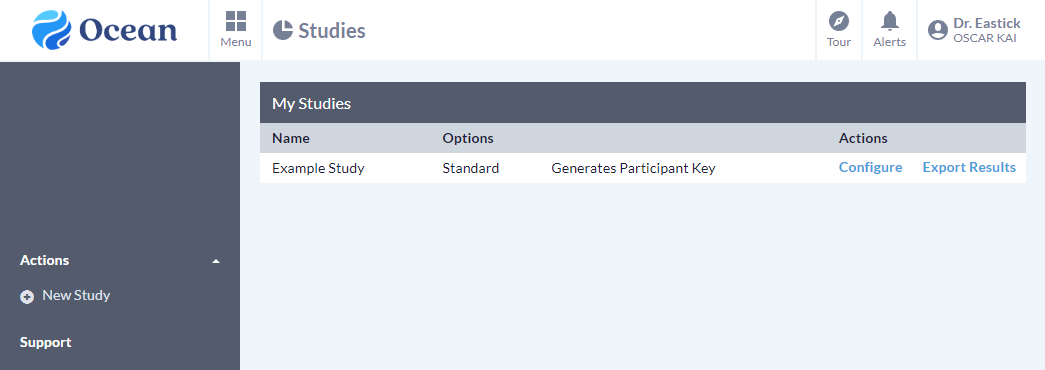
- To learn more about Ocean Studies, please refer to our Guide to Studies.
- Note: An additional fee will apply if you would like to use Ocean Studies (see our pricing page for more details). For more information about Ocean Studies and the different study levels available, please email our support team at ocean.tips/support.
eReferrals & eConsults
- In the eReferrals & eConsults view, you can access all your sent or received requests by clicking on a specific entry listed.

- The status folders on the left automatically categorize your sent and received eReferrals/eConsults.
- The 'Actions' menu in the bottom left allows you to create a New Inbound eReferal, view the Ocean Healthmap, export your eReferral data, update your wait times, and search for a patient's eReferral history.
Healthmap
- Clicking the Healthmap option will bring you to Ocean's Healthmap where you can see what services are accepting eReferrals in your region.

- If you ever run into any troubles while using the Ocean Portal, search through our library of support articles and/or contact our support team at any time by selecting the "Support" link at the bottom left hand corner of any page in the Ocean Portal.

Understanding Patient Status Icons in the Ocean Portal
- When reviewing the list of patients in the Patients view of the Ocean Portal, the "Status" column will indicate various statuses that may be applied to patients, depending upon actions they've performed or have yet to complete.
- Below is a list of the various status icons that may appear in the "Status" column and their meaning.
Note: In the Patients view of the Ocean Portal, hovering over each of the icons for a few moments will also bring up a tooltip displaying the icon's meaning.
Note Status for Ocean eForms
| Icon | Status |
|---|---|
 |
1 Patient has completed some forms but has not finished. |
 |
1 Patient has completed some forms but has not finished. Response Overdue. |
 |
1 Patient's notes are finished and ready for download into the EMR. |
 |
1 Available notes have been downloaded into the EMR. |
 |
Unable to retrieve patient information from EMR. |
 |
Waiting for EMR. |
Status for Ocean Online Messages
| Icon | Status |
|---|---|
 |
The secure message has not yet been seen by the patient. |
 |
The secure message has not yet been seen by the patient. Response overdue. |
 |
The patient has accessed the secure content, but has not completed outstanding eForms. Response overdue. |
Clearing statuses
1 These icons appear if Ocean notes have been created. If a manual re-upload is triggered for the patient (e.g. accessing Ocean from the patient's chart in the EMR) then these statuses will be reset.
Ocean Note Flags
Ocean's Note Flagging feature allows an eForm to tag a patient's response with a coloured "flag". These flags are intended to assist clinicians and their administrators with rapid triaging of responses and appear as coloured asterisks next to the note status in the status column. Learn more about note flags here: Orientation to Ocean Note Flags.
Note flags are unique because they accumulate over time for the patient until the patient is purged/removed from Ocean. If a manual re-upload is triggered for the patient (e.g. accessing Ocean from the patient's chart in the EMR) and their note status is reset, the older note flags will continue to show in the Status column. To manually reset note flags, remove the patient from Ocean.
Pending Forms
- In addition to the "Status" column, you will also see information under the column labelled "Pending Forms". The number of dots displayed in this area correlates to the number of unfinished forms in the patient's queue.