Ocean supports accepting brand new patients with healthcard numbers using Online Booking. This article details how to configure your Ocean Booking Schedules and Booking Links to support the acceptance of new patients, and the workflows used when accepting a brand new patient via online booking.
Configuration
1. Configure your Ocean Site to create new patients in your EMR.
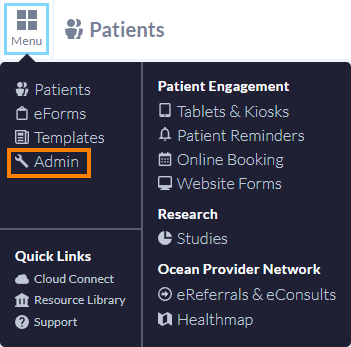
- Login to the Ocean Portal. Open the 'Menu' in the top left corner and select 'Admin'.
- Click 'Site Features'.

- Enable the 'Allow accepted online bookings to create patients in your EMR' checkbox.

-
Choose between 'Manually import patients' or 'Automatically import patients':
When 'Manually import patients' is selected and a brand new patient books an appointment, Ocean will automatically add the appointment to the EMR schedule without an associated patient chart. Users can then trigger the chart creation via Ocean and manually link the chart to the EMR appointment.
When 'Automatically import patients' is selected and a brand new patient books an appointment, Ocean will automatically add the appointment to the EMR schedule and automatically create a new chart. Ocean will also automatically associate the new chart with the booked appointment.
Notes
• Allowing online bookings to automatically import patients to your EMR may result in patients creating invalid or duplicate charts.
• To ensure a seamless transition experience, any users wishing to enable the 'Automatically import patients' site setting for their Online Booking configuration are encouraged to contact your Ocean Practice Consultant before adjusting your Ocean Site settings.
- Click 'Save Changes'.
2. Configure the Ocean Booking Schedule.
- Open the 'Menu' in the top left corner and select 'Online Booking'.

- Click the 'Settings' button in the top right corner.

- Under the 'Booking Schedules' heading, locate the relevant Booking Schedule and click 'Edit'.

- Under the 'Restrictions' heading, locate the setting titled 'Who is allowed to book into this schedule?' and set it to 'All Patients'.

- Click the 'Edit Advanced Settings' button at the bottom of the Booking Schedule configuration page.

-
Under the 'Pre-Booking Form' heading, click 'Change' and select the 'Online Booking - New Patient Intake ' core form found in the Ocean eForm library.
This form captures the patient demographic information that is required to create new charts in your EMR, as well as basic contact information for the patient in the case that you need to contact them (e.g., sex, health card version code (if applicable), telephone number, email address).
Note: If you choose to customize the 'Online Booking - New Patient Intake' form or use a different Booking Form, ensure that your form captures at a minimum the same patient information that is captured by default in the 'Online Booking - New Patient Intake' form.
If your Booking Form does not capture the patient demographic information that is required to create new charts in your EMR, online booking will not function as expected.

- Click the 'Save' button to save your Booking Schedule.
3. Configure the Ocean Booking Link.
- Under the 'Booking Links' heading, locate the relevant Booking Schedule and click 'Edit'.

- Under the 'Who can book into this link?' heading, ensure that the 'Limit online booking to patients with a chart in your EMR' setting checkbox is disabled.

-
Under the 'Authentication' heading, ensure that the 'Authentication Type' is set to 'Health Number'.
Note: Ocean does not support new patient chart creation using Alternate IDs.

- Click the 'Save' button to save your Booking Link.
Workflows for Accepting New Patients
Once your Ocean Site, Booking Schedule, and Booking Link have been configured to accept new patients, new patients (i.e., patients without an existing chart in your EMR) will be able to book online.
The workflow for accepting new patients depends on the choice you made in Step 1 when choosing between the 'Manually import patients' or 'Automatically import patients' patient chart creation options. Select the relevant tab below:
1. Identify when an appointment has been booked for a new patient.
Once an appointment has been booked for a new patient, an appointment will be created in your EMR schedule without an associated patient chart.
Tip: These appointments can be easily identified by the presence of the term '(HN not in EMR: ##########)' in the appointment details.

- Additionally, bookings for brand new patients can be easily identified in the 'Online Booking' area of the Ocean Portal by the lack of an existing 'MRN' (Medical Record Number) value.

2. Import the patient into your EMR to create a new patient chart.
- Once you're ready to create a chart in your EMR for the new patient, locate the booking in the 'Online Booking' area of the Ocean Portal, and click on it to open it.

- Click the 'Import to EMR' button to trigger the import of the patient details from the Ocean online booking submission into a new patient chart in your EMR.

- An 'Import' status window will appear indicating the status of the import. If the import was unsuccessful (e.g., due to missing key demographic fields that Ocean needs to create a chart in your EMR), an error message will appear to inform you of the failure.

3. Link the newly created patient chart in your EMR to the booked appointment in your EMR schedule.
After importing the patient into your EMR to create a new patient chart, you can perform the final step of linking the newly-created chart with the appointment in the EMR schedule:
- Double-click on the appointment in the PS Suite schedule to open the appointment details.
- Enter the patient's name in the 'Patient's name/#' field and click the enter/return key on your keyboard to execute the search.

- Verify that the proper patient chart has been linked to the appointment, and then click 'OK'.

- The newly-created patient chart has now been linked to the appointment booked in your EMR schedule.

1. Identify when an appointment has been booked for a new patient.
Once an appointment has been booked for a new patient, an appointment will be created in your EMR schedule without an associated patient chart.
Tip: These appointments can be easily identified by the presence of the term '(HN not in EMR: ##########)' in the appointment details.

- Additionally, bookings for brand new patients can be easily identified in the 'Online Booking' area of the Ocean Portal by the lack of an existing 'MRN' (Medical Record Number) value.
2. Import the patient into your EMR to create a new patient chart.
- Once you're ready to create a chart in your EMR for the new patient, locate the booking in the 'Online Booking' area of the Ocean Portal, and click on it to open it.
- Click the 'Import to EMR' button to trigger the import of the patient details from the Ocean online booking submission into a new patient chart in your EMR.
- An 'Import' status window will appear indicating the status of the import. If the import was unsuccessful (e.g., due to missing key demographic fields that Ocean needs to create a chart in your EMR), an error message will appear to inform you of the failure.
3. Link the newly created patient chart in your EMR to the booked appointment in your EMR schedule.
After importing the patient into your EMR to create a new patient chart, you can perform the final step of linking the newly-created chart with the appointment in the EMR schedule:
- Double-click on the appointment in the Med Access EMR schedule to open the appointment details.
- Enter the patient's last name and first name in the 'Last Name' and 'First Name' search fields and click the enter/return key on your keyboard to execute the search.
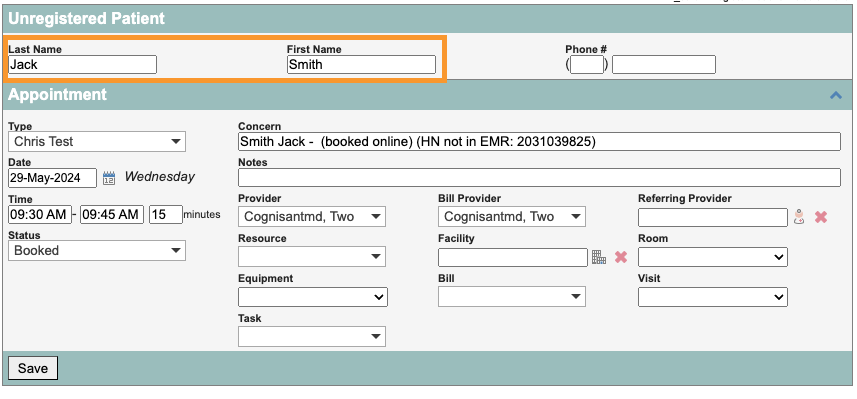
- Verify that the proper patient chart has been linked to the appointment, and then click 'Save'.

- The newly-created patient chart has now been linked to the appointment booked in your EMR schedule.

Default Patient Status of 'Unconfirmed'
By default, Med Access sets the 'Patient Status' for newly created patients by Ocean as 'Unconfirmed'. Please ensure that you update the Patient Status to the appropriate value (e.g., 'Active').
1. Identify when an appointment has been booked for a new patient.
Once an appointment has been booked for a new patient, an appointment will be created in your EMR schedule without an associated patient chart.
Tip: These appointments can be easily identified by the presence of the term '(HN not in EMR: ##########)' in the appointment details.

- Additionally, bookings for brand new patients can be easily identified in the 'Online Booking' area of the Ocean Portal by the lack of an existing 'MRN' (Medical Record Number) value.
2. Import the patient into your EMR to create a new patient chart.
- Once you're ready to create a chart in your EMR for the new patient, locate the booking in the 'Online Booking' area of the Ocean Portal, and click on it to open it.
- Click the 'Import to EMR' button to trigger the import of the patient details from the Ocean online booking submission into a new patient chart in your EMR.
- An 'Import' status window will appear indicating the status of the import. If the import was unsuccessful (e.g., due to missing key demographic fields that Ocean needs to create a chart in your EMR), an error message will appear to inform you of the failure.
3. Link the newly created patient chart in your EMR to the booked appointment in your EMR schedule.
After importing the patient into your EMR to create a new patient chart, you can perform the final step of linking the newly-created chart with the appointment in the EMR schedule:
- Double-click on the appointment in the Accuro EMR schedule to open the appointment details.
- At the bottom of the Appointment Details window, select the free-text radio button, enter the name of the patient and click the enter/return key on your keyboard to execute the search.

- Verify that the proper patient chart has been selected in Accuro, and then click 'OK'.
- The newly-created patient chart has now been linked to the appointment booked in your EMR schedule.

1. Identify when an appointment has been booked for a new patient.
Once an appointment has been booked for a new patient, an appointment will be created in your EMR schedule without an associated patient chart.
Tip: These appointments can be easily identified by the presence of the term '(HN not in EMR: ##########)' in the appointment details.

- Additionally, bookings for brand new patients can be easily identified in the 'Online Booking' area of the Ocean Portal by the lack of an existing 'MRN' (Medical Record Number) value.
2. Import the patient into your EMR to create a new patient chart.
- Once you're ready to create a chart in your EMR for the new patient, locate the booking in the 'Online Booking' area of the Ocean Portal, and click on it to open it.
- Click the 'Import to EMR' button to trigger the import of the patient details from the Ocean online booking submission into a new patient chart in your EMR.
- An 'Import' status window will appear indicating the status of the import. If the import was unsuccessful (e.g., due to missing key demographic fields that Ocean needs to create a chart in your EMR), an error message will appear to inform you of the failure.
3. Link the newly created patient chart in your EMR to the booked appointment in your EMR schedule.
After importing the patient into your EMR to create a new patient chart, you can perform the final step of linking the newly-created chart with the appointment in the EMR schedule:
- Click on the appointment in the OSCAR Pro EMR schedule to open the appointment details.

- In the 'Name' field' , enter the name of the patient and click the enter/return key on your keyboard to execute the search.

- Verify that the proper patient chart has been selected, and then click 'Update Appt'.

- The newly-created patient chart has now been linked to the appointment booked in your EMR schedule.

- When a brand new patient books an appointment online, Ocean will automatically add the appointment to the PS Suite schedule, automatically create a new patient chart in PS Suite with the corresponding booking notes, and automatically associate the chart with the booked appointment.

- When a brand new patient books an appointment online, Ocean will automatically add the appointment to the Med Access schedule, automatically create a new patient chart in Med Access with the corresponding booking notes, and automatically associate the chart with the booked appointment.

Default Patient Status of 'Unconfirmed'
By default, Med Access sets the 'Patient Status' for newly created patients by Ocean as 'Unconfirmed'. Please ensure that you update the Patient Status to the appropriate value (e.g., 'Active').
- When a brand new patient books an appointment online, Ocean will automatically add the appointment to the Accuro schedule, automatically create a new patient chart in Accuro with the corresponding booking notes, and automatically associate the chart with the booked appointment.

- When a brand new patient books an appointment online, Ocean will automatically add the appointment to the OSCAR Pro schedule, automatically create a new patient chart in OSCAR Pro with the corresponding booking notes, and automatically associate the chart with the booked appointment.
