-
Initiate your email message.
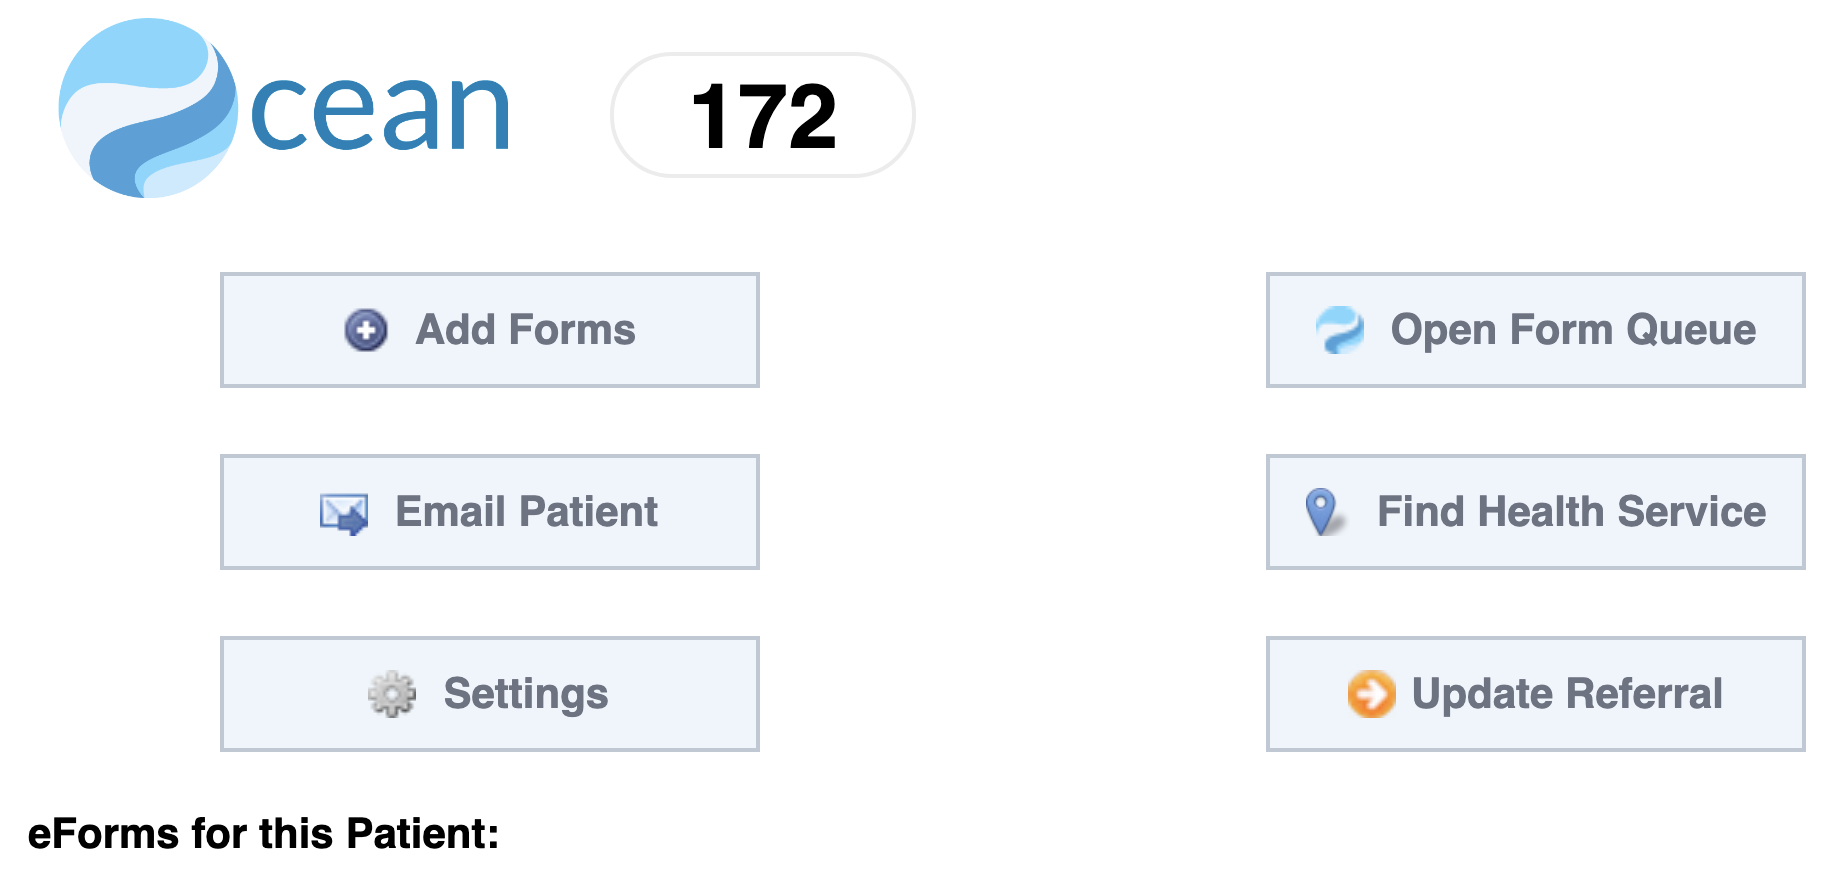
- Select "Email" from the Ocean custom form or toolbar.
-


- Open the patient's chart and access the TELUS Launcher.

- Under My Extensions, locate 'Ocean' and select Send Message.

There are 3 options for initiating your Patient Message once the relevant patient chart has been opened in Accuro:
- Option 1: Click the 'Send Patient Message' CDS Quick Link from the Accuro action bar.

- Option 2: Click the 'Send Patient Message' global CDS link from within the CDS menu.

- Option 3: Click the 'View Patient Dashboard' CDS Quick Link from the action bar, or use the equivalent global CDS link to open the Ocean Patient Summary, and then click 'Email Patient'.

-
Select "Email Patient" from the Ocean eForm.
Alternatively, expand the Ocean Toolbar within the patient chart using the grey arrow on the right and select "Email".
-

-
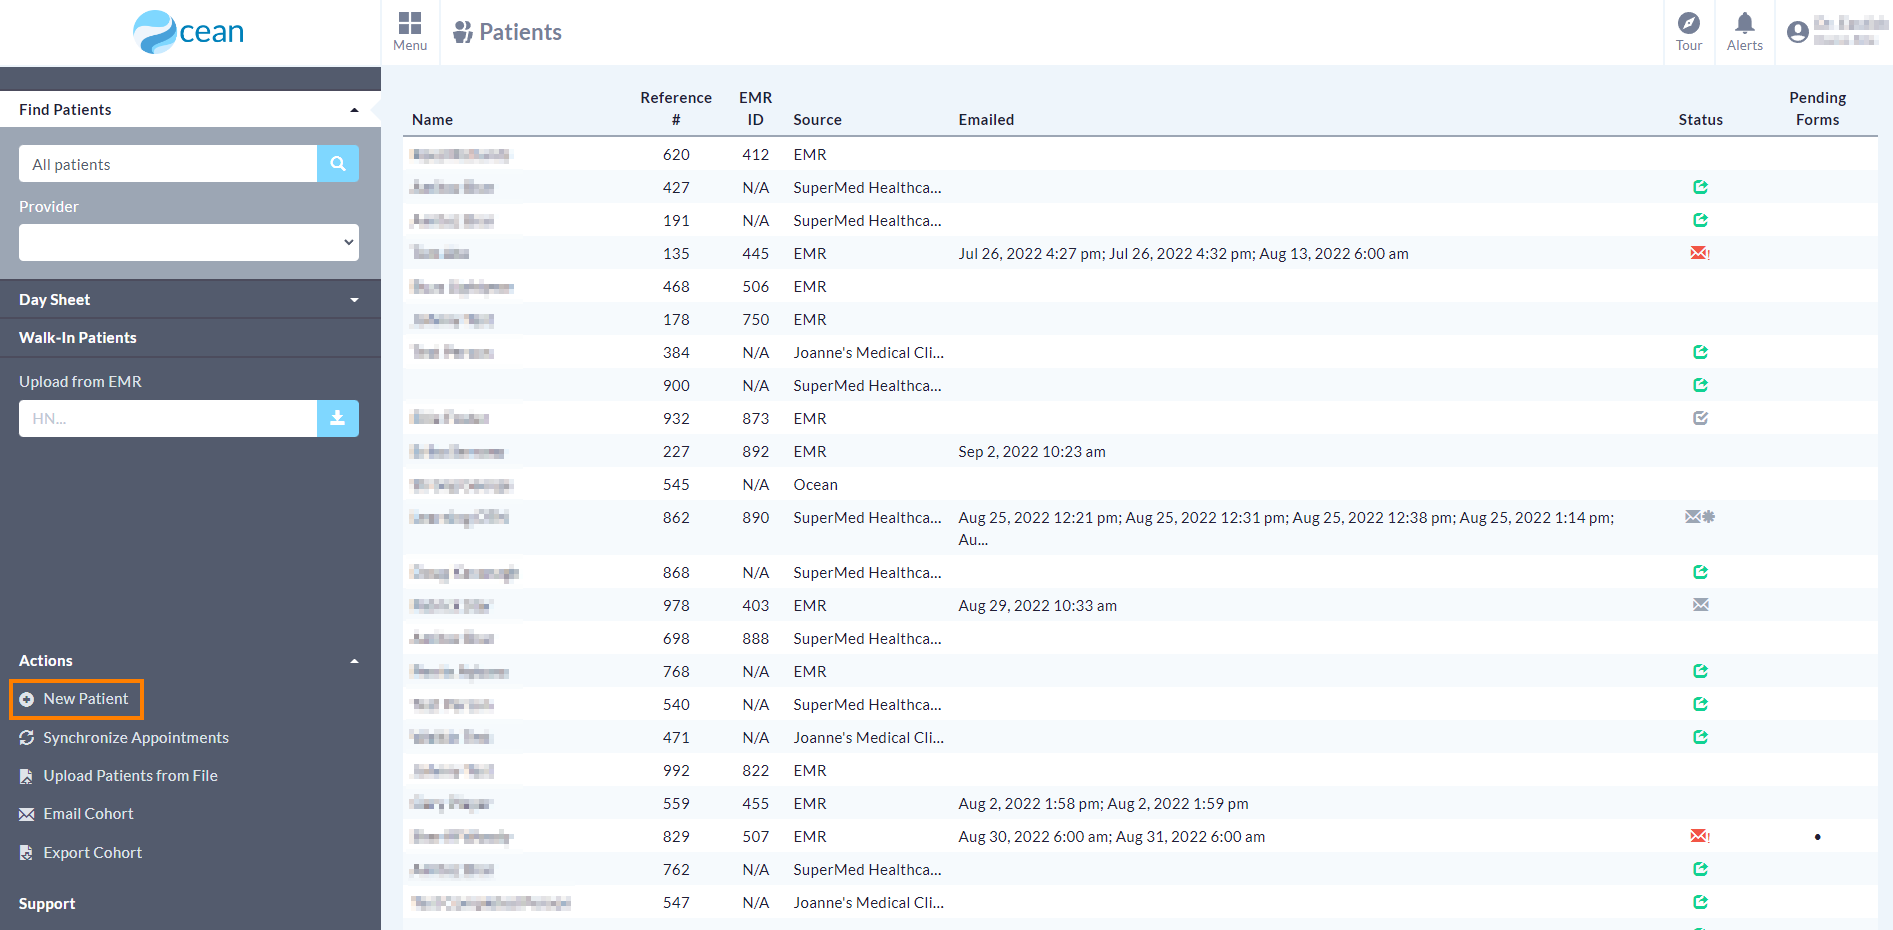
Login to the Ocean Portal. If you aren't already in the Patients view, click the “Menu” button in the top left corner and select "Patients. Click on the patient and select "Email Patient...".
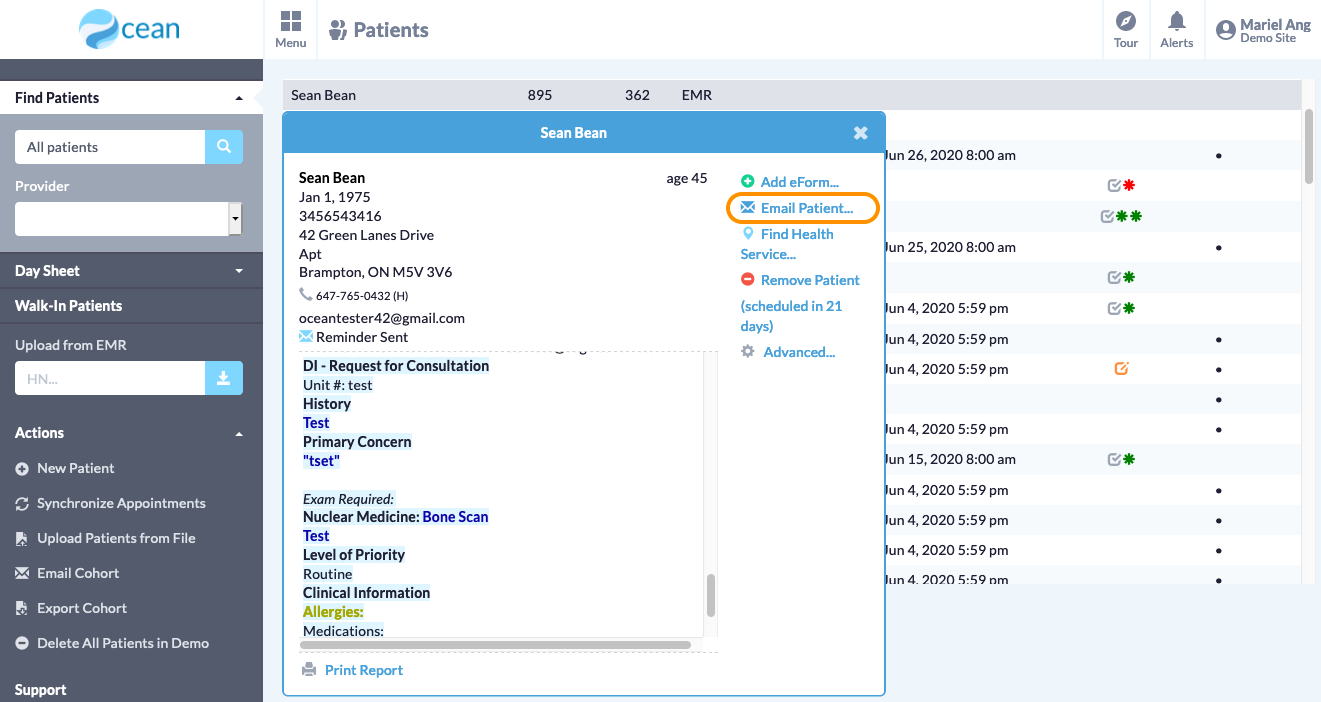
- Note: If your patient does not already exist within the Ocean Portal, you can create them by using the 'New Patient' button on the left.
-
- This will open a message window in an internet browser. The "To:" field will be automatically populated with the patient’s email address from their EMR chart (if available), and the template fields will be pre-populated with your Site Default template.
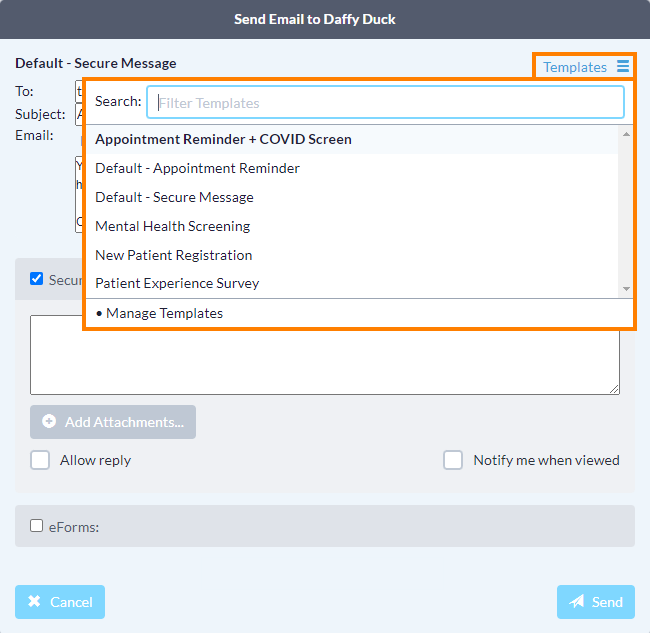
- To learn more about how to customize your templates and change your Site Default template, please refer to "Customize Your Templates".
-
Add your secure message, add attachments, and select notification alerts.
-
- Include Secure Message:
- To include a secure, encrypted message, enable the "Secure Message" checkbox and type your message in the text box.
- Add Attachment:
- You may opt to add attachments such as lab requisitions or test results by selecting "Choose File" and selecting the file from your computer.
- Allow patient to reply:
-
Secure messages are designed to be clinician-driven. A patient can only send you a secure message after you have sent one to them first. You can allow the patient to respond to your message only by enabling the "Allow reply" checkbox. The patients reply will be recorded in their chart with a date and time stamp.
Note that this functionality is not available when using Group Messages with Ocean.
- Allow patient to send attachments:
- You can allow the patient to respond with an attachment by enabling this checkbox.
- Reply window
- If the 'Allow patient to reply' or 'Allow patient to send attachment' setting is enabled, you can optionally set a reply window to limit the amount of time that the patient has to respond.
- Notify me when viewed:
- Selecting "Notify me when viewed" will provide you with an email confirmation when a patient opens a secure message.

-
- The following screen shot is an example of a Secure Message in PSS.
- The following screen shot is an example of a Secure Message in Med Access.
Depending on the location you selected in your Cloud Connect settings, Secure Messages will appear in either the Encounter Notes or Documents area.
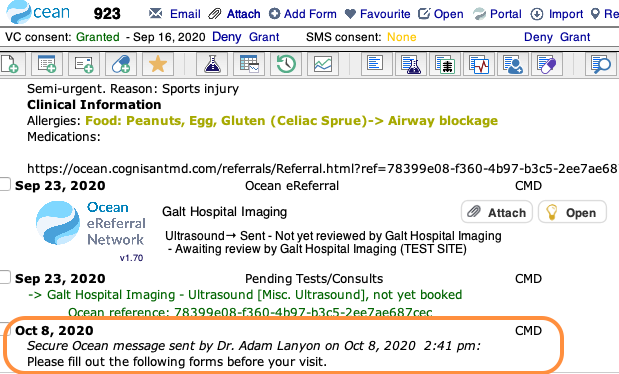
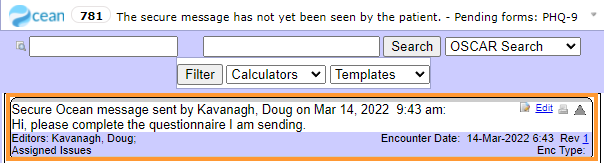
- If you have selected the Encounter Notes area, Secure Messages will appear within the chart as shown in this screenshot.

- If you have selected the Documents area, Secure Messages will appear within the selected folder as shown in this screenshot.
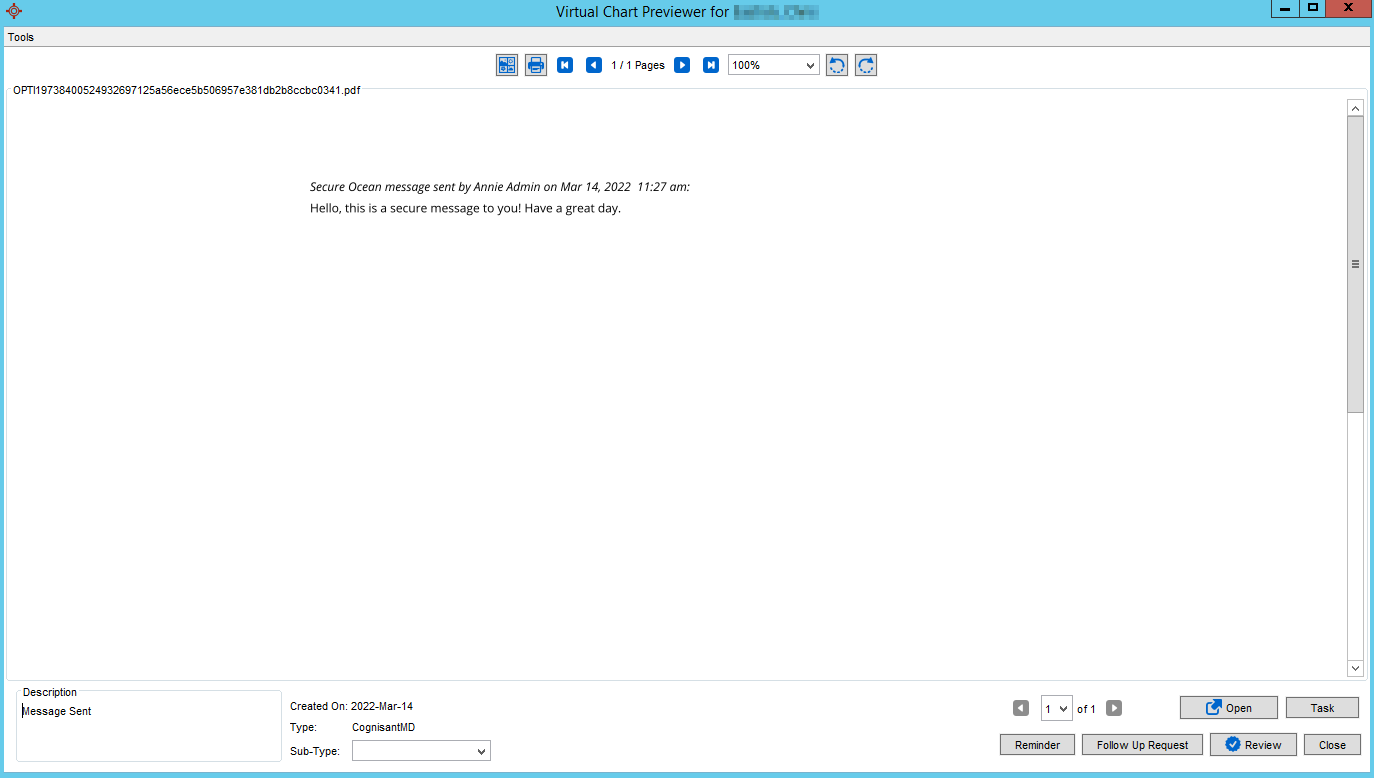
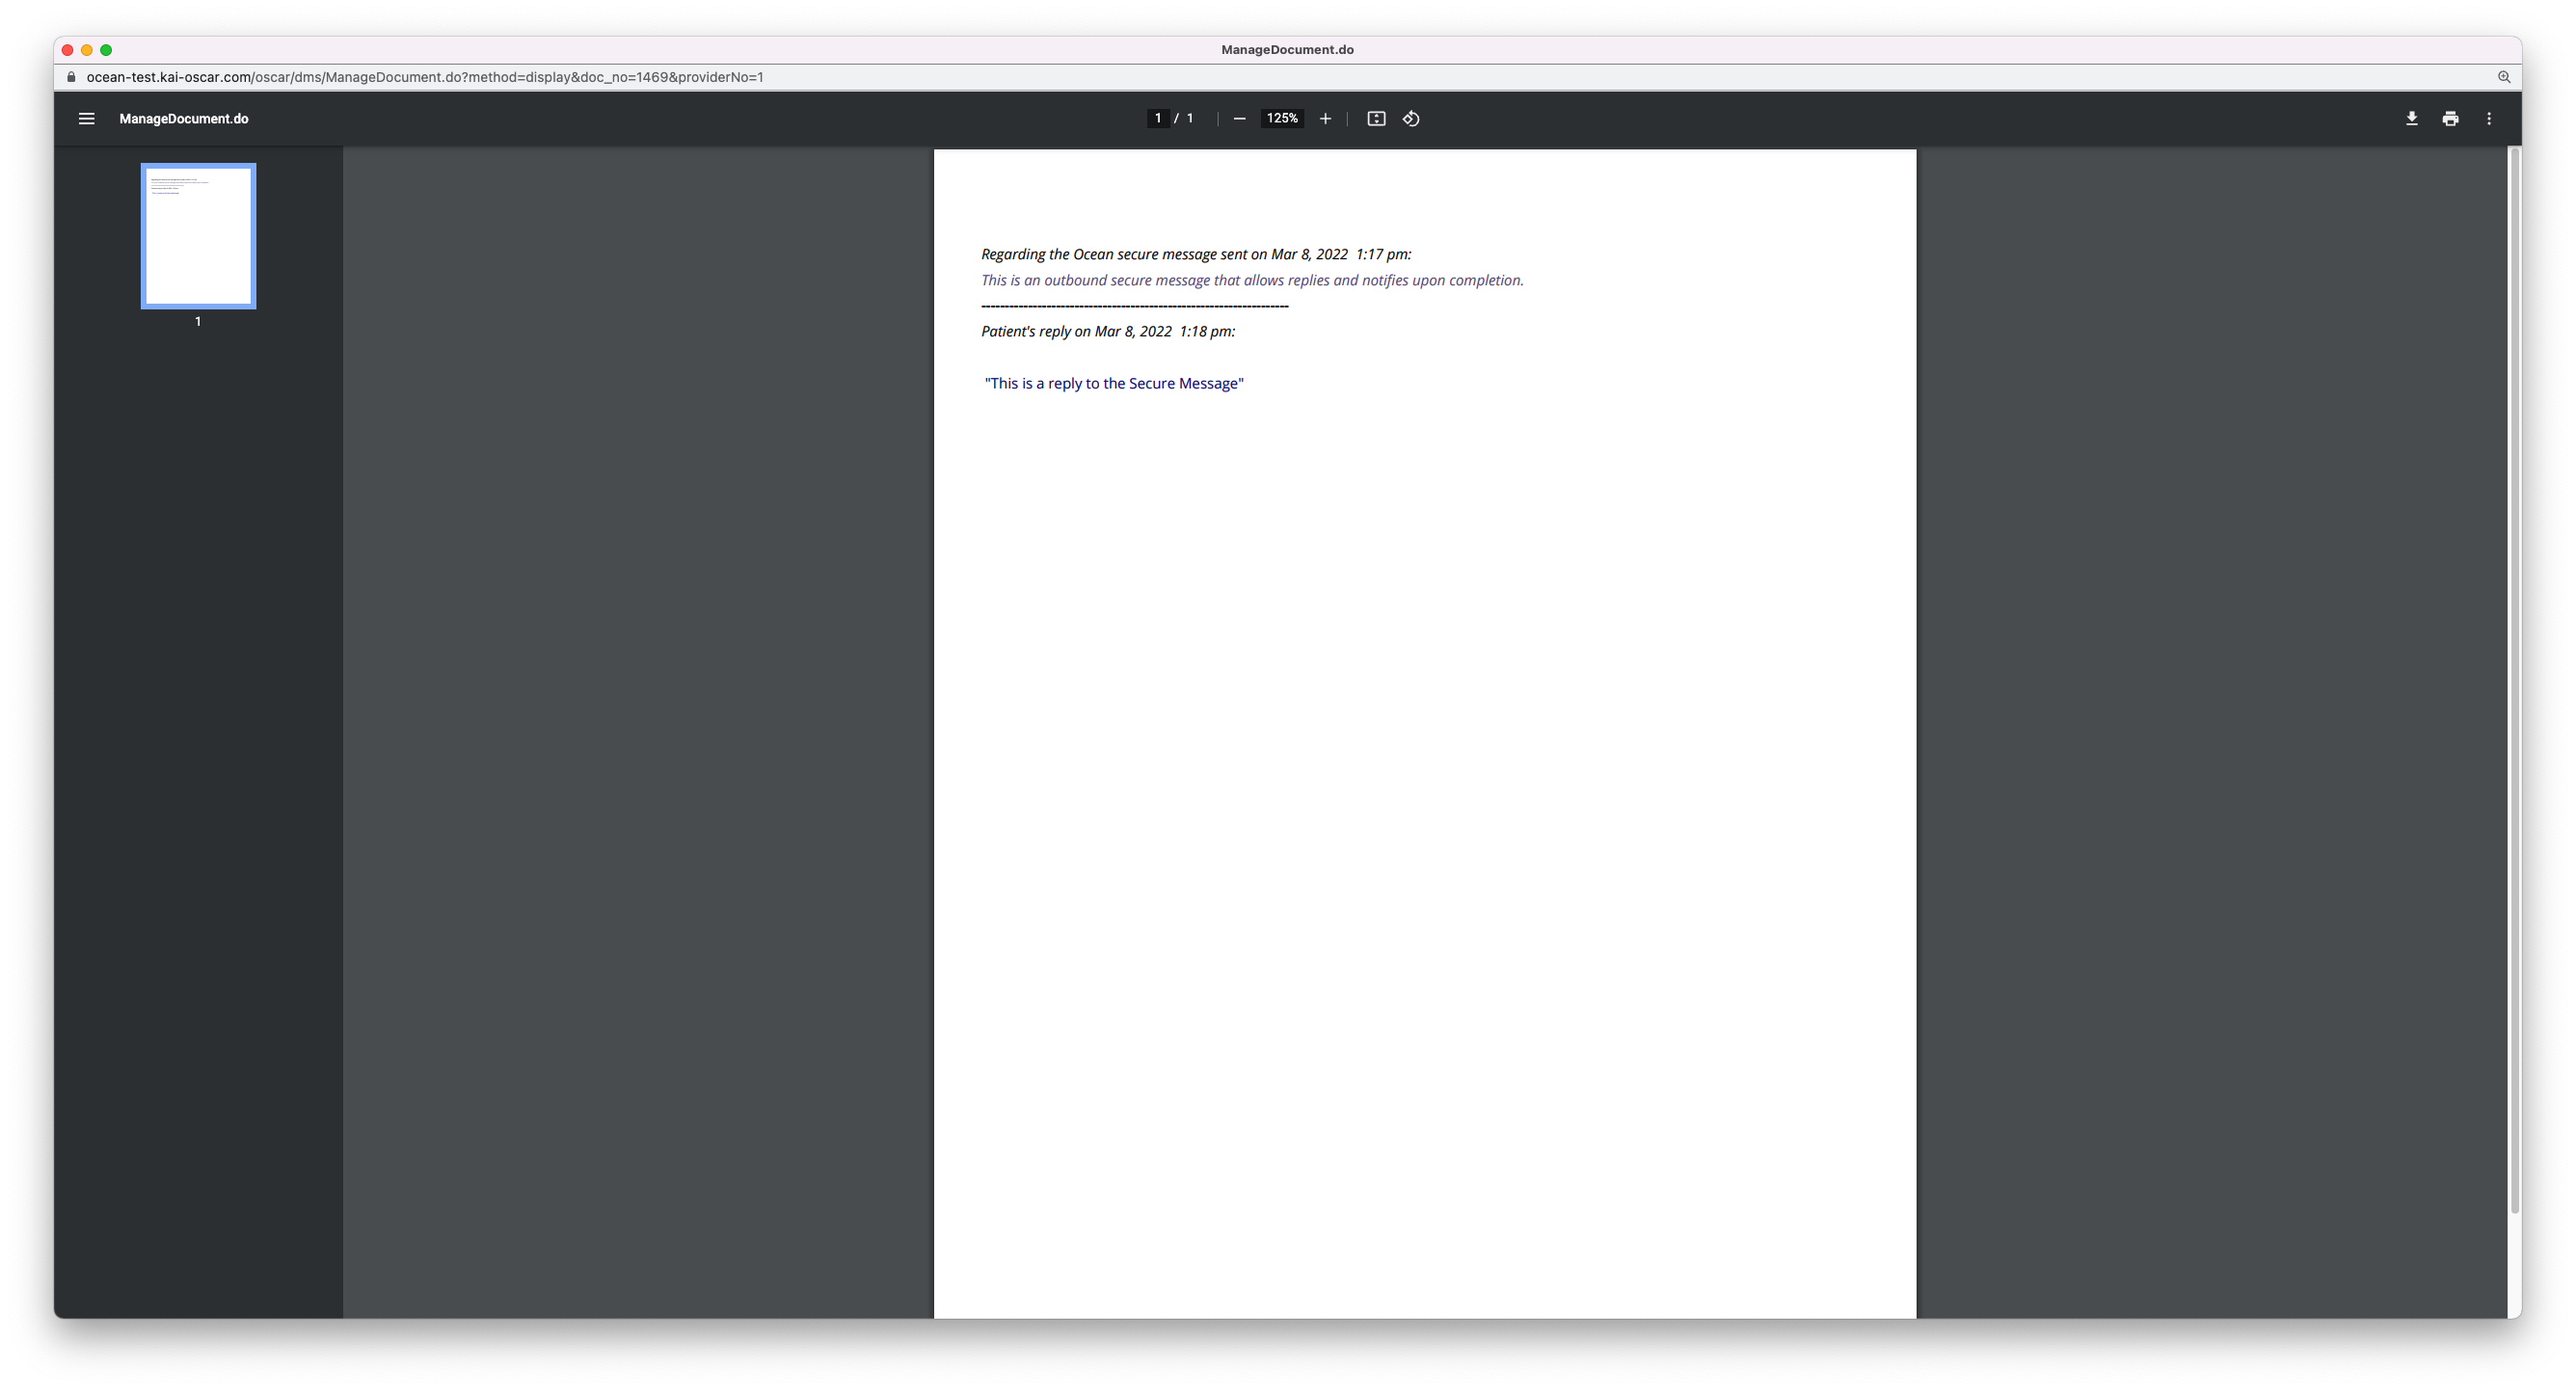
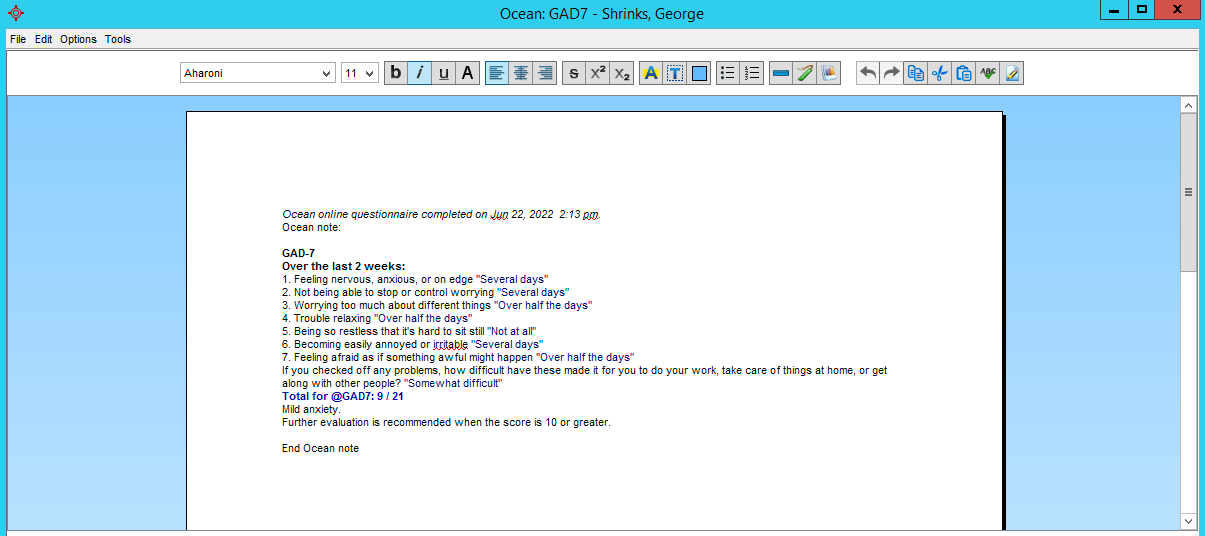
- Clicking on the document will allow you to view its contents in a new window.
Depending on the location you selected in your Cloud Connect settings, Secure Messages will appear in either the Encounter Notes or Documents area.
- If you have selected the Encounter Notes area, Secure Messages will appear within the chart as shown in this screenshot.
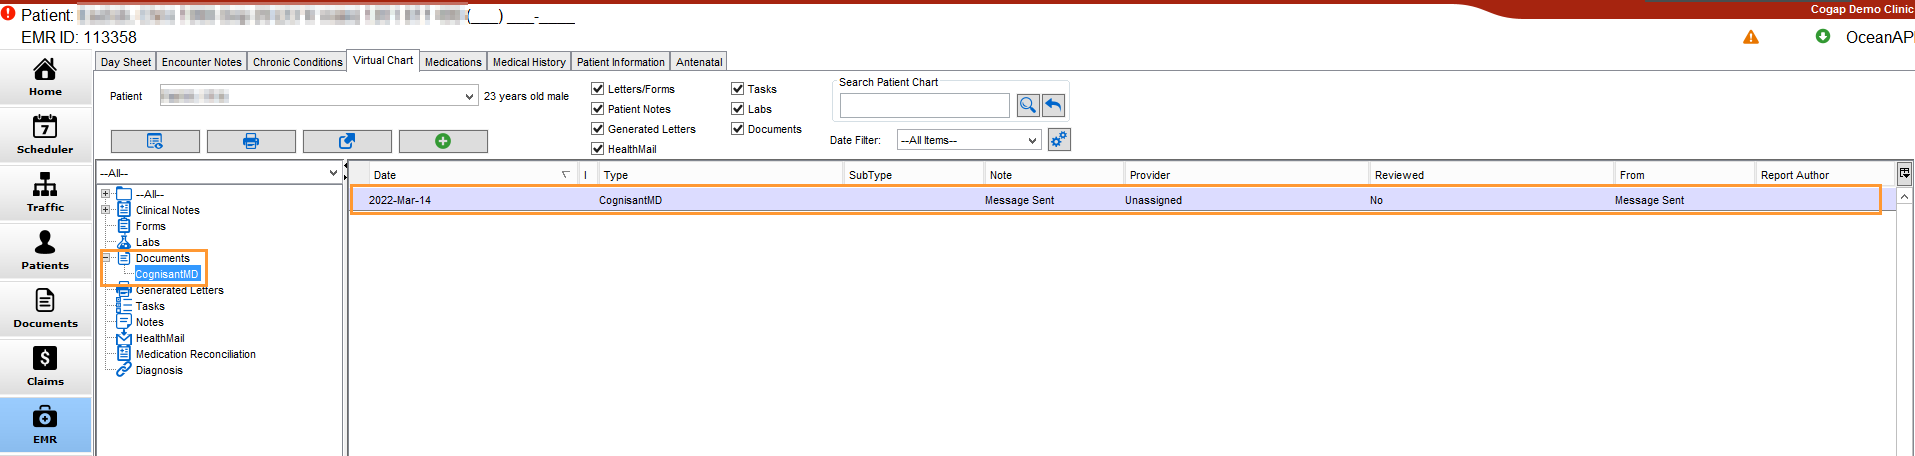
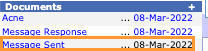
- If you have selected the Documents area, Secure Messages will appear as a PDF in the Documents area on the left side of the chart.
- Clicking on the document will allow you to view its contents in a new window.
-
Add forms and select notification alerts.
-
- Include eForms:
- To include a secure link to an eForm that patient can complete, select the "Include eForm" checkbox.
- Add eForm:
- To include a form for the patient to fill out at home, select "Add eForm" and search for the appropriate eForm. Click the title of the eForm to save it.
- Notify me when complete:
- Selecting "Notify me when complete" will provide you with an email confirmation when a patient has finished completing the eForm you sent them.

-
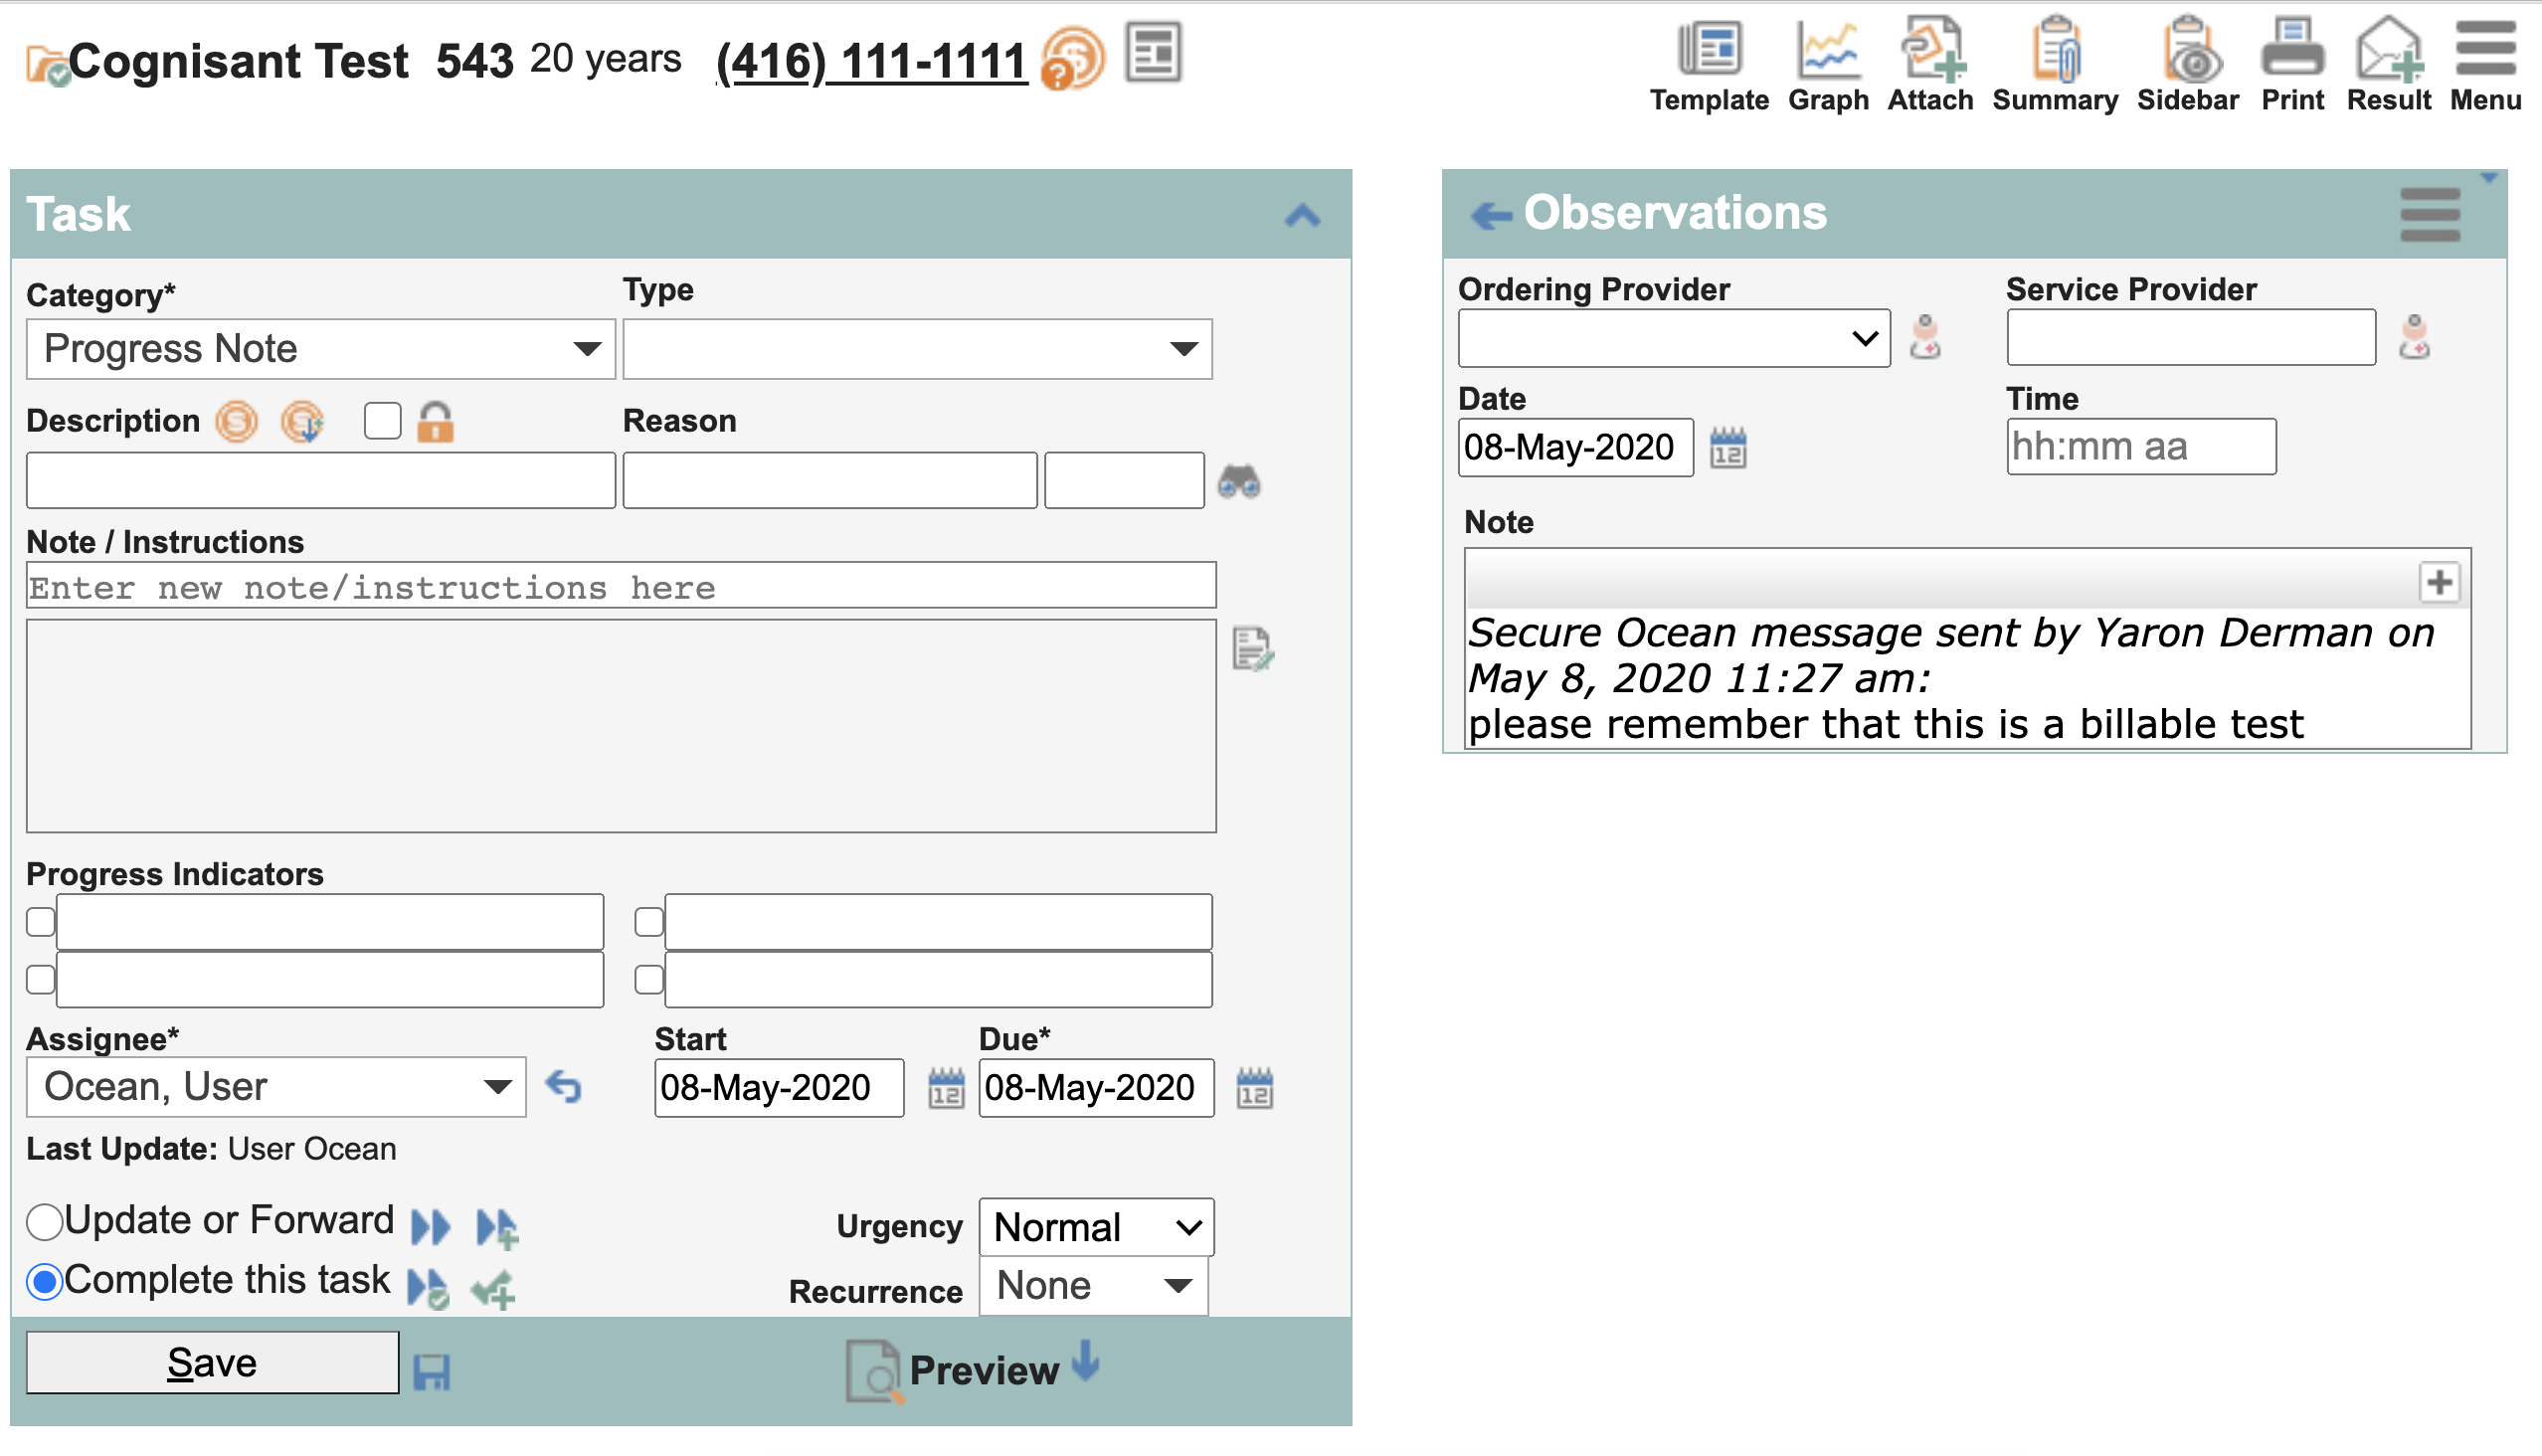
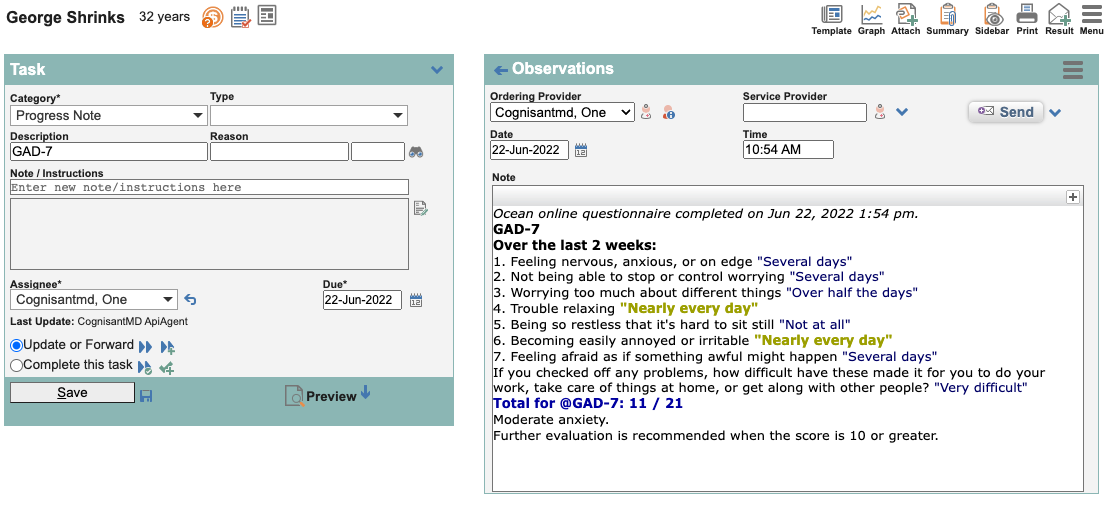
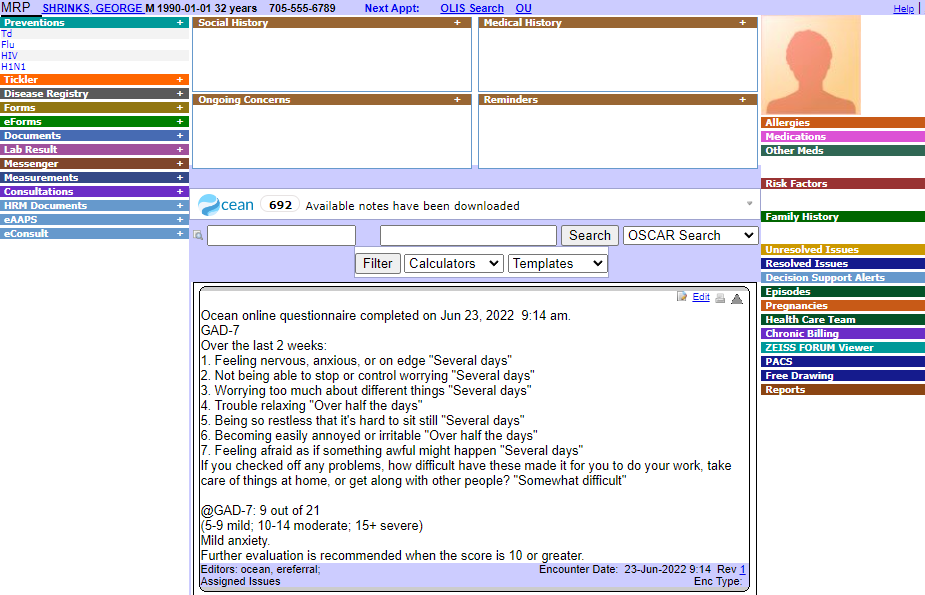
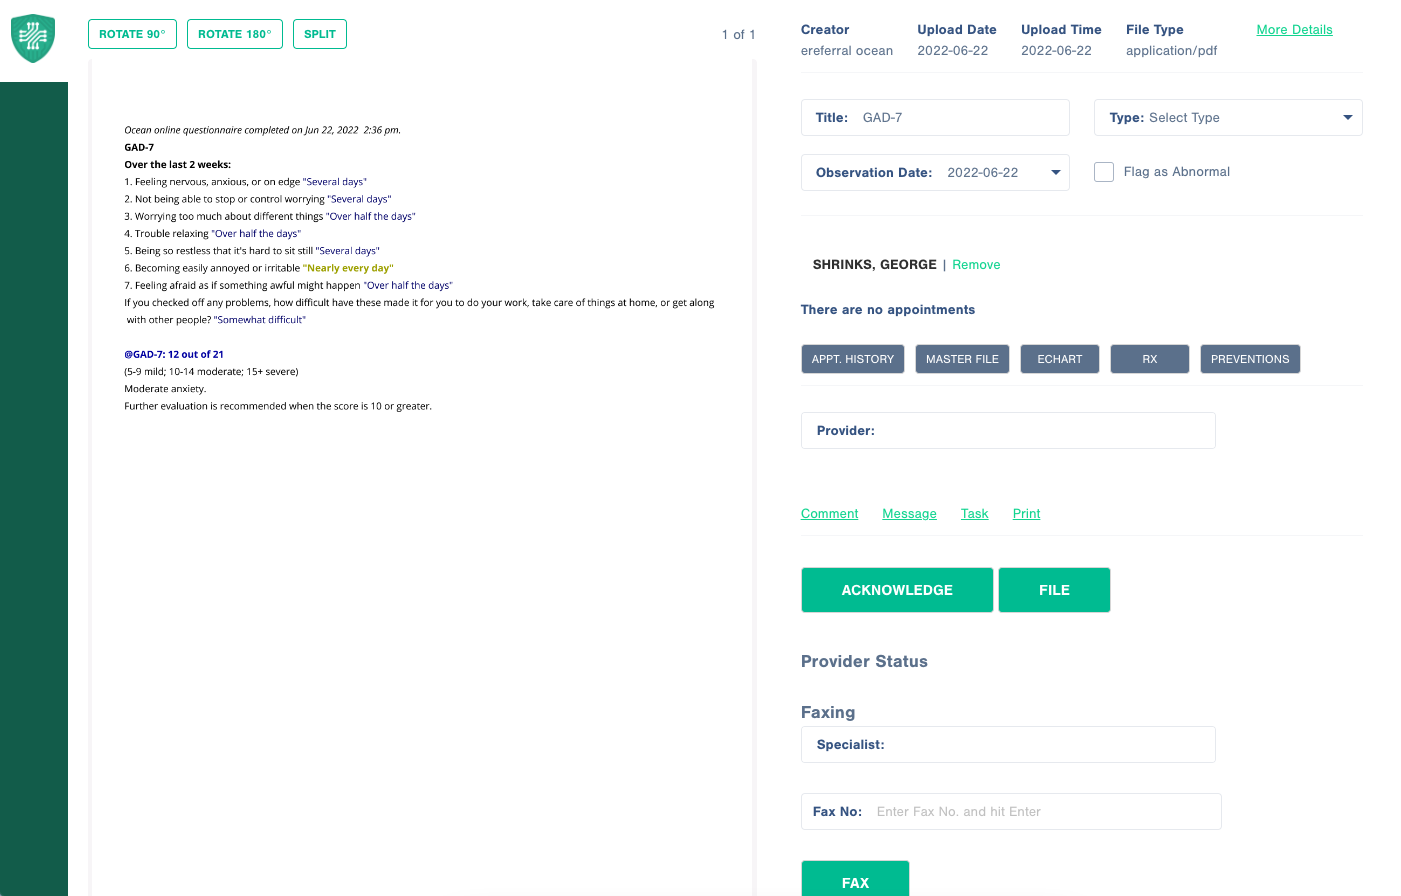
- The screenshot on the right is an example of a completed eForm note in PS Suite.
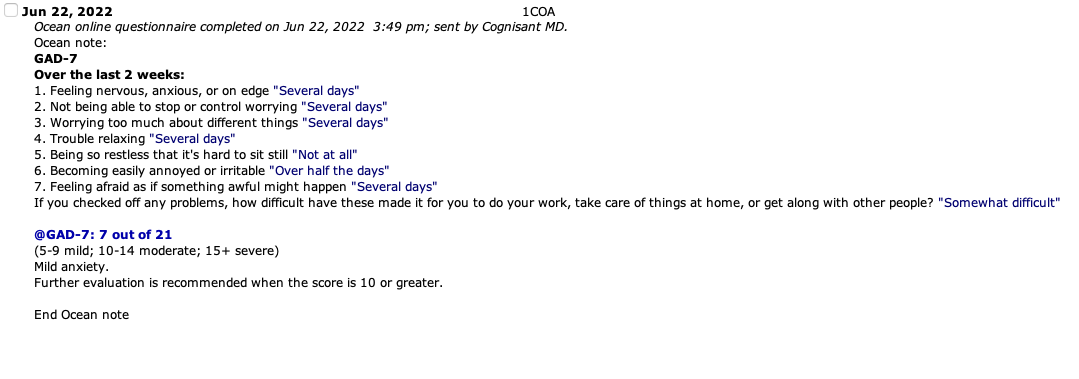
- The screenshot on the right is an example of a completed eForm note in Med Access.
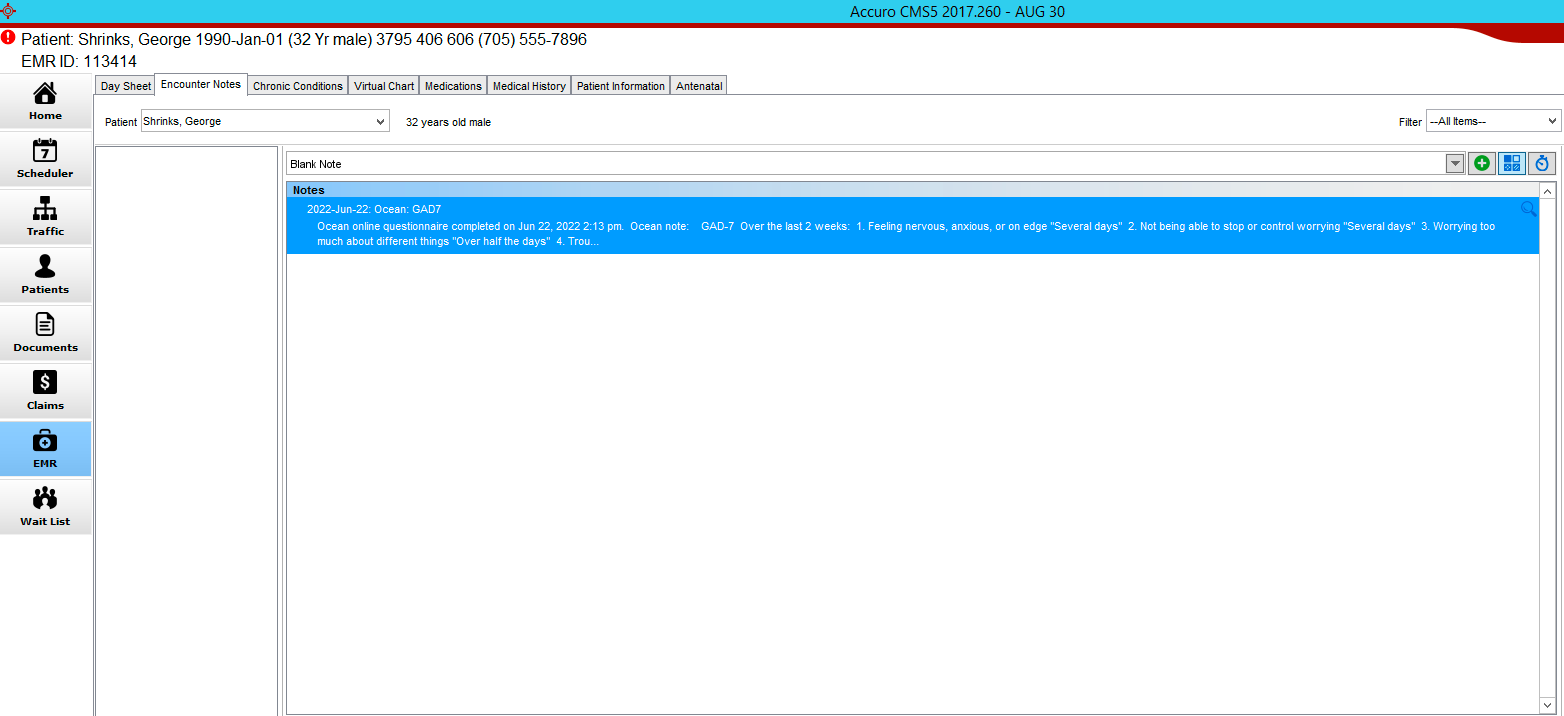
- The screenshot on the right is an example of a completed eForm note in Accuro.
- Clicking on the encounter note will allow you to view its contents in a larger window.
Depending on the location you selected in your Cloud Connect settings, completed eForms will appear in either the Encounter Notes or Documents area.
- If you have selected the Encounter Notes area, completed eForms will appear within the chart as shown in this screenshot.
- If you have selected the Documents area, completed eForms will appear as a PDF in the Documents area on the left side of the chart.
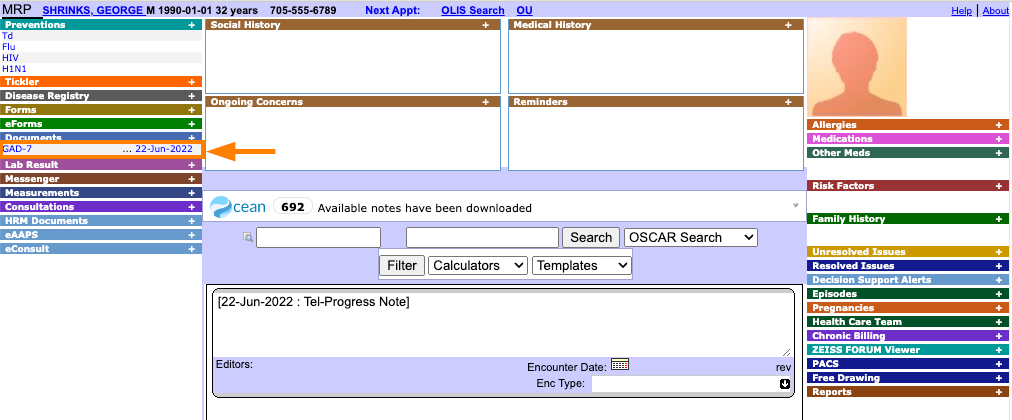
- Clicking on the document will allow you to view its contents in a larger window.
-
Set security information to require your patient to verify their identity.
- The Security Information section at the bottom of the window provides you with identifying information that will be used by the patient to access the secure message and form(s).

- The options are an access password (given to the patient in advance), the patient’s birthdate (pre-populated using data from your EMR), the patient’s health number (pre-populated from your EMR), the patient’s EMR ID number (pre-populated from your EMR), or an Alternate ID value (e.g., student number). You may select one or more of these options.
- If you do not select any option, it will default to the patient’s birthdate.
- You can also set Ocean to let you know if a patient doesn’t open a message within a certain period of time by selecting "Notify me if no response after".
-
Send message, receive alerts, and view patient responses in your EMR.
- You are now ready to send your message!
- If you have requested email notifications related to the secure message or eForm, you will receive an email containing the patient’s chart ID number in your EMR, as well as their Ocean reference number.
- The next time you access the patient’s chart, you will see a new encounter note that includes the message as well as any replies, attachments, and eForms that were completed.
-
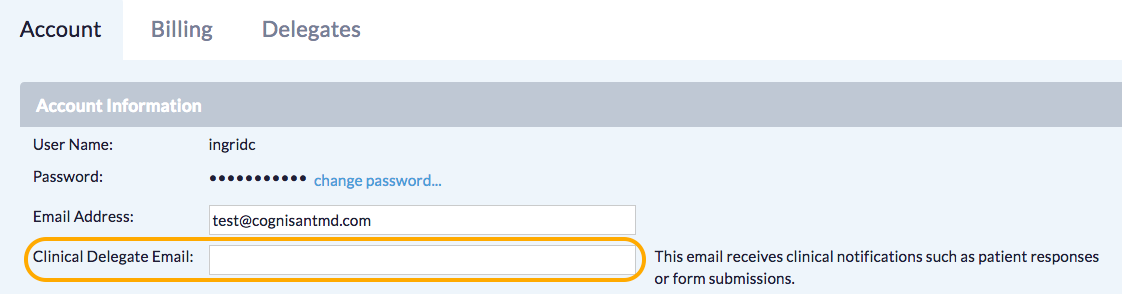
Configure your email address for alerts (optional).
- Ocean automatically requires users to log in to Ocean the first time they send a secure message. By default, Ocean will send email alerts and notifications to the email address on file for that Ocean user.
- If you would like to assign a delegate email address to receive these notifications, you can do this by changing the "Clinical Delegate Email" from the “View My Account" section of the Ocean Portal (also accessible by clicking your name at the top right corner and selecting "View My Account").
For more details about all of the Patient Messages options, please refer to "Patient Messages Settings".