Participant Keys - Tracking & Anonymizing Study Participants

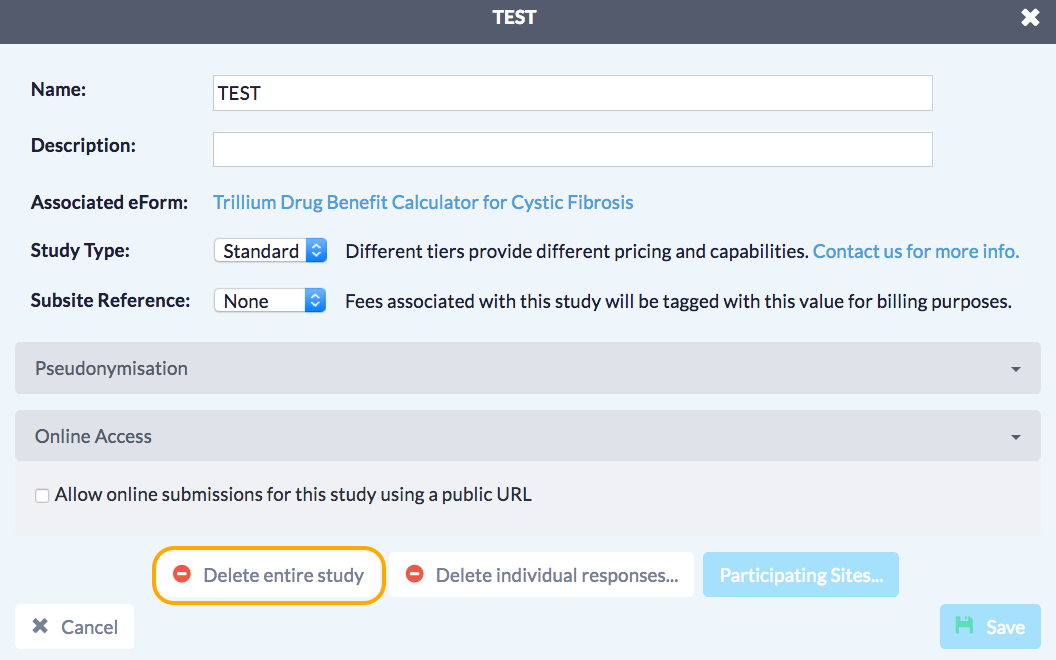
Research studies often use "participant linking maps" to depersonalize patient responses in a secure manner and accomplish blinding of the investigators. Concretely, this usually takes the form of a spreadsheet with a row for each participant containing the patient's name/ID and a sequence number. The sequence number is then recorded, usually in handwriting, at the top of each paper questionnaire completed by the patient. The data set contains only the sequence number, enabling unbiased and anonymous analysis of the result set(s).

There are two drawbacks of this process, which is as old as blinded research:

  1. It takes time and energy to create as well as look up a sequence number from the map every time a participant is going to complete a response or be assessed for a data point.
  2. Somebody needs access to this "master" list and therefore can "unmask" the participants.

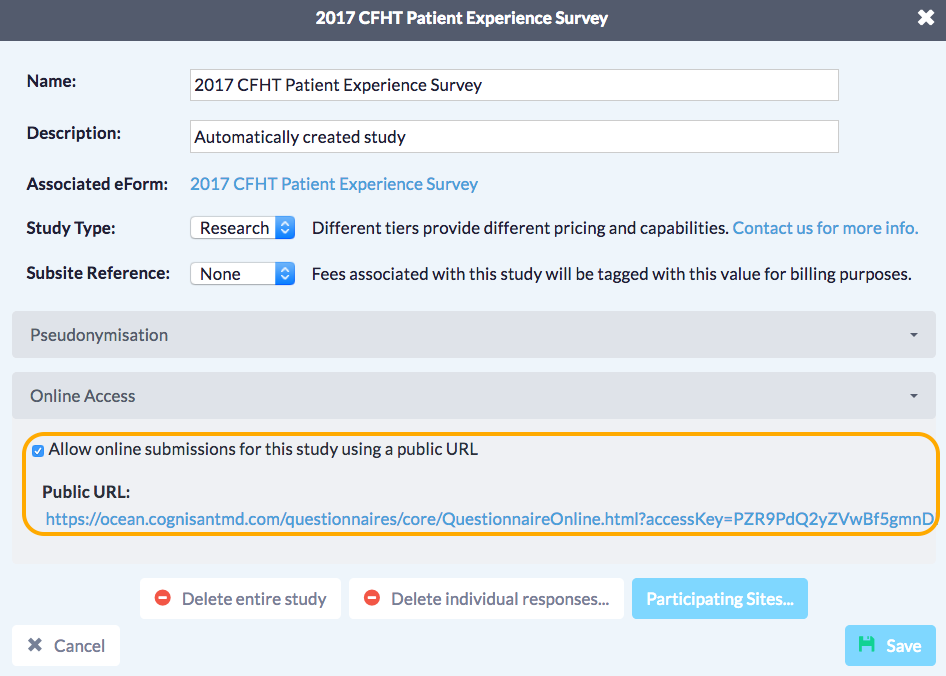
Ocean Studies provides a better, simpler way of mapping participating patients to result data. It is done with "participant key", which is generated automatically from stable, personally identifying information using a one-way hashing algorithm. An Ocean participant key may look ugly, but it provides an irreversible token so that you cannot figure out any identifying information about the patient from the key. The concept is gaining momentum in health research and is often called pseudonymization.

In Ocean, the participant key is constructed automatically from the site number, the patient birthdate, sex, surname and, if available, a few digits from the middle of the health number. The resulting participant key is attached to every Ocean Study submission. As a result, every submission from a given patient will have the same participant key for a given study.

For patient data security, Ocean will generate different participant keys for different studies, even if the same patient is participating in two different studies. If you are doing a multi-form study, you can use participant key "alignment" on the Ocean Study definitions to have multiple studies produce the same participant key for the same patient. For more information about aligning participant keys, please refer to "How do I follow a participant across studies?".


Allowing Access to an Ocean Study from a Website

Ocean supports public online questionnaires for any study. This is particularly useful for things like patient experience surveys.

  • To enable this, log in to the Ocean Portal. Click "Menu" in the top left corner and select "Studies".  
  • Click "Allow online submissions for this study using a public URL" in the configuration panel for the study. This will display a URL that you can add to your website.

There is no additional cost to creating and using a public URL. However, normal study submission fees will apply, depending on the study tier (i.e. the same as if an Ocean Tablet was used).

A few notes to consider:

If a patient completes a study survey via your website, the data in the export will have a submission source of "Public Online Questionnaire" so you will know that it came from your website link.

Form memory and participant keys will be disabled for public online questionnaires since the patient is truly anonymous (i.e. the last name, birthdate, HN and sex is not known as it might be for a web questionnaire or tablet), so Ocean will not "remember" that a particular patient has completed a form for use in tablet rules or form scripts.


Inviting Other Sites to Join Your Ocean Study

Ocean Studies can span multiple medical clinics, multiple EMR servers and even multiple EMR types through the multi-site feature.

  • To Invite Other Site(s) to Your Study

    • Log in to the Ocean Portal. Click "Menu" in the top left corner and select "Studies". 
    • Click "Configure" on the study you want to extend to another site.
    • If the "Study Type" is "Standard", you'll need to contact ocean.tips/support to request your study be upgraded to a research tier type before proceeding.
    • Click "Participating Sites..." button at the bottom. This will open up a dialog box open that allows you to type in an invitation message to the other clinic.
    • Pick the sites you want to invite by typing in part of the name in the box below and click "Send invitations". Note that you can only invite sites that are also subscribed to Ocean.
  • To Accept an Invitation to Another Site's Study

    • The payer on the invited site(s) will receive an email with your note plus specific instructions on how to proceed.
    • The invitation will show up in the invited site's Studies view, under "Pending Study Invitations". The invitation can be accepted by clicking the green checkmark at the end of the row.
    • Once the invitation has been accepted, the study eForm will be available automatically to the participating clinic's Ocean site, and any updates to the eForm will be reflected in that site automatically.
    • Whenever the eForm is completed in the invited site (e.g. by a patient or clinician), the results will appear in the study export of the site that created the study, tagged with the source site number and site name.

Note: Some sites have a separate invitation and/or consent eForm that is independent of the study eForm, which is often set-up to automatically load the study eForm (via an eForm Action) if the patient consents to participate. In this case, it is best to ensure that all the participating study sites have all the eForms needed for their participants saved in the eForms tab of their Ocean portal (i.e. study invitation/consent and the actual study data collection eForm), with the corresponding eForm Action set up to pull both up automatically.


Viewing Data from Ocean Studies

You can export Ocean Studies data for viewing at any time, as many times as you like.

  • Log in to the Ocean Portal and navigate to the Studies view.
  • Find the study you wish to view data from and click "Export Results".
  • You can export results by: (1) picking at date range to view study data within a specific time period, (2) leave the end date blank to view study data from a specific date onwards, or (3) leave both dates blank to view all study data ever collected.
  • The data will be downloaded as a CSV file. For most computers, this type of file will automatically open in Microsoft Excel.

Deleting Studies Upon Completion

Any form completions associated with an active study in Ocean will incur charges. Therefore, when a study is complete, it should be deleted from the Studies view of the Ocean Portal in order to prevent further submissions (and to prevent incurring accidental charges).

  • Log in to the Ocean Portal and navigate to the Studies view.
  • Select "Export Results" for the study you want to delete in order to ensure you have a copy of all your study data before you delete it. You can leave the date fields blank to ensure your file includes submissions from the entire study duration.
  • Select "Configure" for the study you want to delete.
  • Select "Delete Entire Study". You will be asked to confirm that you want to delete your study (with a reminder that all study data will be lost when the study is deleted.)
  • Select "Yes - Remove this study" to permanently delete your study.