


You can access the Ocean eSubmission Network from the link in your EMR (for integrated EMRs) or directly from the Ocean Healthmap to initiate your eSubmission.
With an Ocean account, you can initiate an Ocean eSubmission at any time directly from the Ocean Healthmap. If you are using an EMR which is integrated with Ocean, you can also initiate an eSubmission at any time by following the steps below.
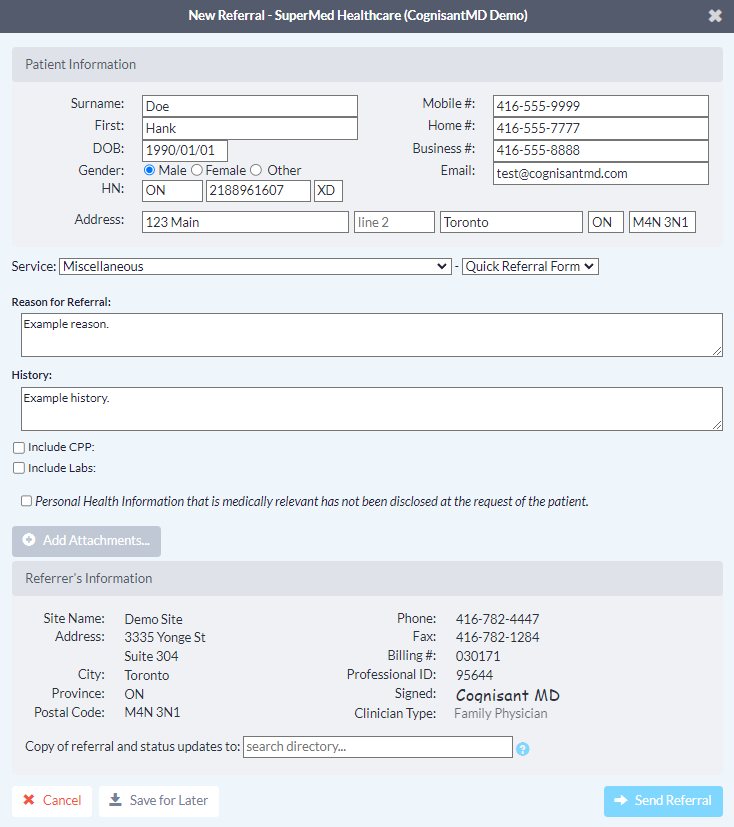
Initiate your eSubmission (without an attachment)
- Click the "Refer" button on the Ocean toolbar in the patient record.

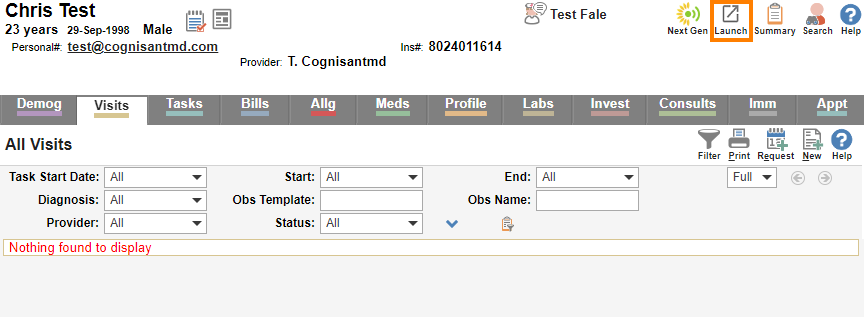
- Press the "Launch" icon from within the patient's chart.
- Locate the "Ocean" extension, and select "View Patient".

- Press the "Send eSubmission" button from within the patient's dashboard.

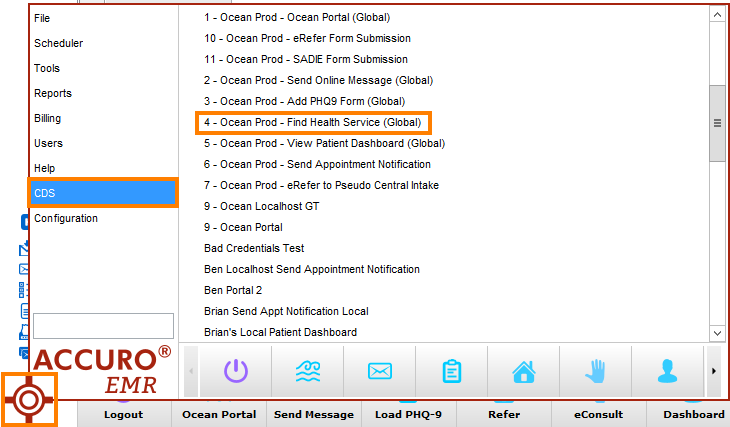
- With your desired patient in context in Accuro, click the "Send eRequest / Find Health Service" global CDS link.
- Alternatively, you can click your equivalent user-friendly CDS link on the action bar.

- Click the 'Refer' button on the Ocean Toolbar.

- Alternatively, click the 'Oc.' shortcut on the relevant patient's appointment from the schedule, and then click 'Find Health Service' on the Ocean eForm.

- Click the 'Refer' button on the Ocean Toolbar.
- Alternatively, click the 'Oc.' shortcut on the relevant patient's appointment from the schedule, and then click 'Find Health Service' on the Ocean eForm.
In a web browser, navigate directly to the Ocean Healthmap.
Initiate your eSubmission (with an attachment)
- Use the Ocean-MA Extension for Google Chrome and Microsoft Edge to capture the desired attachments from the patient's chart in Med Access.

- Press the "Launch" icon from within the patient's chart.
- Locate the "Ocean" extension, and select "View Patient".
- Press the "Send eSubmission" button from within the patient's dashboard.
Prerequisite
- Ensure that you have enabled the 'Save for Ocean' button within your Accuro system settings.
- Select the patient in Accuro that you wish to generate an attachment in Ocean for.
-
If you do have an Encounter Note Template and corresponding Quick Action Button configured, use your Quick Action Button to create a new Encounter Note.
If you do not have an Encounter Note Template and corresponding Quick Action Button configured, create a new blank Encounter Note in the patient chart.
Tip: You can use the 'CTRL+F11' keyboard shortcut to create a new note from any section of Accuro, as long as you have the patient selected first.

- Specify a filename for your attachment by using the 'Title' field in the bottom left, and then click Generate Letter.

- Ensure you have the correct 'From:' Provider selected in the top left, then go to the Attachments pane and click the green plus icon to add an attachment.

- In the Select Attachments window, choose the items from the patient chart that you would like included, and then select OK.

- The list of selected attachments will appear on the left. Click the 'Save for Ocean' button.

- An Encounter Note and the Generated Letter will be created in the patient chart.

-
Use the 'Send eRequest / Find Health Service' CDS link or action button to launch into the Ocean Healthmap.
Ocean will automatically include any unused Generated Letters with the current date as an attachment on your eSubmission.
Initiating an eSubmission from the 'Consultations' area in OSCAR allows you to attach Documents from the patient's chart to your eSubmission.
- From within the patient chart, create a new consultation by clicking the '+' icon on the purple 'Consultations' ribbon.

- Click 'Attach File to Consultation' on the left side.

- Select the desired Document(s) to attach using the checkboxes on the left side, and then click 'Done Close Window'.

- The chosen Document(s) will now appear in the left hand side of the Consultation window.

-
Click the 'Refer' button in the top right corner of the window to launch into the Ocean Healthmap.
Note: The Consultation window will automatically close after clicking the 'Refer' button. Any text typed in the OSCAR Consultaton window will not transfer into the Ocean eSubmission. 
- Use your clinic's pre-existing process for creating documents for fax or mail in OSCAR (e.g., consults, submissions).
-
Rather than printing your document to paper, save your document as a PDF file to your computer.
Note: After sending the eSubmission, ensure that you delete any attachments saved to your computer to ensure any personal health information is appropriately cleansed.
- Click the 'Refer' button on the Ocean Toolbar.
- Alternatively, click the 'Oc.' shortcut on the relevant patient's appointment from the schedule, and then click 'Find Health Service' on the Ocean eForm.
- Use your clinic's pre-existing process for creating documents for fax or mail in your EMR (e.g., consults, submissions).
-
Rather than printing your document to paper, save your document as a PDF file to your computer.
Note: After sending the eSubmission, ensure that you delete any attachments saved to your computer to ensure any personal health information is appropriately cleansed.
- In a web browser, navigate directly to the Ocean Healthmap.
- The EMR-specific actions above will take you directly to the Ocean Healthmap.

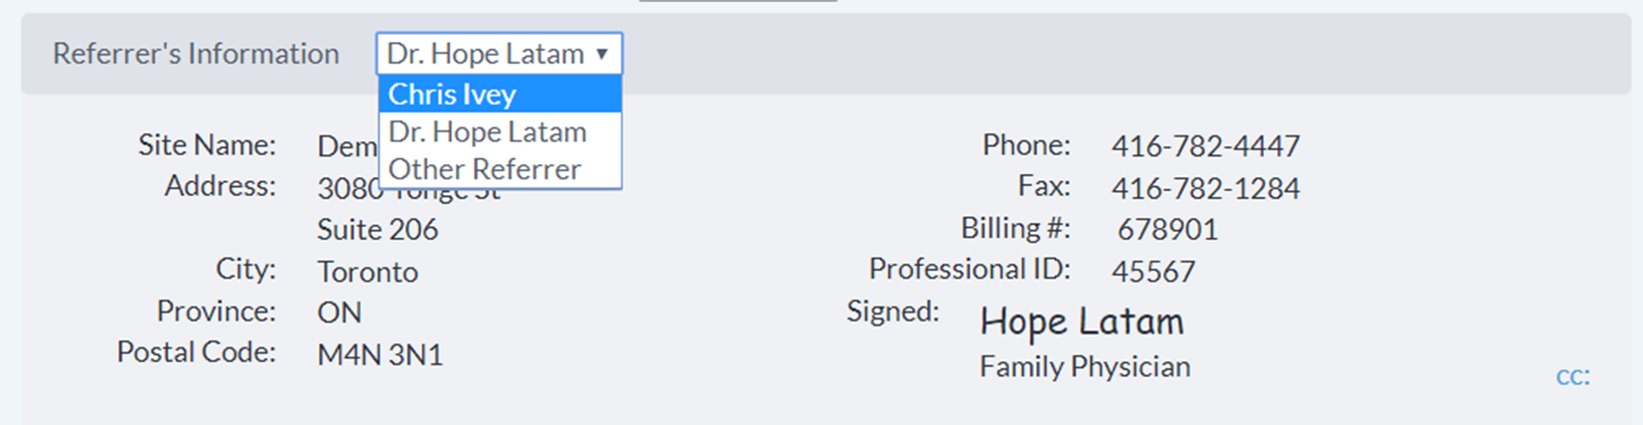
- Note: Log in to the Ocean Healthmap with your Ocean user credentials if your user name does not appear in the top right so that your provider details are autopopulated in the eSubmission.