Complete the eSubmission form and send your submission off to the recipient.
-
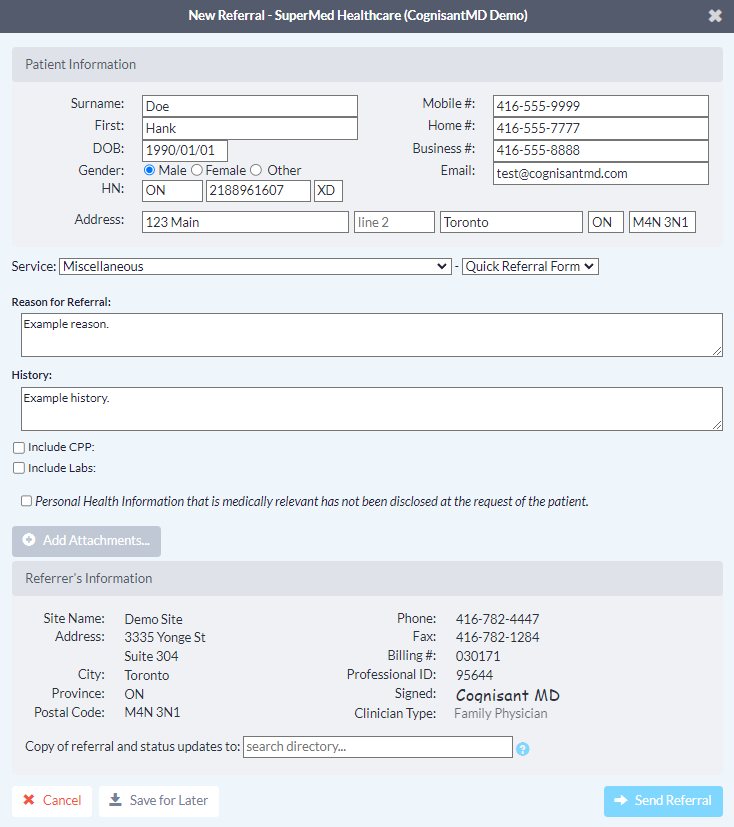
Complete the eSubmission form, as required. If you initiated the eSubmission from an integrated EMR, patient contact information and other required details will be automatically pre-populated. Complete the remaining fields as required.
Note: The 'Email' field in the Patient Information section supports only one patient email address per eSubmission. Do not include more than one email patient address in this field.
-
Include any relevant attachments by pressing the 'Add Attachments' button and selecting them from your computer.
Note: If you are a Med Access user and using the Ocean-MA Extension you will be automatically prompted to include any queued attachments as soon as the eSubmission form is opened.
If you are a PS Suite, Accuro, or OSCAR Pro user and you initiated your eSubmission with an attachment, it will be automatically included below the 'Add Attachments' button.
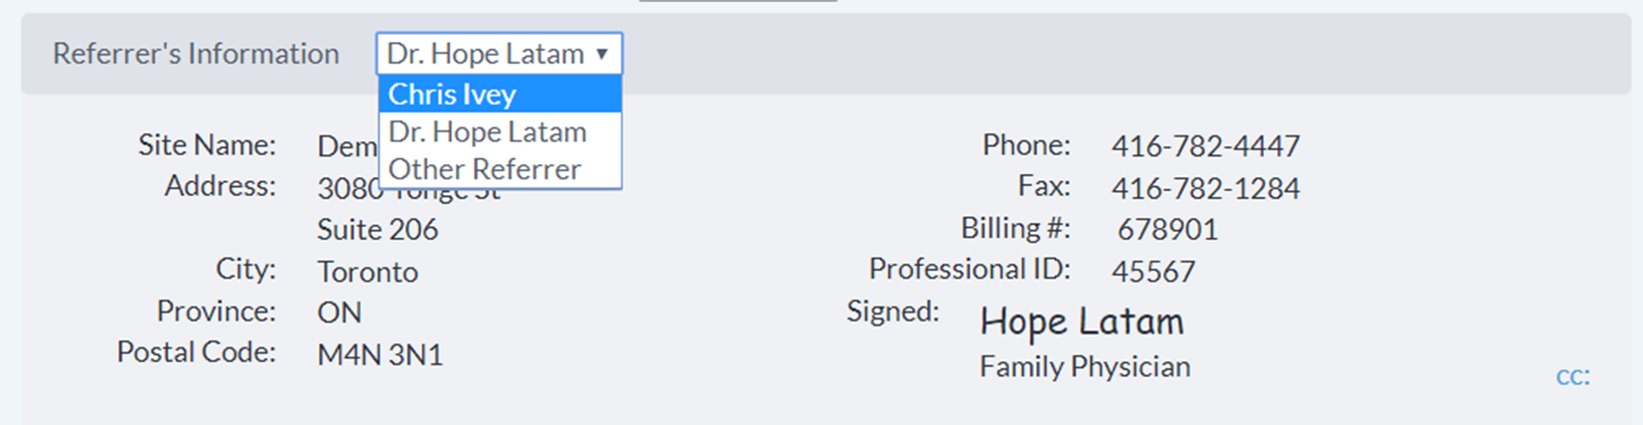
- If you are sending an eSubmission as a delegate, you will need to select the appropriate provider that you are referring on behalf of (from the dropdown menu at the top of the "Referrer Information" panel).
- Click the "Send" button to send your eSubmission.
- Once sent, you will see a confirmation window.

- The eSubmission will then be documented in the patient's chart.
The eSubmission note and the Ocean eSubmission Custom Form are automatically downloaded into the patient chart.
Using the Ocean eSubmission Custom Form, an internal PS message can optionally be triggered to the PS user/group of your choice as a reminder follow up on the submission in the specified number of days. The Ocean eSubmission Custom Form Also also offers a shortcut to quickly create a PSS Pending Test / Consult.
- If the 'Automatically Import Attachments to EMR' setting is disabled in your Cloud Connect configuration, the submission note will be added to the patient chart as only a textual Progress Note.
- If the 'Automatically Import Attachments to EMR' setting is enabled in your Cloud Connect configuration, the submission note will be added to the patient chart as both a textual Progress Note and a eSubmission record PDF attached to an additional Progress Note. The eSubmission PDF includes any attachments that were included at the time of sending the eSubmission.
- The eSubmission information summary will automatically populate into the patient's chart as an Active Task with a PDF attachment of the eSubmission record. Any file attachments included with the eSubmission will also be included in the PDF eSubmission record.
- For detailed information on the logic that Ocean uses to assign the task to an EMR user, please refer to the Ocean Note Tasks support article.
After reviewing the changes and making any other necessary adjustments to the Task, click 'Save'. The Task will be automatically categorized into the 'Active Requests' section of the corresponding 'Consults ' or 'Investigations' area of the patient chart.
- Depending on the configuration of your Cloud Connect settings, the eSubmission information summary will automatically populate either as an Encounter Note, or as a PDF file in the Documents area of the patient's chart.
- When your Cloud Connect settings are configured to save sent eSubmission as Documents, any file attachments included at the time of sending the eSubmission will also be included in the PDF eSubmission record.
- The eSubmission information summary will automatically populate as a PDF in the Documents area of the patient's chart. Any file attachments included with the eSubmission will also be included in the PDF eSubmission record.
- A new Consultation will also be automatically generated in the patient's chart.
- Click the “Download” button from the Ocean Toolbar.
- The eSubmission information will populate into the progress notes section of the patient’s Encounter chart.
- If you are using a non-integrated EMR, you can download a copy of the eSubmission from the Ocean portal.
